Tag: Visual edit |
No edit summary Tag: Visual edit |
||
| (48 intermediate revisions by 25 users not shown) | |||
| Line 3: | Line 3: | ||
| location = [[The Glorious Sea Dog Tavern]] |
| location = [[The Glorious Sea Dog Tavern]] |
||
| company = Sea Dogs}} |
| company = Sea Dogs}} |
||
| + | {{tocright}} |
||
| − | |||
| − | '''The Arena''' is a |
+ | '''The Arena''' is a competitive [[Game Mode]] hosted by the [[Sea Dogs]] within [[The Glorious Sea Dog Tavern]] in the world of [[Sea of Thieves]]. |
== Summary == |
== Summary == |
||
| + | Before entering the Arena, players must choose whether they wish to compete in [[Sloop]] only or [[Galleon]] only matches. Once this selection is made, players enter [[The Glorious Sea Dog Tavern]] lobby where the five [[Crews]] for the match are gathered. The match will also end in the Tavern lobby where results are displayed and players may choose to continue into the next match. The Tavern lobby also provides players access to the various Customization Chests and services from the [[Shopkeepers]] and [[Sea Dogs]] representatives. |
||
| − | Every Arena game begins and ends inside [[The Glorious Sea Dog]] Tavern lobby, where players can interact with various vendors and objects, communicate with each other and access various Sea Dog Representatives. Once in game, up to five Crews compete for [[Silver]] and [[Sea Dog Chest|Sea Dog Chests]] that are hidden on [[Islands]] within one of the main [[Regions]] of [[The Sea of Thieves]]. The location of the Chests are marked on [[Treasure Maps]] shared by all crews. Two stationary Sea Dog outposts are placed on each map that house Sea Dog Agents who accept these Chests for additional Silver points. Once all the provided maps have been expended, all crews are given another set of maps. The crew that earns the most Silver in the 24 minute matchup wins. Pirates score Silver for various actions, such as digging and cashing in Sea Dog Chests or battling other players and ships. Silver is a currency only applicable in Arena matches. The reward for placements is awarded in set amounts of [[Gold]] and [[Reputation]] with the Sea Dogs. |
||
| + | |||
| + | Once the match-up is ready, players are sent into a small area within [[The Sea of Thieves]] for a 15 minute contest for [[Silver]] and glory. In an Arena match, Crews have to locate, compete for and deliver single [[Glorious Sea Dog Chests]] that are buried on [[Islands]], marked with a purple light pillar and a purple [[Map Table]] marker at all times. These chests need to be delivered to a Sea Dog Seapost, marked with a red smoke pillar and a golden Map Table marker. All other [[Ships]] are also displayed on the Map Table. Once a Glorious Sea Dog Chest has been delivered to a Sea Dog Agent at a Seapost, another Chest will appear buried on an Island. |
||
| + | |||
| + | The score of a match is counted with [[Silver]], which is awarded to Crews for various actions, such as digging or selling Chests, hitting other Ships with [[Cannons]] or killing other [[Player Pirates]]. Players will lose Silver for sinking or scuttling their Ship. The Crew that earns the most Silver within the 15 minutes of a single match, wins. Silver as a [[Currency]] is only used in single Arena matches and does not carry over to [[Adventure Mode]] or the Lobby. All Crews will be rewarded with a set amount of [[Gold]] and [[Sea Dogs]] [[Reputation]] based on their placement in the match. |
||
| + | == Elements of Arena == |
||
| ⚫ | |||
| + | * Two modes: '''Duo Sloop Arena''' for two-player [[Crews]] and '''Galleon Arena''' for 4-player Crews. |
||
| + | * The color and type of your ship is predetermined in the Lobby and persists throughout the matchup. |
||
| + | * Every player has a coloured team icon beside their name. |
||
| + | * Players can check '''Other Crews''' from the Main Menu to see all Crews and their participants or even mute them. |
||
| + | * Players who quit contests too often will temporarily be suspended from playing Arena. While inside The Arena, receiving an invite to a different session will warn players that this will also count as a quit contest. |
||
| − | == |
+ | === Lobby === |
| ⚫ | |||
| − | [[File:Ship_Customisation_in_Arena.png|right|thumb|Players can customise the [[Wheel]], [[Capstan]], [[Cannons]] and [[Figurehead]] in Arena, but not the Ship.]] |
||
| + | * Players have access to the following Shops: [[Shipwright Shop]], [[Weaponsmith's Shop]], [[Equipment Shop]], [[General Clothing Shop]], [[Pirate Emporium]], [[Tavern]]. |
||
| ⚫ | |||
| + | * Players have access to the following Customization Chests: [[Armoury]], [[Equipment Chest]], [[Clothing Chest]], [[Vanity Chest]], [[Pet Chest]] & [[Ship Customization Chest]] |
||
| − | * Players can choose to compete in two man Crews (Duo Sloop Arena) or 3-4 man Crews (Galleon Arena). |
||
| + | : '''Note:''' Only [[Figureheads]], [[Wheels]], [[Cannons]] and [[Capstans]] may be customized. |
||
| − | * [[Pets]] can be taken to the Arena Game Mode. |
||
| + | * [[Pets]] can be equipped and perched in the Lobby and taken to matches. |
||
| − | * Players can customise the [[Wheel]], [[Capstan]], [[Cannons]] and [[Figurehead]] of their Ship before the match. |
||
| + | * After a match, Players can view the placements of the match in their [[Map Radial Menu]]. |
||
| − | * The colour and type of your ship is pre-determined. |
||
| ⚫ | |||
| ⚫ | |||
| − | * The arena map is a small circular cut-out of one of the three main regions. |
||
| ⚫ | |||
| ⚫ | |||
| − | * Each ship has a set amount of [[Planks]], [[Cannonballs]], [[Firebombs]] and [[Food]] on board. Unlike [[Adventure Mode]], Arena ships spawn with [[Coconut|Coconuts]] instead of [[Banana|Bananas]], however other Food items are obtainable on [[Islands]]. |
||
| − | *Every crew gets the same [[Treasure Map|Treasure Maps]] with up to 25 X-marks-the-spots on a single map. |
||
| − | *[[Sea Dog Chest|Sea Dog Chests]] take only 3 [[Shovel]] hits to dig up. |
||
| − | *Every Arena map has two Chest turn-in Outposts marked by red smoke pillars. These are essentially floating [[Galleons]] with two Sea Dog Agents on each post. |
||
| − | *Instead of being sent to the [[Ferry of the Damned]], dead pirates will float above their corpse until they re-spawn, giving them a chance to keep an eye on their surroundings even after death. |
||
| − | *Most all Ship and Close Combat mechanics from [[Adventure Mode]] apply to Arena matches. |
||
| − | *The following elements from [[Adventure Mode]] are cut from Arena: [[Skeletons]] (aside from [[Ancient Skeletons]]), [[Gunpowder Barrel|Gunpowder Barrels]], [[Cursed Cannonballs]], [[Rowboat|Rowboats]], mixed [[Ship]] types. |
||
| ⚫ | |||
| + | === Matches === |
||
| + | {{float file|[[File:Glorious Sea Dog Chest Light.png|right|thumb|250px|[[Glorious Sea Dog Chests]] are visible through a Purple Light Beacon.]]}} |
||
| ⚫ | |||
| ⚫ | |||
| + | * Arena Matches take place in small circular areas in [[The Sea of Thieves]], surrounded by [[The Devil's Shroud]]. |
||
| + | * Players compete for [[Silver]] (see: [[The_Arena#Point System|Point System]] below) |
||
| ⚫ | |||
| ⚫ | |||
| + | * Every Ship spawns with a set amount of [[Planks]], [[Cannonballs]], [[Firebombs]], [[Chainshot]], [[Blunderbombs]] and [[Coconuts]] on board. |
||
| + | * Every Ship will receive a single team-coloured [[Harpoon Rowboat]] per Match. |
||
| + | * [[Glorious Sea Dog Chests]] appear buried on [[Islands]], always marked by a <span style="color: #9b59b6">Purple</span> Light Beacon in the sky or by a Purple Icon on the [[Map Table]]. |
||
| + | * Chests are sold to Sea Dog Agents at Sea Dog Seaposts. |
||
| + | * Every Arena Map has one Sea Dog Seapost with two Sea Dog Agents, marked by a <span style="color: #c0392b">Red</span> Light Beacon or by a Golden Icon on the [[Map Table]]. |
||
| + | * Players are not sent to the [[Ferry of the Damned]] and stay in a [[Revivable]] state until they respawn. |
||
| + | * Arena Matches have no [[Skeletons]] (aside from [[Ancient Skeletons]]), |
||
| + | * Arena Matches have no [[Gunpowder Barrels]] or [[Cursed Cannonballs]]. |
||
| + | * Sunk Ships will lose [[Silver]] and respawn nearby with a freshly stocked [[Resources]], but no [[Rowboat]]. |
||
| ⚫ | |||
| + | * The [[Crew]] with the most Silver at the end of a match wins. |
||
== Point System == |
== Point System == |
||
| − | [[File:Sea Dog Chest.png |
+ | {{Float file|[[File:Glorious Sea Dog Chest.png|thumb|200px|right|The [[Glorious Sea Dog Chest]] can be dug for 150 Silver and sold for 1000 Silver!]]}} |
| + | The match is won by the Crew that earns the most Silver during a single match. Silver as a currency is only tied to single Arena matches and cannot be used to purchase items nor converted into [[Gold]]. |
||
| − | The match is won by the Crew that earn |
||
{| class="wikitable" style="text-align:center" |
{| class="wikitable" style="text-align:center" |
||
! colspan="2" | Point System |
! colspan="2" | Point System |
||
|- |
|- |
||
| − | !Action !! |
+ | !Action !! Amount of Points |
|- |
|- |
||
!'''Digging up [[Sea Dog Chest]]''' |
!'''Digging up [[Sea Dog Chest]]''' |
||
| − | | {{S|+ |
+ | | {{S|+150}} |
|- |
|- |
||
!'''Cashing in [[Sea Dog Chest]]''' |
!'''Cashing in [[Sea Dog Chest]]''' |
||
| Line 52: | Line 69: | ||
|- |
|- |
||
!'''Cannonball Hit''' |
!'''Cannonball Hit''' |
||
| − | | {{S|+ |
+ | | {{S|+40}} |
|} |
|} |
||
| − | {{Clear}} |
||
== Rewards == |
== Rewards == |
||
| + | At the end of the match, [[Crews]] are rewarded [[Gold]] and [[Reputation]] with the [[Sea Dogs]] based on their placement: |
||
| ⚫ | |||
{| class="wikitable" style="text-align:center" |
{| class="wikitable" style="text-align:center" |
||
! colspan="2" | Rewards |
! colspan="2" | Rewards |
||
|- |
|- |
||
| − | !Placement !! |
+ | !Placement !! Gold |
|- |
|- |
||
!'''First''' |
!'''First''' |
||
| − | | {{g| |
+ | | {{g|6000}} |
|- |
|- |
||
!'''Second''' |
!'''Second''' |
||
| − | | {{g| |
+ | | {{g|5000}} |
|- |
|- |
||
!'''Third''' |
!'''Third''' |
||
| − | | {{g| |
+ | | {{g|4000}} |
|- |
|- |
||
!'''Fourth''' |
!'''Fourth''' |
||
| − | | {{g| |
+ | | {{g|3000}} |
|- |
|- |
||
!'''Fifth''' |
!'''Fifth''' |
||
| − | | {{g| |
+ | | {{g|2000}} |
|} |
|} |
||
| + | |||
| − | {{Clear}} |
||
== Teams == |
== Teams == |
||
| + | <center><gallery widths="220px" mode="nolines"> |
||
| − | [[File:The Azure Scout.png]] |
+ | File:The Azure Scout Sloop.png|[[File:The Azure Scout icon.png|40px]] [[The Azure Scout]] |
| − | |||
| − | [[File:The Flaming Jackal.png]] |
+ | File:The Flaming Jackal Sloop.png|[[File:The Flaming Jackal icon.png|40px]] [[The Flaming Jackal]] |
| + | File:The Golden Chaser Sloop.png|[[File:The Golden Chaser icon.png|40px]] [[The Golden Chaser]] |
||
| − | |||
| − | [[File:The |
+ | File:The Lucky Rover Sloop.png|[[File:The Lucky Rover icon.png|40px]] [[The Lucky Rover]] |
| ⚫ | |||
| − | |||
| + | File:The Good Boy Sloop.png|[[File:The Good Boy icon.png|40px]] [[The Good Boy]]<br/>(Rare team with unique sounds.) |
||
| − | [[File:The Lucky Rover.png]] - The Lucky Rover |
||
| ⚫ | |||
| − | |||
| ⚫ | |||
== Tactics == |
== Tactics == |
||
| − | Due to the open nature of |
+ | Due to the open nature of Arena battles, there are various ways to secure your victory over other teams. The following section uncovers some common and less common tactics. |
=== Roles and Communication === |
=== Roles and Communication === |
||
| − | Apart from getting |
+ | Apart from getting Chests, sinking ships and securing as much Silver as possible, the most important thing in Arena matches is Communication! If every teammate is able to communicate everything they do and see, then your team will already have a great advantage over other ships that don't. This is more difficult to achieve in Open Crews, making a prepared Closed Crew much more effective. Before the match starts, it is commonplace to agree upon set Roles for each crewmate. The most common role division is to have two people on deck and two people ready off-deck on a [[Galleon]], with one on and one off on a [[Sloop]]. Note that the best teams are capable of filling up any of these roles and switching on the fly depending on the circumstances. The main agreed upon roles are listed below. Note that the 4 man role separation works best in a Galleon match. In a Duo Sloop setting be prepared to apply these roles between the two of you and change accordingly. |
====Captain/Helmsman==== |
====Captain/Helmsman==== |
||
| − | The Helmsman will take control of the ship and give out sailing, maintenance and battle commands to the rest of the crew. The Helmsman should stay on the ship at all times if possible and make sure the ship and sails are positioned correctly. The main role of the Helmsman is to sail the Ship and handle the [[Wheel]]. The Helmsman should have a good understanding on how to maneuver each ship type, how to read the [[Map Table]], the position of the wind and everything that the enemy players are doing. At the start of the fight, it is best for the Helmsman to run to the [[Map Table]], check the |
+ | The Helmsman will take control of the ship and give out sailing, maintenance and battle commands to the rest of the crew. The Helmsman should stay on the ship at all times if possible and make sure the ship and sails are positioned correctly. The main role of the Helmsman is to sail the Ship and handle the [[Wheel]]. The Helmsman should have a good understanding on how to maneuver each ship type, how to read the [[Map Table]], the position of the wind and everything that the enemy players are doing. At the start of the fight, it is best for the Helmsman to run to the [[Map Table]], check the positioning of the Ships and the Chest and prepare a strategy for the current match (although this can be delegated to any player who feels comfortable with this task and is furthest away from the Anchor). The Helmsman should take note of enemy ship placements, movements and presumed intentions and be ready to act accordingly. This means that they ideally need to pay attention to the buried Chests on each Map, where the enemy crews are, what and where they have found chests at and how they may play with their given hand. A good Helmsman will always call out the required sail positioning and angle, [[Harpoon]] handling, when to board and when to go to the [[Island]], when to attack and where, when to handle repairs, and of course, when to come back to the ship. This makes it the most difficult role by far, but if done right, will secure the team a great advantage over other, more unorganised crews. |
An expert Helmsman will be capable of sailing a [[Galleon]] alone, leaving up to three people to handle everything else. |
An expert Helmsman will be capable of sailing a [[Galleon]] alone, leaving up to three people to handle everything else. |
||
| − | This role should definitely be present on a Duo [[Sloop]] Crew as well. It is advised not to leave your Ship unattended unless enemy Crews are |
+ | This role should definitely be present on a Duo [[Sloop]] Crew as well. It is advised not to leave your Ship unattended unless enemy Crews are far away. |
====Deckhand==== |
====Deckhand==== |
||
| Line 119: | Line 134: | ||
====Treasure Hunter==== |
====Treasure Hunter==== |
||
| − | The fourth main role is generally more open. The Treasure Hunter can generally help out with filling any other role, but their main focus should be to focus on |
+ | The fourth main role is generally more open. The Treasure Hunter should be a jack-of-all-trades that can generally help out with filling any other role, but their main focus should be to focus on retrieving [[Glorious Sea Dog Chests]] hidden on the [[Islands]]. The Treasure Hunter should acquaint themselves with Map and Island awareness for finding the Chests quickly and Combat prowess for defending the said Chests or trying to prevent anyone else from scoring points. A good Treasure Hunter should also be capable of defending their Chests or keeping other Crews from digging up any more Chests on Islands. A good tactic for a Treasure Hunter who is contesting a Chest on an Island, is to lay low with a [[Hide Emote]] and wait for other Players to approach the Chest and kill them so that they can freely dig up the Chest without interruptions themselves. When there is no treasure to dig up, the Treasure Hunter should focus on helping out their crew with either handling the Sails, Repairs, Boarding or Ship Combat. |
| − | An expert Treasure Hunter knows [[Islands |
+ | An expert Treasure Hunter knows [[Islands]] inside out and can manage digging chests and getting them aboard as quick as possible. While Arena is considered a PvP Game Mode, it is actually quick and painless Chest retrieval that wins matches. |
In a [[Sloop]] Crew, this role can be fulfilled by any player off the Ship. |
In a [[Sloop]] Crew, this role can be fulfilled by any player off the Ship. |
||
=== The Start of the Battle === |
=== The Start of the Battle === |
||
| − | + | As time is limited in Arena, it is of utmost importance to get your [[Anchor]] up and your [[Sails]] down as soon as the match starts. The Ships that get moving the quickest also have the advantage towards the Chest [[Island]] or other Ships. There is not much of a difference between three and four people on the [[Capstan]] on a [[Galleon]] (one player can raise the Anchor very quickly on a [[Sloop]]), so one of the crew members can start preparing the [[Sails]] or check on the [[Map Table]] to prepare a strategy for the matchup. Make sure that everyone has the correct [[Weapons]] and pockets full of [[Resources]] before heading out into any Combat scenarios. If another crew that spawns close takes their time to get moving, it is possible to have one of your Crewmates [[Cannon]] over to hinder the movements and progression of other Ships. It is advisable to this person to go without Supplies and steal from the other Ship instead. |
|
| − | The second most important part of |
+ | The second most important part of a successful Arena match is to determine a Strategy for the start of the match by checking out the [[Map Table]]. In Sea of Thieves, Knowledge is Power. The more you know about the other teams the better. More experienced players can determine which Crews are competitive already in the Lobby and keep an eye out for their Ship on the Map and plan accordingly. Mostly, this is done by judging the rarity or experience needed to acquire a team's [[Cosmetics]] or their [[Titles]]. One can also check the Xbox Profiles of Players to see how much experience they have on the seas by their distance sailed. If you did not get a chance to size up the enemy teams, then take note of which Ships started moving on the Map and whether they have better or worse wind than your ship. Make note of the exact location of the [[Glorious Sea Dog Chest]] and whether it is in an easily accessible place or not. You can also check the '''Other Crews''' Tab in the Main Menu to see the names of your competitors and whether they have full Crews or not. |
| − | If you are further away from the Treasure Islands than other ships and get there last, then you have a few options. You can either plan on taking down any Ships already busy on the Island and contest them, or plan to cut off their escape towards |
+ | If you are further away from the Treasure Islands than other ships and get there last, then you have a few options. You can either plan on taking down any Ships already busy on the Island and contest them, or plan to cut off their escape towards the turn-in Seaposts. The ships that get to an Island first are mostly busy with acquiring the Chest or contesting the island and are more than likely not set to sail quickly, so they make for easy targets. Be careful with your approach however. If the other Crew hasn't lowered their anchor and has all Pirates on board, then they may very well sink you before you get in Cannon range yourself. If you are too far behind, you can sail to the middle of the map, wait for other crews to retrieve a Chest and hope for a better Chest spawn. |
| − | |||
| − | Try to pin down which Crews may pose the biggest threat already in the Lobby and track their position on the Map. Often times, it is wiser to not confront stronger teams head-on, but rather play around them and focus on the Islands that don't get their attention. |
||
=== Ship Tactics === |
=== Ship Tactics === |
||
| + | While useful for Arena, these tactics can be used to a great effect in [[Adventure Mode]] as well! |
||
| + | |||
====Capstan Tactics ==== |
====Capstan Tactics ==== |
||
| − | As mentioned in the previous section, you want to raise your [[Anchor|Capstan]] as quick as possible to get ahead on other players. Generally, you never want your Anchor to be dropped in Arena as it will make you an easy target for other Ships. Conversely, this means that when engaging other ships you will want to target their Anchor first to stop their ship from maneuvering. This can be done by sending a Boarder over to their ship to drop it for them and keep their crew from raising it. |
+ | As mentioned in the previous section, you want to raise your [[Anchor|Capstan]] as quick as possible to get ahead on other players. Generally, you never want your Anchor to be dropped in Arena as it will make you an easy target for other Ships. Conversely, this means that when engaging other ships you will want to target their Anchor first to stop their ship from maneuvering. This can be done by sending a Boarder over to their ship to drop it for them and keep their crew from raising it. If a Ship's anchor is already lowered, you can aim and shoot [[Cannonballs]] or [[Chainshot]] around the Capstan area to prevent the team from raising it and breaking its pegs off. Alternatively a Boarder can use [[Blunderbombs]] to prevent more than one person raising an Anchor. Setting [[Fire]] to an Anchor with a [[Firebomb]] can also buy time to stop the Enemy from raising their Anchor. |
| ⚫ | |||
| + | There are some situations where you can let your Anchor drop, but you must make sure there are no Ships even remotely close enough to take advantage of your inability to move. One of these situations would be when you need to turn your ship around quickly in open seas with an Anchor turn. For this, you need the Helmsman to turn the [[Wheel]] completely to the desired direction and have the teammates drop the Anchor while the ship is moving. You must communicate this, as an Anchor turn is only as effective as the number of people willing to pull it up again. Anchoring is also an option if you need to make a quick stop at a Sea Dog turn-in Seapost and cannot raise the [[Sails]] in time or if you have little time left in the match. Again, you need to be wary of other ships using your lack of mobility against you. If you are alone by an [[Island]] and need to stop your ship from moving, you can also lower the Anchor and manage the Sails before raising, but make sure you are in safe waters. At all other times, it is not advisable to drop Anchor in an Arena match. |
||
| ⚫ | |||
| + | |||
| + | You must also be attentive and ready to defend your Anchor from enemy Boarders. Instead of anchoring, you should pull up your Sails to stop the ship from moving as you can set sail by simply lowering the Sails and not have to deal with raising the Capstan first. Try to have at least three repaired or healthy Anchor pins on a [[Galleon]] for quick Anchor raising. |
||
| + | |||
| ⚫ | |||
| + | |||
| ⚫ | |||
====Sail Tactics ==== |
====Sail Tactics ==== |
||
| − | After raising the Anchor, getting your [[Sails]] down and angled correctly is your second priority at the start of a match. You should ideally have at least two people on board to manage Sails in a [[Galleon]] Crew, as it is significantly slower to do alone. Two people raising or angling the same Sail will |
+ | After raising the Anchor, getting your [[Sails]] down and angled correctly is your second priority at the start of a match. You should ideally have at least two people on board to manage Sails in a [[Galleon]] Crew, as it is significantly slower to do alone. Two people raising or angling the same Sail will double the speed of any actions. To get the most speed out of your ship, you will want to angle the Sails with the [[Wind]] at all times. If you are sailing into the direction of the Wind, it is advisable to go for "Dummy Sails", that is, having your sails straight into the wind, as it will cut directly through the waves and improve your speed by a little bit. If you can spare some speed, the Middle Sail can be slightly raised, so that the Helmsman can see better. You will need to practice the timing of raising Sails before you get to a destination. When you close to your destination and want to slow down, you will want to raise the middle sail first (advisably with two people) as this counts for the most speed due to its size. Generally the front or back sail will be raised right after and one or the other will be left down for maneuvering until stopping and also raising the last sail. In most cases, the Helmsman will order the raising of the Front Sail before the Back Sail, dealing with the latter themselves. However the Front Sail can be left last if you need to move the ship for [[Harpoon]] play, because the front sail is closer to the Harpoons. Many players like to prepare "Combat Sails" for Ship to Ship combat between Galleons, which is either the Front or Back Sail fully lowered and the other half-raised. This placement offers the best maneuvering conditions for a Galleon. |
| + | |||
| − | Many players like to prepare "Combat Sails" for Ship to Ship combat between Galleons, which is either the Front or Back Sail fully lowered and the other half-raised. This placement offers the best maneuvering conditions for a Galleon. |
||
| + | Be mindful that the Masts can be broken down by 3 direct [[Cannonball]] hits or a single [[Chainshot]]. A broken Mast will hinder your mobility by one Sail on a [[Galleon]] or completely stop the Ship's movements of a [[Sloop]]. While on a Sloop, getting a sail up and running is very important, you can leave one or two Sails broken on a Galleon if you are in a difficult situation and only need to move out of a Cannon's range. The Sails can be fixed on the seas or when you are in safety later. Therefore, if you see cracks in the Masts, you should repair them with [[Wooden Plank|Wooden Planks]] when in safe waters. |
||
| ⚫ | |||
| + | |||
| + | When in Ship Combat, try to use [[Chainshot]] on Enemy Ship's Sails to easily hinder the movements of their Ship. Breaking all the Masts of a Ship essentially anchors them in place. A broken Mast needs to be pulled up from the Sail Length Cleat, which can also be sped up with two people. This action will also pull up the sailcloth so you need to lower it again after fixing the mast. |
||
| + | |||
| ⚫ | |||
====Helm Tactics ==== |
====Helm Tactics ==== |
||
| − | The [[Helm]] (or [[Wheel]]) is both the most necessary and often the most difficult part of the ship to take control of in |
+ | The [[Helm]] (or [[Wheel]]) is both the most necessary and often the most difficult part of the ship to take control of, especially in [[Galleon]] matchups. The job of the Helmsman can be greatly improved by having a designated Deckhand on board of the ship to help the Helmsman with the [[Sails]], [[Cannons]], [[Repairs]], [[Capstan]] and [[Harpoon]] while the Helmsman can focus on steering the Ship and giving out commands. Without a deckhand, the Ship's maneuverability will suffer greatly as the Helmsman will have to do the job of two people alone. Ideally it is best to have the Helmsman on the Wheel at most times, so that they can position the ship while the rest of the crew is dealing with the Sails or Repairs. Also, be mindful that when going through [[Storms]], having one player holding the Wheel steady is an absolute necessity unless you are willing to risk lowering your Anchor. Taking on any ships in a Storm that are not prepared to steady their Ship will give you an advantage. Helming on a Sloop isn't as difficult, as it is fairly easy to maneuver and sail Solo, but be careful as you can easily be shot off the side of the Ship if a [[Cannonball]] hits you at the Helm. |
| + | |||
| + | Be mindful that the Wheel can also sustain damage from [[Cannonballs]] and [[Chainshot]], making it harder to turn the ship if left unrepaired. Aiming for the enemy ship's Wheel should not be the primary objective, but can help to hinder their ability to maneuver their Ship. This will often set them sailing in a undesirable trajectories until the Wheel is fixed. Make sure to prioritise fixing your own Wheel with [[Wooden Planks]] if it is damaged. |
||
==== Harpoon Tactics ==== |
==== Harpoon Tactics ==== |
||
| − | The [[Harpoon]] is something you want to master as soon as possible for Arena, as it is a very powerful tool for mobility, |
+ | The [[Harpoon]] is something you want to master as soon as possible for Arena, as it is a very powerful tool for mobility, Combat and Chest or Crew-mate retrieval. The Harpoon can be tricky to aim because it shoots high. You can predict the destination of the Harpoon by imagining a cross-hair at the exact middle of your screen. With enough practice, you will start to gauge the exact spot where the Harpoon will hit. Luckily, [[Glorious Sea Dog Chests]] are large and easy to grab, but wave and ship movement can still make harpooning difficult, so be sure to get some practice in! |
| − | If your teammates dig up any Chests on an island, it's good to have the Ship |
+ | If your teammates dig up any Chests on an island, it's good to have the Ship nearby, so that your Crewmates can leave the Chests on the shores to be picked up with the Harpoon. You can also retrieve your teammates and even enemy Pirates with the Harpoon. If your teammate is bringing the Chest to your ship, you can tell them to turn their back to the Harpoon while carrying the Chest, so that you can pick up both them and the Chest at once. |
| − | Harpoons are also very good at precise maneuvering of your ship. When you are close to [[Islands]] or larger sea structures like Rock formations, you can essentially perform an Anchor Turn without dropping the [[Anchor]] by having the Helmsman turn the [[Wheel]] to the desired side and having a Deckhand pull the ship around the corner by harpooning any solid surface structure. You can also utilize the Harpoon to pull your ship closer to an Island or away from it. The surrounding area of all Islands has shallow water, so you can |
+ | Harpoons are also very good at precise maneuvering of your ship. When you are close to [[Islands]] or larger sea structures like Rock formations, you can essentially perform an Anchor Turn without dropping the [[Anchor]] by having the Helmsman turn the [[Wheel]] to the desired side and having a Deckhand pull the ship around the corner by harpooning any solid surface structure. You can also utilize the Harpoon to pull your ship closer to an Island or away from it. The surrounding area of all Islands has shallow water, so you can use the Harpoon to turn your ship around quicker by having one of your Deckhands shoot the ground below water with the Harpoon and pull you to a desired position. |
| + | The Harpoon is also valuable at keeping up with other ships or positioning your ship around them. Try to grab moving Ships with your harpoon to catch up speed or pull yourself closer. The Harpoon has to be pulled in constantly to get closure, because a slack Harpoon will easily disconnect with its target. Interestingly, an anchored Ship harpooned to a sailing Ship will pull the other ship behind with you, effectively also anchoring them. When positioned right, you can have one crewmate Harpoon the back of a turning Ship and pull it, keeping the Ship in range of your [[Cannons]] and away from the other team's Cannons. |
||
| − | A good method for turning in Chests is to have a Crewmate take one Chest in and position themselves to be Harpooned in to quickly grab another Chest. This should save you valuable time and also prevents Enemy Pirates from picking up leftover Chests from the water or Outpost and turning them in for themselves. |
||
| − | + | Anyone handling a Harpoon has to be careful, since they are immobile and make for easy targets for [[Cannons]] or [[Weapons]]. A Harpoon latch can be disconnected by damaging the Harpoon itself with any [[Weapon]], [[Throwable]] or [[Cannonball]]. If you get Harpooned by another Ship, try to shoot at it or throw a [[Blunderbomb]] towards it to make it let go. |
|
| + | |||
| + | There is also a Harpoon on each Ship's [[Rowboat]]. If your Ship is stuck, but there is something to Harpoon behind it, you can use the connected Harpoon Rowboat's Harpoon to pull your Ship in reverse. |
||
====Ship Combat==== |
====Ship Combat==== |
||
| − | Ship to Ship Combat is more streamlined in the Arena game mode, as you have neither [[Cursed Cannonballs]] nor [[Gunpowder Barrel|Gunpowder Barrels]], so you have to rely on careful maneuvering, Boarding and [[Cannon]] fire. When approached by enemy ships, or when approaching one yourself, try to position your Ship with your sides either in front or behind their ship. This is fairly easy to achieve if the enemy ship is Anchored so try to get your Boarder on their ship, ready to lower the [[Anchor]] and guard the enemy team from picking it up or raising it. |
+ | Ship to Ship Combat is more streamlined in the Arena game mode, as you have neither [[Cursed Cannonballs]] nor [[Gunpowder Barrel|Gunpowder Barrels]], so you have to rely on careful maneuvering, Boarding and [[Cannon]] fire. When approached by enemy ships, or when approaching one yourself, try to position your Ship with your sides either in front or behind their ship. This is fairly easy to achieve if the enemy ship is Anchored so try to get your Boarder on their ship, ready to lower the [[Anchor]] and guard the enemy team from picking it up or raising it. On a [[Galleon]], if you can get all four crew-mates on each [[Cannon]] to aim at and barrage a ship at range, then you are more than likely to sink the enemy ship very quickly. This is an ideal scenario though. In real Arena fights, you will have to guard yourself from enemy Cannon fire, have someone on [[Repairs]] and lose Deckhands to Boarders or boarding. Nonetheless, try to have at least two people on Cannons for maximum efficiency. |
| + | If you are close to an enemy Ship, but do not have the necessary mobility to get to the right angle, have one of your crew-mates grab the opposing ship with a [[Harpoon]]. The Harpoon is ideal for pulling your ship out of the enemy Ship's Cannon range or into your own, to keep up in speed with their ship or to simply stop them from moving. You can also pull your ship closer to an escaping Ship and allow for boarding opportunities. |
||
| ⚫ | On open seas you have to take the wind position to account and manage your [[Sails]] accordingly. Since all Ships share their typing in Arena matches, your maneuverability is equal, but correctly angled Sails can make just the right difference to get away from, or catch up with a less-skilled enemy crew. |
||
| ⚫ | On open seas you have to take the wind position to account and manage your [[Sails]] accordingly. Since all Ships share their typing in Arena matches, your maneuverability is equal, but correctly angled Sails can make just the right difference to get away from, or catch up with a less-skilled enemy crew. Use this knowledge against other teams. |
||
| ⚫ | |||
| + | |||
| ⚫ | |||
If you are being chased by an enemy Ship and want to lose them, try to get your Boarders on their Ship unnoticed and have them Anchor that Ship, or simply keep the crew busy and away from managing their Ship. |
If you are being chased by an enemy Ship and want to lose them, try to get your Boarders on their Ship unnoticed and have them Anchor that Ship, or simply keep the crew busy and away from managing their Ship. |
||
| Line 174: | Line 204: | ||
===== Cannon Tactics ===== |
===== Cannon Tactics ===== |
||
| − | When it comes to Cannon fire there are three different spots |
+ | When it comes to [[Cannon]] fire there are three different spots that you want to aim at depending on the situation. A good Helmsman will know how to call out the right spot: |
| − | |||
| ⚫ | # If you want to sink a ship, you will have to aim below deck. The more (and the larger) holes the enemy ship has at different spots below deck, the faster they will go down. For maximum damage, spread out your shots at different parts of the hull, so that |
||
| ⚫ | # If you want to hinder a ship's activities, you want to aim top deck. While aiming top-deck does not make a sink ship, you will want to keep their crew away from all the important areas. If you see an enemy pirate going for their cannons, aim at the cannons and see if you can shoot them off or kill them before they get any hits on you. If you want to stop a ship from moving, you will have to prioritise aiming towards their [[Capstan]] |
||
| ⚫ | # |
||
| ⚫ | # If you want to sink a ship, you will have to aim below deck. The more (and the larger) holes the enemy ship has at different spots below deck, the faster they will go down. For maximum damage, spread out your shots at different parts of the hull, so that their repair crew has more holes to fix. You can also periodically keep hitting the same spot to keep the enemy crew from patching up that one hole and potentially even try to kill them while doing so. |
||
| − | The [[Sloop]] has a semi-Mid-Deck at the back, but unlike the [[Galleon]], even smaller holes there will let water through. Despite this, Sloops are more difficult to sink, especially since they are easy to maintain. Additionally, in Sloop Arena you only have one [[Cannon]] per Ship meaning that you have considerably less firepower than a Galleon. Another factor that balances this out, however, is the fact that any Cannon shot that hits a person on top-deck will most likely throw them off their ship. This, coupled with the small surface area of a Sloop's deck, makes accurate Cannon hits extremely effective in disabling the enemy crew! |
||
| ⚫ | # If you want to hinder a ship's activities, you want to aim top deck. While aiming top-deck does not make a sink ship, you will want to keep their crew away from all the important areas. If you see an enemy pirate going for their cannons, aim at the cannons and see if you can shoot them off or kill them before they get any hits on you. This is especially important in [[Sloop]] Arena, as successful hits can also knock their Cannoneer off the Ship. If you want to stop a ship from moving, you will have to prioritise aiming towards their [[Capstan]] area. By aiming at this area, you keep opposing Crews from raising their anchor. Additionally, the Capstan can lose up to three pins (one on Sloop) from Cannon fire, allowing less people to raise it once lowered. On a Galleon, this area is also where the staircase to bottom decks is located and can offer cover for your boarders to keep the enemy team from moving up or down their top and mid deck. If you want to go the extra mile, you can also aim for the enemy ship's sails and wheel, although this should be done with [[Chainshot]] for maximum efficiency. Each Sail and Wheel can take up to three points of damage from Cannonballs. |
||
| ⚫ | # On a [[Galleon]], your last priority should be to fire the mid-deck of a ship, however there are some advantages to this. Of course, the more holes the enemy ships has on their mid-deck, the faster they sink after filling up to second level. You can also aim at the ladder area to keep enemy pirates from climbing back on their ship or to cover your own Boarders. The last option is to simply farm Cannonball points by hitting a ship mid-deck, as this will keep the Ship afloat longer. The mid-deck at the back of the Sloop can still fill the Ship with water though. On a Sloop, hitting this area can hinder the Crew's movements up and down their Ship. |
||
| − | Remember that each [[Cannonball]] that hits an enemy ship is worth + |
+ | Remember that each [[Cannonball]] that hits an enemy ship is worth +40 Silver. Every shot that is not taken is a potential 40 Silver lost so try to take pot-shots and fire at difficult angles. Cannonball points are very lucrative in Arena and sometimes simply stopping your ship next to an idle or anchored ship and emptying all your cannonballs at it can get you enough points to win a game. You have 594 Cannonballs on a freshly spawned Ship (396 on a Sloop). If you hit every single one of those cannonballs, you can get 23760 Silver on a Galleon or 15840 Silver on a Sloop. A clever Helmsman can position your ship either right next to an opponent's ship, or just out of range and have the crew offload their cannons on the top deck so that the opposing ship won't sink. If all four players are firing at the same time on a Galleon, you will make 1600 Silver if you each hit all 10 cannonballs. |
You can also use Cannons on [[Islands]], [[Forts]] and the Sea Dog Outposts, so make sure you have [[Cannonballs]] with you even when you're off your ship. |
You can also use Cannons on [[Islands]], [[Forts]] and the Sea Dog Outposts, so make sure you have [[Cannonballs]] with you even when you're off your ship. |
||
| Line 188: | Line 216: | ||
When it comes to launching people from [[Cannons]], you can have one player aim the other to help them land a shot more precisely. |
When it comes to launching people from [[Cannons]], you can have one player aim the other to help them land a shot more precisely. |
||
| − | You can shoot [[Firebombs]] out of Cannons, however they are better saved for close combat on Ships as each Ship has a small stock of these and Cannon shots may not be as accurate at causing the intended damage. Remember not to use Firebombs in [[Storms]], because the rain will immediately put out any fires, making the bombs near useless. |
+ | You can shoot [[Firebombs]] out of Cannons, however they are better saved for close combat on Ships as each Ship has a small stock of these and Cannon shots may not be as accurate at causing the intended damage. Firebombs are less effective against Sloops, as it can easily be extinguished, however, it can be effective on a [[Galleon]] as the longer [[Fire]] is left unchecked there, the more difficult it becomes to get rid of and the more helping hands it requires. Remember not to use Firebombs in [[Storms]], because the rain will immediately put out any fires, making the bombs near useless. |
| + | |||
| + | [[Blunderbombs]] can be used with Cannons to blast Ship [[Hulls]] and sway Ships off-course. Shooting the back of a ship can make the Ship turn and crash into yours, allowing for boarding opportunities. Shooting the front of a ship can push the Ship away from Cannon range. |
||
| + | |||
| + | [[Chainshot]] are very valuable, as they will immediately break any [[Mast]], [[Capstan]] or [[Wheel]] that they hit. The downside is their lower firing arc and distance, requiring precise aim. |
||
If you feel like your Cannon fire isn't as up to snuff as you'd like, you can practice the firing arc, angles and movement in Adventure mode by trying to hit adjacent islands or rocks when at sea. |
If you feel like your Cannon fire isn't as up to snuff as you'd like, you can practice the firing arc, angles and movement in Adventure mode by trying to hit adjacent islands or rocks when at sea. |
||
====Supply Management ==== |
====Supply Management ==== |
||
| − | You have plenty of [[Supplies]] on board of your ship. Each Arena Galleon is packed with |
+ | You have plenty of [[Supplies]] on board of your ship. Each Arena Galleon is packed with 198 [[Cannonball|Cannonballs]] per Barrel, 2 [[Firebombs]], [[Chainshot]] & [[Blunderbombs]] per Barrel, 198 [[Wooden Planks]], 198 [[Coconuts]] per barrel and a limitless [[Ammo Chest]], so make sure you have your pockets full and your weapons loaded before getting into any fights. It is good to call out a reminder to get Supplies right after you get your anchor up and the sails down. If boarders are confident enough, they can try to board other ships to steal their supplies. A good time to do this would be right at the beginning of a game if adjacent ships are slow enough to get their anchor up. The [[Barrel|Barrels]] that spawn on islands have the same contents as [[Adventure Mode]] [[Barrel|Barrels]] (with the exception of [[Cursed Cannonballs]]), so you can stock up on better [[Fruit]] and even [[Bait]] when looking for Chests. Be mindful that [[Sea Dog Chest]] turn-in points have no Supply Barrels of any kind, but they do have Cannons on each side so it is advisable to take Cannonballs with you if you can line up a shot from them. It is also advisable to familiarise yourself with the placements of the [[Ammo Chest|Ammo Chests]] on Islands and [[Fortress|Forts]]. Players cannot get any additional [[Throwables]] or [[Chainshot]] from [[Barrels]], so these need to be either stolen from other Ships or reacquired once a Ship sinks. |
| − | |||
| ⚫ | Resource management is not as important in [[Sloop]] Arena, since the amount of [[Resource]] items per Ship is the same as in [[Galleon]] Arena and the Sloop takes up to 4 times less supplies to manage than a Galleon. With just one [[Cannon]], but |
||
| ⚫ | Resource management is not as important in [[Sloop]] Arena, since the amount of [[Resource]] items per Ship is the same as in [[Galleon]] Arena and the Sloop takes up to 4 times less supplies to manage than a Galleon. With just one [[Cannon]], but 198 [[Cannonballs]], a crew has more than enough firepower to last them the entire match. The only Resource Item to take note of in Sloop Arena would be the 4 [[Firebombs]], [[Chainshot]] and [[Blunderbombs]] (2 in each Barrel). Players should carry these in their inventories, as these are limited in supply and can be used against you when boarded. |
||
| ⚫ | |||
| − | [[Firebombs]] are a valuable Resource in Arena and should be used strategically. These items are not meant for sinking Ships, but rather for setting Ships on [[Fire]] to distract and slow down enemy Crews. A Galleon Crew only gets 15 Firebombs per spawn, whereas a Sloop crew gets 10 (5 for each Crew member). It's best for the crew members to take the Firebombs into their inventories at the start of a match, because Boarders from other crews can steal your Firebombs and throw them on your ship for little effort. Since Firebombs are quite rare to find in [[Barrels]], don't waste these items. If you can, steal any Firebombs you see from enemy Ships or use them up on theirs. Firebombs are most effective when thrown on deck of a [[Ship]] by hand, for you can carefully aim your throws and target specific locations like the stairs to hinder access between Decks or the breakable Ship pieces to help with lowering the Ship's maneuverability. [[Cannon]] shots can miss and waste valuable ammo, so only use Firebombs with Cannons when you know you can hit and know that a deck on fire will help your Crew in slowing down the enemy Ship. Firebombs can help with Boarding when the enemy crew is guarding their ladders. Throwing a bomb up there lowers the enemy's health and may distract them for just enough time to help you get up their Deck. |
||
Firebombs are essentially useless in [[Storms]], because the Rain quickly extinguishes any started fires. They do deal some damage to Players, but they are better off saved for causing wide-spread [[Fires]]. |
Firebombs are essentially useless in [[Storms]], because the Rain quickly extinguishes any started fires. They do deal some damage to Players, but they are better off saved for causing wide-spread [[Fires]]. |
||
| Line 205: | Line 234: | ||
When it comes to [[Food]], it is also possible to catch [[Fish]] and kill [[Animals]] or [[Shark|Sharks]] for their meat and cook it on [[Stove|Stoves]] on your ship or islands. While this is time consuming, it is a valid tactic when you have nothing else to do while sailing as this will give your close combatants the valuable boost of health regeneration. This should not be considered as a tactic for every game, as there is rarely time for getting meat in Arena games, only do this if you know you have enough time to kill. |
When it comes to [[Food]], it is also possible to catch [[Fish]] and kill [[Animals]] or [[Shark|Sharks]] for their meat and cook it on [[Stove|Stoves]] on your ship or islands. While this is time consuming, it is a valid tactic when you have nothing else to do while sailing as this will give your close combatants the valuable boost of health regeneration. This should not be considered as a tactic for every game, as there is rarely time for getting meat in Arena games, only do this if you know you have enough time to kill. |
||
| − | As a side-note, it is also possible to get different kind of [[Bait]] from [[Barrel|Barrels]] on Islands. Bait is quite useless in Arena when it comes to catching fish, as none of the different fish types provide any additional health benefits. It is, however, possible to eat bait to make your pirate sick. |
+ | As a side-note, it is also possible to get different kind of [[Bait]] from [[Barrel|Barrels]] on Islands or dug up from the ground. Bait is quite useless in Arena when it comes to catching fish, as none of the different fish types provide any additional health benefits. It is, however, possible to eat bait to regain small amounts of health and make your pirate sick. Vomit can be used as a diversionary tactic against foes at Close Combat, although its rarely effective. Other than that, Bait heals for 10% health and you can have 10 of it in hand (with additional 1 on the [[Fishing Rod]]), so if the sick does not bother a player, they can use it as extra Food. |
=== Other Tactics === |
=== Other Tactics === |
||
==== Close Combat ==== |
==== Close Combat ==== |
||
| − | Despite what some Arena players think, Close Combat is actually secondary in the Arena. Close Combat alone will not win you Arena matches, however good PvP skills definitely help in slowing down enemy Crews or defending yours. |
+ | Despite what some Arena players think, Close Combat is actually secondary in the Arena. Close Combat alone will not win you Arena matches, however good PvP skills definitely help in slowing down enemy Crews or defending yours. The importance of Close Combat vs Ship Combat is reflected by the measly +5 [[Silver]] that you get from killing an enemy player vs +40 Silver for landing [[Cannonball]] hits. Therefore, if you want to win you should not focus your game plan on simple PvP on board of ships, camping the spawn points for the duration of the match (although it is a valid tactic for hindering any real competition). Close Combat should be approached more creatively in an Arena game, as should your choice of [[Weapons]]. |
| − | The main situations where Close Combat is favoured is either when you board or get boarded, or when you need to defend a [[Sea Dog Chest]] or kill someone digging one up or turning one in. You might also want to leave a Boarder on a turn-in Seapost to |
+ | The main situations where Close Combat is favoured is either when you board or get boarded, or when you need to defend a [[Glorious Sea Dog Chest]] or kill someone digging one up or turning one in. You might also want to leave a Boarder on a turn-in Seapost to prevent approaching Crews from selling their Chest. Clever players make use of the [[Hide & Sneak Emote Bundle]] Emotes to hide on Seaposts or Islands and lay in wait for unwitting Pirates. Despite Boarders doing all the heavy lifting in Close Combat, it is advisable to get practice in this form of PvP regardless of your role, as you will have to defend your own ship or chests from enemy boarders no matter who you play as. |
| − | Many pirates swear |
+ | Many pirates swear by the [[Cutlass]] as a mainstay of their arsenal. This is due to the increased mobility it offers (Sword lunges can get you off ships, on ships, away from trouble and even kills). If you are favouring a Cutlass, make sure to learn how to block and dodge as well. Generally, [[Pistol|Pistols]], [[Eye of Reach]] and the [[Blunderbuss]] are used as secondary weapons, but it is also possible to fight effectively with two guns. For example, you can kill an enemy pirate if you can land both an eye of reach and pistol shot in succession. Ship ladders are fairly easy to guard with an Eye of Reach and Blunderbuss combo. A pistol-Eye of Reach combo is especially good underwater if the enemy is carrying a Cutlass and/or a Blunderbuss as you can pin them down before they can ever reach you. Double-gunning can also be effective at land combat if you can keep enemy players at a distance. The main weakness of double-gunning is the loss of the mobility gained with a [[Cutlass]] and your dependency on Ammunition, which can be difficult to replenish depending on your situation. |
| + | [[Throwables]] can be used to disrupt various actions. Both [[Firebombs]] and [[Blunderbombs]] can prevent a full Crew from raising a [[Capstan]]. Blunderbombs can also be used to knock back anyone guarding Ladders, or knock boarders off them instead. Since Blunderbombs do 50% of damage on a direct hit, they can also effectively be used as a tertiary weapon, but be careful as it will also damage you if used in tight spaces like at the bottom of a Ship. |
||
| ⚫ | |||
| − | Last, but not least, we get to the main objective of the Arena game-mode: The [[Sea Dog Chest|Sea Dog Chests]]! These chests will currently earn you a 1000 Silver, meaning that each chest that you turn in, is worth as much as 40 Cannonball hits or effectively a single sinking of your ship. Every crew should prioritise getting as many of these as possible and keeping the other crews from digging up or turning in any of their own. This means that you will have to pay careful attention to the title cards that tell you which team discovered a chest and where their ship or crew-mates are situated. Paying attention to this information, will determine the strategy of your match. |
||
| ⚫ | |||
| − | Remember that every competitor in an Arena match has the same [[Treasure Map|Treasure Maps]] with the same chests. If you can keep an eye on which chests are dug up and where, you can also assume where enemy pirates are located, or where they might hide their chests. |
||
| + | Last, but not least, we get to the main objective of the Arena game-mode: The [[Glorious Sea Dog Chest]]! These chests will currently earn you 1000 Silver, meaning that each chest that you turn in, is worth as much as 25 [[Cannonball]] hits or effectively a single sinking of your ship. Every Crew should prioritise acquiring these Chests and turning them in for the extra points. If not that, then they should at least stop the enemy Crews from turning in these chests. A good strategist will always keep an eye on the Title Cards on who digs up a Chest and where the Chest is at all times itself. Since the Chest has a constant purple Light Beacon attached to it, it is difficult to hide the Chest or attempt to sneak it away with a [[Rowboat]], although it is possible. If you want to keep enemy teams from easily taking your Chest, you can leave it on top of the [[Crow's Nest]] so that they have to take a few seconds to climb up. |
||
| ⚫ | |||
| − | If your ship is in proximity to other contestants or if the Island you are digging on is contested, or far away, then you will want your Treasure Hunters to try and hide the chests for safekeeping. Hiding chests is both a good tactic to keep your chests safe and a way to stop your enemies from cashing in any chests of their own. If you manage to kill an enemy player with a chest and hide the chest from them, then they will have to spend all that extra time to find it. Getting acquainted with any popular hiding spots is also a good skill to have for any Treasure Seeker so that you may be able to find any chests hidden by other players. |
||
| ⚫ | |||
| − | A good tactic for a match would be to leave a player on a less profitable island that you are passing by for a more profitable one. You can have your crew-mates cannon or swim off to the island, dig up the chests, hide them and save them for later as a safety net. When enemy teams are inattentive, they will forget about the islands as soon as new maps appear and you can safely return there later for extra points. |
||
| ⚫ | Every Arena match lasts for 15 minutes. You will be notified of remaining time in the match-up after every quarter. While generally 15 minutes is just enough for one Arena match, it is during the last minutes when you might have to pay close attention to how much time is left in the match. Try to accustom yourself with how long it takes you to dig up and retrieve Chests from Islands, how long it takes to sail from one place to another and how long does it take for your team to get to the turn-in point without resistance. These are all important factors in the late game as you might have to switch up your strategy on the fly depending on your circumstances. |
||
| ⚫ | |||
| − | There are many places to hide Sea Dog Chests on your ship, so get creative. You do not want Boarders to have an easy time of finding a chest and jumping or dropping off with one. The most popular hiding spots are right behind the Harpoons, between Cannons, in the Captain's Quarters (expert players can even get the chests to stay on top of the door or on the cosmetic shelves!), below deck and on the balconies. |
||
| ⚫ | Scuttling or having your ship purposefully sink in an Arena match is a controversial tactic as it will lose you 1000 points, but there are some situations where it might be advantageous. If you get a bad spawn in a match, your crew could gamble with scuttling a ship and hoping to get a better spawn. As you have no points at the beginning of a match, this move will only cost your crew one or two minutes, but be ready to raise your anchor again. If you are far ahead in points (we are talking approximately +2000 points ahead), then you can also allow your ship to sink if you want to get away from the clutches of an enemy ship or a chaotic situation and get a fresh spawn. Remember, since every enemy cannonball hit gives them +40 points, you can sometimes save yourself from a situation where the enemy team can simply get ahead by getting stuck on your ship and not letting you sink. Scuttling can also help you to replenish your ships supply for the cost of 1000 points. If you are running low, but still ahead in the competition, you can consider sacrificing your ship by ramming it in a destination or enemy ship and going full close combat. |
||
| ⚫ | |||
| ⚫ | |||
| + | Every Ship spawns with one [[Harpoon Rowboat]] of their team colours. A Crew can only have one Rowboat per match and will not respawn with one. There are not too many situations where a Rowboat is useful in 15 minute Arena matches, but it can be put to clever use in certain situations. The main purpose of the Harpoon Rowboat is probably to offer Players a method of salvaging a [[Glorious Sea Dog Chest]] after a Ship battle where all Ships were sunk or lost. The Rowboat does not offer Players enough protection from other Crews as the Chest is always visible on the Map and from a distance. |
||
| + | The Rowboat could be used in an instance where numerous Ships are locked in battle and a Crew can spare one Player who would sneak away with the Rowboat and attempt to go and steal the chest unnoticed. |
||
| ⚫ | |||
| ⚫ | Every Arena match lasts for |
||
| + | Another use for the Rowboat is its [[Harpoon]]. If a [[Ship]] is stuck and has something that can be harpooned at the back, the Rowboat Harpoon can be used to pull the Ship in a reverse direction. The Harpoon can also be used to stay attached to sailing ships from behind. |
||
| ⚫ | |||
| + | |||
| ⚫ | Scuttling or having your ship purposefully sink in an Arena match is a controversial tactic as it will lose you 1000 points, but there are some situations where it might be advantageous. If you get a bad spawn in a match, your crew could gamble with scuttling a ship and hoping to get a better spawn. As you have no points at the beginning of a match, this move will only cost your crew one or two minutes, but be ready to raise your anchor again. If you are far ahead in points (we are talking approximately +2000 points ahead), then you can also allow your ship to sink if you want to get away from the clutches of an enemy ship or a chaotic situation and get a fresh spawn. Remember, since every enemy cannonball hit gives them + |
||
| + | The Rowboat Chest will appear Empty, but can be filled with Supplies. |
||
== Trivia == |
== Trivia == |
||
| − | *While it is not possible to take damage or die in the Arena lobby, you will still get the fall damage screen notification when dropping down from heights. |
+ | * While it is not possible to take damage or die in the Arena lobby, you will still get the fall damage screen notification when dropping down from heights. |
* Many of the features shown in the The Arena trailer did not make it into the game mode, such as Explosive Barrels, The Devil's Roar nor Captain's Chests. |
* Many of the features shown in the The Arena trailer did not make it into the game mode, such as Explosive Barrels, The Devil's Roar nor Captain's Chests. |
||
| + | * Continuous Arena Matches usually use the same Map, evidenced by any lit [[Beacons]] still staying lit throughout matchups. |
||
| − | * The Barrels on islands contain the same loot table as Adventure mode (with the exception of [[Cursed Cannonballs]], making it possible to get [[Bait]] for catching different fish, despite different types of fish not providing any sort of advantage in the game mode. Bait does however make the player vomit. |
||
| − | * It is possible to fish up [[Treacherous Plunder |
+ | * It is possible to fish up [[Treacherous Plunder]] in Arena, however nothing can be done with it. |
| − | *[[File:The |
+ | *[[File:The Midnight Prowl.png]] The Midnight Prowl was a ship that got removed from the arena. It is rumored that it got removed because it was too hard to spot at night. |
* With the addition of [[Pirate Emporium]], [[Ancient Skeletons]] can be encountered in the Arena Game Mode as well. |
* With the addition of [[Pirate Emporium]], [[Ancient Skeletons]] can be encountered in the Arena Game Mode as well. |
||
| − | == |
+ | == Tips from the Tavern == |
| + | <center><gallery widths="220px" mode="nolines"> |
||
| − | <gallery> |
||
| − | File: |
+ | File:SDTavern 1.png |
| − | File: |
+ | File:SDTavern 2.png |
| − | File: |
+ | File:SDTavern 3.png |
| − | File: |
+ | File:SDTavern 4.png |
| − | File: |
+ | File:SDTavern 5.png |
| − | File: |
+ | File:SDTavern 6.png |
| − | File: |
+ | File:SDTavern 7.png |
| − | File: |
+ | File:SDTavern 8.png |
| − | File: |
+ | File:SDTavern 9.png |
| + | File:Tavernsybil.png |
||
| ⚫ | |||
| ⚫ | |||
| + | |||
| + | == Patch History == |
||
| + | {{scroll box|content= |
||
| + | ;[[2.0.14]] |
||
| + | * '''Arena 2.0''' Introduced. |
||
| + | * '''Glorious Sea Dog Chests''' – [[Treasure Maps]] have been removed and crews will now be fighting over a single [[Glorious Sea Dog Chest]], visible for all to see via a beacon of light. This Chest replaced the [[Sea Dog Chest (Legacy)]]. |
||
| + | * '''Contest Map Size''' – All contest locations updated, with smaller Contest Maps and turn-in locations lowered from two to one per Map. |
||
| + | * '''Contest Duration''' – Arena contests reduced from 24 minutes to 15 minutes. |
||
| + | * '''Increased Silver''' – [[Silver]] gains for hitting Ships with [[Cannonballs]] increased from {{s|25}} to {{s|40}}. |
||
| + | * '''Penalty for Quitting''' – Players who quit contests too often will be temporarily suspended from playing in The Arena. While inside The Arena, receiving an invite to a different session will warn players that this will also count as a quit contest. |
||
| + | * '''Achievement and Commendation Rebalancing''' – The Fortune & Glory achievement and the Seeker of Silvered Loot, Keeper of Silvered Loot and Treacherous Sea Dog Commendations have been rebalanced in line with the improved Arena experience. |
||
| + | }} |
||
== Videos == |
== Videos == |
||
| Line 259: | Line 304: | ||
[[es:The Arena]] |
[[es:The Arena]] |
||
| + | [[zh:競技場]] |
||
Revision as of 17:47, 16 July 2021
| The Arena | |
|---|---|
| |
| Details | |
| Type | Game Mode |
| Location | The Glorious Sea Dog Tavern |
| Company | |
The Arena is a competitive Game Mode hosted by the Sea Dogs within The Glorious Sea Dog Tavern in the world of Sea of Thieves.
Summary
Before entering the Arena, players must choose whether they wish to compete in Sloop only or Galleon only matches. Once this selection is made, players enter The Glorious Sea Dog Tavern lobby where the five Crews for the match are gathered. The match will also end in the Tavern lobby where results are displayed and players may choose to continue into the next match. The Tavern lobby also provides players access to the various Customization Chests and services from the Shopkeepers and Sea Dogs representatives.
Once the match-up is ready, players are sent into a small area within The Sea of Thieves for a 15 minute contest for Silver and glory. In an Arena match, Crews have to locate, compete for and deliver single Glorious Sea Dog Chests that are buried on Islands, marked with a purple light pillar and a purple Map Table marker at all times. These chests need to be delivered to a Sea Dog Seapost, marked with a red smoke pillar and a golden Map Table marker. All other Ships are also displayed on the Map Table. Once a Glorious Sea Dog Chest has been delivered to a Sea Dog Agent at a Seapost, another Chest will appear buried on an Island.
The score of a match is counted with Silver, which is awarded to Crews for various actions, such as digging or selling Chests, hitting other Ships with Cannons or killing other Player Pirates. Players will lose Silver for sinking or scuttling their Ship. The Crew that earns the most Silver within the 15 minutes of a single match, wins. Silver as a Currency is only used in single Arena matches and does not carry over to Adventure Mode or the Lobby. All Crews will be rewarded with a set amount of Gold and Sea Dogs Reputation based on their placement in the match.
Elements of Arena

The results of a match can be read from a Quest after every game.
- Two modes: Duo Sloop Arena for two-player Crews and Galleon Arena for 4-player Crews.
- The color and type of your ship is predetermined in the Lobby and persists throughout the matchup.
- Every player has a coloured team icon beside their name.
- Players can check Other Crews from the Main Menu to see all Crews and their participants or even mute them.
- Players who quit contests too often will temporarily be suspended from playing Arena. While inside The Arena, receiving an invite to a different session will warn players that this will also count as a quit contest.
Lobby
- Players gather inside The Glorious Sea Dog Tavern between all Arena matches.
- Players have access to the following Shops: Shipwright Shop, Weaponsmith's Shop, Equipment Shop, General Clothing Shop, Pirate Emporium, Tavern.
- Players have access to the following Customization Chests: Armoury, Equipment Chest, Clothing Chest, Vanity Chest, Pet Chest & Ship Customization Chest
- Note: Only Figureheads, Wheels, Cannons and Capstans may be customized.
- Pets can be equipped and perched in the Lobby and taken to matches.
- After a match, Players can view the placements of the match in their Map Radial Menu.
Matches
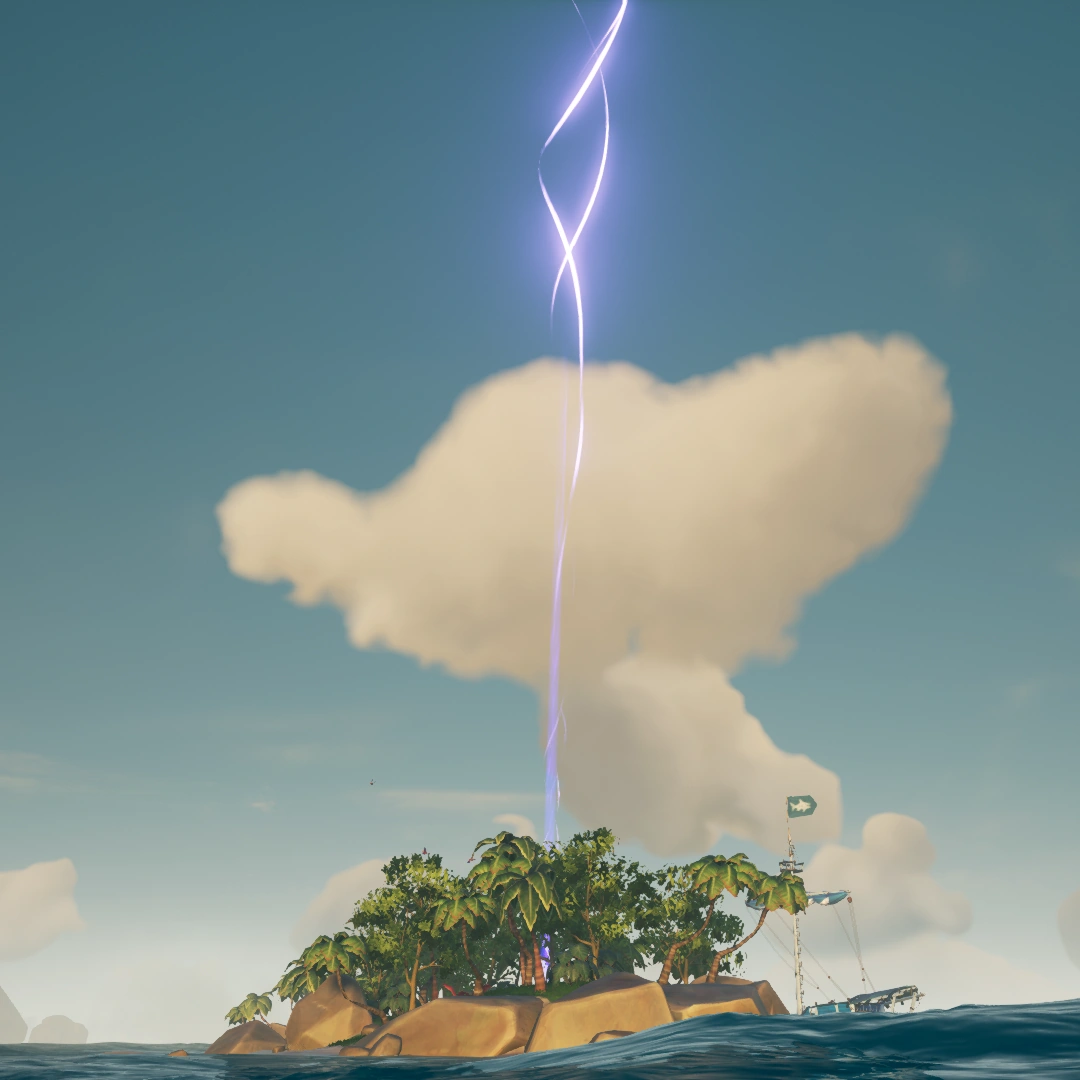

Glorious Sea Dog Chests are visible through a Purple Light Beacon.
- Each Arena Match lasts for 15 minutes.
- Up to 5 ships can compete in one match.
- Arena Matches take place in small circular areas in The Sea of Thieves, surrounded by The Devil's Shroud.
- Players compete for Silver (see: Point System below)
- Every Ship is marked on the Map Table with their designated team colors at all times.
- Every Ship spawns with their Anchor down and Sails up.
- Every Ship spawns with a set amount of Planks, Cannonballs, Firebombs, Chainshot, Blunderbombs and Coconuts on board.
- Every Ship will receive a single team-coloured Harpoon Rowboat per Match.
- Glorious Sea Dog Chests appear buried on Islands, always marked by a Purple Light Beacon in the sky or by a Purple Icon on the Map Table.
- Chests are sold to Sea Dog Agents at Sea Dog Seaposts.
- Every Arena Map has one Sea Dog Seapost with two Sea Dog Agents, marked by a Red Light Beacon or by a Golden Icon on the Map Table.
- Players are not sent to the Ferry of the Damned and stay in a Revivable state until they respawn.
- Arena Matches have no Skeletons (aside from Ancient Skeletons),
- Arena Matches have no Gunpowder Barrels or Cursed Cannonballs.
- Sunk Ships will lose Silver and respawn nearby with a freshly stocked Resources, but no Rowboat.
- Ships can be scuttled to get out of sticky situations for the Silver cost of sinking.
- The Crew with the most Silver at the end of a match wins.
Point System
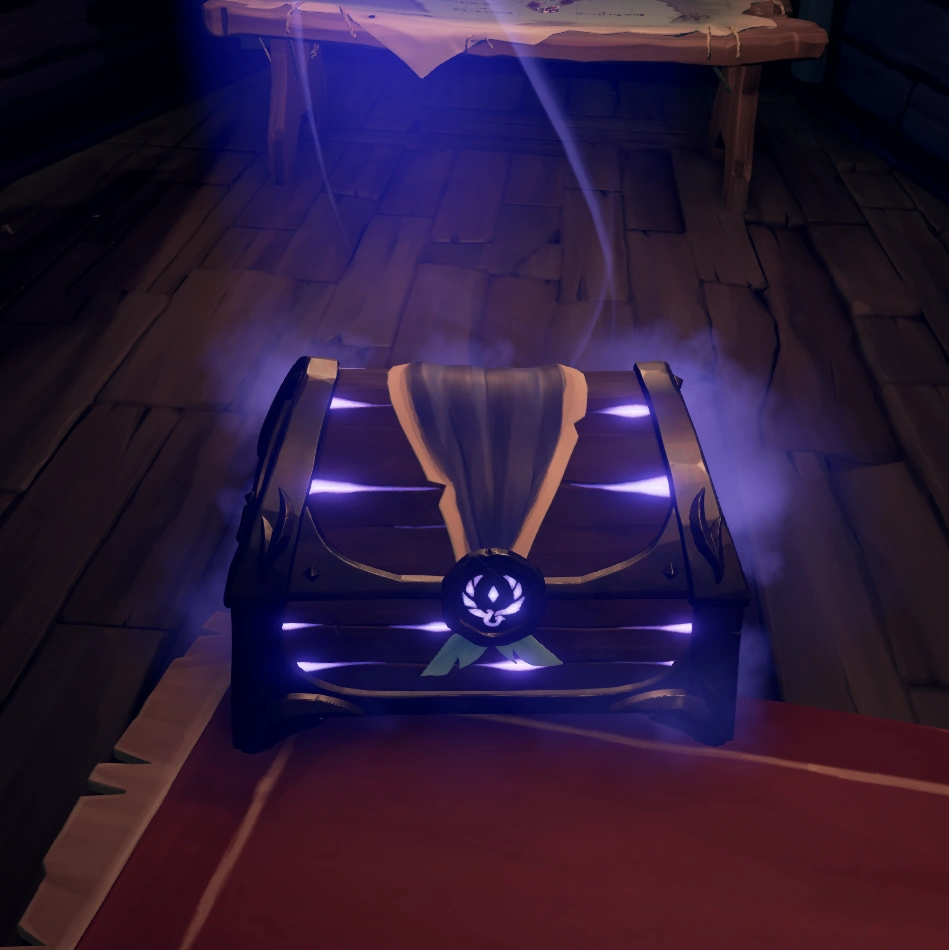

The Glorious Sea Dog Chest can be dug for 150 Silver and sold for 1000 Silver!
The match is won by the Crew that earns the most Silver during a single match. Silver as a currency is only tied to single Arena matches and cannot be used to purchase items nor converted into Gold.
| Point System | |
|---|---|
| Action | Amount of Points |
| Digging up Sea Dog Chest | 150 |
| Cashing in Sea Dog Chest | 1,000 |
| Kill Player | 5 |
| Sink | - 1000 |
| Cannonball Hit | 40 |
Rewards
At the end of the match, Crews are rewarded Gold and Reputation with the Sea Dogs based on their placement:
| Rewards | |
|---|---|
| Placement | Gold |
| First | 6,000 |
| Second | 5,000 |
| Third | 4,000 |
| Fourth | 3,000 |
| Fifth | 2,000 |
Teams
 The Good Boy
(Rare team with unique sounds.)
Tactics
Due to the open nature of Arena battles, there are various ways to secure your victory over other teams. The following section uncovers some common and less common tactics.
Roles and Communication
Apart from getting Chests, sinking ships and securing as much Silver as possible, the most important thing in Arena matches is Communication! If every teammate is able to communicate everything they do and see, then your team will already have a great advantage over other ships that don't. This is more difficult to achieve in Open Crews, making a prepared Closed Crew much more effective. Before the match starts, it is commonplace to agree upon set Roles for each crewmate. The most common role division is to have two people on deck and two people ready off-deck on a Galleon, with one on and one off on a Sloop. Note that the best teams are capable of filling up any of these roles and switching on the fly depending on the circumstances. The main agreed upon roles are listed below. Note that the 4 man role separation works best in a Galleon match. In a Duo Sloop setting be prepared to apply these roles between the two of you and change accordingly.
Captain/Helmsman
The Helmsman will take control of the ship and give out sailing, maintenance and battle commands to the rest of the crew. The Helmsman should stay on the ship at all times if possible and make sure the ship and sails are positioned correctly. The main role of the Helmsman is to sail the Ship and handle the Wheel. The Helmsman should have a good understanding on how to maneuver each ship type, how to read the Map Table, the position of the wind and everything that the enemy players are doing. At the start of the fight, it is best for the Helmsman to run to the Map Table, check the positioning of the Ships and the Chest and prepare a strategy for the current match (although this can be delegated to any player who feels comfortable with this task and is furthest away from the Anchor). The Helmsman should take note of enemy ship placements, movements and presumed intentions and be ready to act accordingly. This means that they ideally need to pay attention to the buried Chests on each Map, where the enemy crews are, what and where they have found chests at and how they may play with their given hand. A good Helmsman will always call out the required sail positioning and angle, Harpoon handling, when to board and when to go to the Island, when to attack and where, when to handle repairs, and of course, when to come back to the ship. This makes it the most difficult role by far, but if done right, will secure the team a great advantage over other, more unorganised crews.
An expert Helmsman will be capable of sailing a Galleon alone, leaving up to three people to handle everything else.
This role should definitely be present on a Duo Sloop Crew as well. It is advised not to leave your Ship unattended unless enemy Crews are far away.
Deckhand
The Deckhand is responsible for general Ship maintenance. The Deckhand may often be disregarded, as it is perceived to require less technical skill, however a good Deckhand is the key to having your ship surviving the toughest odds. Since the Helmsman is mostly handling the Wheel for maneuvering, any Deckhands should help them handle the Sails, deal with Repairs and Fire, prepare and use Cannons, work the Harpoon, check ladders and the Ship for potential Boarders, etc. Repair duty is one of the most important things when under attack, because most Ships sink due to carelessness with repairs. A Deckhand should call out for aid with bailing and report the water level to the Crew. The main skills a deckhand should focus on mastering are effective handling of the Harpoon and Sails, Cannonfire and most importantly, Close Combat. It is often the Deckhand and not the Close Combat oriented Boarder who will have to deal with any enemy Boarders. Essentially, the Deckhand should be a jack of all trades.
An expert Deckhand can perform Ship maintenance with the Helmsman by essentially "reading their minds" and working Sails, Cannons, Guarding duty and Harpoon maneuvers on the fly.
Since a Sloop can essentially be sailed alone, then the Deckhand role can be performed by the Helmsman or anyone on the Ship.
Boarder
The Boarder's objective is to master both Ship and Close Combat, because they will spend most of their time off the ship, battling and hindering other Crews from getting ahead. A good boarder understands how Cannon and Ship positioning works as they will need to judge the distances and speeds of other ships to be able to board them safely. If a Ship is in firing distance, a boarder should attempt to either aim themselves on a Ship or in front of one with the Cannon to land a boarding. If a ship is behind or ahead, the boarder will need to either jump or sword lunge themselves onto the other ship. Experienced crews listen to Mermaids and watch Ladders for any boarders, so be careful not to waste your life boarding a Ship that sees you coming. You may try throwing Firebombs at the ladder to help with your boarding. Once on board the enemy Ship, a Boarder should focus on lowering their Anchor immediately and killing anyone who is trying to either catch or raise the Capstan. A lowered anchor makes a ship a sitting duck, allowing for the rest of your crew to catch up and apply more pressure by maneuvering around the sitting duck. Boarders can also focus on guarding the cannonball holes on lower decks to prevent the other crew from repairing their ship. With the exception of Food, Boarders should also empty their Inventory to steal Supplies from enemy Ships. Boarders should also generally focus on stealing the Sea Dog Chests of other crews. If a boarder notices Chests on board of other ships, they can try and throw them overboard or hide them in different spots to slow the enemy Crew's progress. Boarders can also stay low on Sea Dog Outposts in wait of any crews trying to turn in their Chest, attempt to kill them and cash their Chests in themselves.
An expert Boarder has mastered Close Combat with all Weapon types, keeping enemy numbers low, while being prepared to run away or jump around to avoid damage from any active Combatants.
In a Sloop Crew, one player should deal with off-ship Roles like Boarding, while the other player maneuvers the Ship. It is generally not a good idea to leave the Sloop alone and both head off the ship.
Treasure Hunter
The fourth main role is generally more open. The Treasure Hunter should be a jack-of-all-trades that can generally help out with filling any other role, but their main focus should be to focus on retrieving Glorious Sea Dog Chests hidden on the Islands. The Treasure Hunter should acquaint themselves with Map and Island awareness for finding the Chests quickly and Combat prowess for defending the said Chests or trying to prevent anyone else from scoring points. A good Treasure Hunter should also be capable of defending their Chests or keeping other Crews from digging up any more Chests on Islands. A good tactic for a Treasure Hunter who is contesting a Chest on an Island, is to lay low with a Hide Emote and wait for other Players to approach the Chest and kill them so that they can freely dig up the Chest without interruptions themselves. When there is no treasure to dig up, the Treasure Hunter should focus on helping out their crew with either handling the Sails, Repairs, Boarding or Ship Combat.
An expert Treasure Hunter knows Islands inside out and can manage digging chests and getting them aboard as quick as possible. While Arena is considered a PvP Game Mode, it is actually quick and painless Chest retrieval that wins matches.
In a Sloop Crew, this role can be fulfilled by any player off the Ship.
The Start of the Battle
As time is limited in Arena, it is of utmost importance to get your Anchor up and your Sails down as soon as the match starts. The Ships that get moving the quickest also have the advantage towards the Chest Island or other Ships. There is not much of a difference between three and four people on the Capstan on a Galleon (one player can raise the Anchor very quickly on a Sloop), so one of the crew members can start preparing the Sails or check on the Map Table to prepare a strategy for the matchup. Make sure that everyone has the correct Weapons and pockets full of Resources before heading out into any Combat scenarios. If another crew that spawns close takes their time to get moving, it is possible to have one of your Crewmates Cannon over to hinder the movements and progression of other Ships. It is advisable to this person to go without Supplies and steal from the other Ship instead.
The second most important part of a successful Arena match is to determine a Strategy for the start of the match by checking out the Map Table. In Sea of Thieves, Knowledge is Power. The more you know about the other teams the better. More experienced players can determine which Crews are competitive already in the Lobby and keep an eye out for their Ship on the Map and plan accordingly. Mostly, this is done by judging the rarity or experience needed to acquire a team's Cosmetics or their Titles. One can also check the Xbox Profiles of Players to see how much experience they have on the seas by their distance sailed. If you did not get a chance to size up the enemy teams, then take note of which Ships started moving on the Map and whether they have better or worse wind than your ship. Make note of the exact location of the Glorious Sea Dog Chest and whether it is in an easily accessible place or not. You can also check the Other Crews Tab in the Main Menu to see the names of your competitors and whether they have full Crews or not.
If you are further away from the Treasure Islands than other ships and get there last, then you have a few options. You can either plan on taking down any Ships already busy on the Island and contest them, or plan to cut off their escape towards the turn-in Seaposts. The ships that get to an Island first are mostly busy with acquiring the Chest or contesting the island and are more than likely not set to sail quickly, so they make for easy targets. Be careful with your approach however. If the other Crew hasn't lowered their anchor and has all Pirates on board, then they may very well sink you before you get in Cannon range yourself. If you are too far behind, you can sail to the middle of the map, wait for other crews to retrieve a Chest and hope for a better Chest spawn.
Ship Tactics
While useful for Arena, these tactics can be used to a great effect in Adventure Mode as well!
Capstan Tactics
As mentioned in the previous section, you want to raise your Capstan as quick as possible to get ahead on other players. Generally, you never want your Anchor to be dropped in Arena as it will make you an easy target for other Ships. Conversely, this means that when engaging other ships you will want to target their Anchor first to stop their ship from maneuvering. This can be done by sending a Boarder over to their ship to drop it for them and keep their crew from raising it. If a Ship's anchor is already lowered, you can aim and shoot Cannonballs or Chainshot around the Capstan area to prevent the team from raising it and breaking its pegs off. Alternatively a Boarder can use Blunderbombs to prevent more than one person raising an Anchor. Setting Fire to an Anchor with a Firebomb can also buy time to stop the Enemy from raising their Anchor.
There are some situations where you can let your Anchor drop, but you must make sure there are no Ships even remotely close enough to take advantage of your inability to move. One of these situations would be when you need to turn your ship around quickly in open seas with an Anchor turn. For this, you need the Helmsman to turn the Wheel completely to the desired direction and have the teammates drop the Anchor while the ship is moving. You must communicate this, as an Anchor turn is only as effective as the number of people willing to pull it up again. Anchoring is also an option if you need to make a quick stop at a Sea Dog turn-in Seapost and cannot raise the Sails in time or if you have little time left in the match. Again, you need to be wary of other ships using your lack of mobility against you. If you are alone by an Island and need to stop your ship from moving, you can also lower the Anchor and manage the Sails before raising, but make sure you are in safe waters. At all other times, it is not advisable to drop Anchor in an Arena match.
You must also be attentive and ready to defend your Anchor from enemy Boarders. Instead of anchoring, you should pull up your Sails to stop the ship from moving as you can set sail by simply lowering the Sails and not have to deal with raising the Capstan first. Try to have at least three repaired or healthy Anchor pins on a Galleon for quick Anchor raising.
Another tactic for Anchors is to prime them. Once you raise or let go of an Anchor, you can catch it and manually lower or raise it inch by inch. This is called Anchor priming or preparing the Anchor and can be useful when coming close to a destination where a quick and precise stop is required.
In Duo Sloop Arena, if you kill both of the enemy Players of a Crew, you should have enough time to raise their Anchor and sail them into Rocks or Islands for holes or simply away from a strategic location before they come back to disrupt their progress.
Sail Tactics
After raising the Anchor, getting your Sails down and angled correctly is your second priority at the start of a match. You should ideally have at least two people on board to manage Sails in a Galleon Crew, as it is significantly slower to do alone. Two people raising or angling the same Sail will double the speed of any actions. To get the most speed out of your ship, you will want to angle the Sails with the Wind at all times. If you are sailing into the direction of the Wind, it is advisable to go for "Dummy Sails", that is, having your sails straight into the wind, as it will cut directly through the waves and improve your speed by a little bit. If you can spare some speed, the Middle Sail can be slightly raised, so that the Helmsman can see better. You will need to practice the timing of raising Sails before you get to a destination. When you close to your destination and want to slow down, you will want to raise the middle sail first (advisably with two people) as this counts for the most speed due to its size. Generally the front or back sail will be raised right after and one or the other will be left down for maneuvering until stopping and also raising the last sail. In most cases, the Helmsman will order the raising of the Front Sail before the Back Sail, dealing with the latter themselves. However the Front Sail can be left last if you need to move the ship for Harpoon play, because the front sail is closer to the Harpoons. Many players like to prepare "Combat Sails" for Ship to Ship combat between Galleons, which is either the Front or Back Sail fully lowered and the other half-raised. This placement offers the best maneuvering conditions for a Galleon.
Be mindful that the Masts can be broken down by 3 direct Cannonball hits or a single Chainshot. A broken Mast will hinder your mobility by one Sail on a Galleon or completely stop the Ship's movements of a Sloop. While on a Sloop, getting a sail up and running is very important, you can leave one or two Sails broken on a Galleon if you are in a difficult situation and only need to move out of a Cannon's range. The Sails can be fixed on the seas or when you are in safety later. Therefore, if you see cracks in the Masts, you should repair them with Wooden Planks when in safe waters.
When in Ship Combat, try to use Chainshot on Enemy Ship's Sails to easily hinder the movements of their Ship. Breaking all the Masts of a Ship essentially anchors them in place. A broken Mast needs to be pulled up from the Sail Length Cleat, which can also be sped up with two people. This action will also pull up the sailcloth so you need to lower it again after fixing the mast.
If a Boarder has enough free time and an enemy Ship is unanchored, they can lower the Sails of the Ship to sail it away from strategic points or sail it into Rocks or Islands to get the Ship stuck and create holes.
Helm Tactics
The Helm (or Wheel) is both the most necessary and often the most difficult part of the ship to take control of, especially in Galleon matchups. The job of the Helmsman can be greatly improved by having a designated Deckhand on board of the ship to help the Helmsman with the Sails, Cannons, Repairs, Capstan and Harpoon while the Helmsman can focus on steering the Ship and giving out commands. Without a deckhand, the Ship's maneuverability will suffer greatly as the Helmsman will have to do the job of two people alone. Ideally it is best to have the Helmsman on the Wheel at most times, so that they can position the ship while the rest of the crew is dealing with the Sails or Repairs. Also, be mindful that when going through Storms, having one player holding the Wheel steady is an absolute necessity unless you are willing to risk lowering your Anchor. Taking on any ships in a Storm that are not prepared to steady their Ship will give you an advantage. Helming on a Sloop isn't as difficult, as it is fairly easy to maneuver and sail Solo, but be careful as you can easily be shot off the side of the Ship if a Cannonball hits you at the Helm.
Be mindful that the Wheel can also sustain damage from Cannonballs and Chainshot, making it harder to turn the ship if left unrepaired. Aiming for the enemy ship's Wheel should not be the primary objective, but can help to hinder their ability to maneuver their Ship. This will often set them sailing in a undesirable trajectories until the Wheel is fixed. Make sure to prioritise fixing your own Wheel with Wooden Planks if it is damaged.
Harpoon Tactics
The Harpoon is something you want to master as soon as possible for Arena, as it is a very powerful tool for mobility, Combat and Chest or Crew-mate retrieval. The Harpoon can be tricky to aim because it shoots high. You can predict the destination of the Harpoon by imagining a cross-hair at the exact middle of your screen. With enough practice, you will start to gauge the exact spot where the Harpoon will hit. Luckily, Glorious Sea Dog Chests are large and easy to grab, but wave and ship movement can still make harpooning difficult, so be sure to get some practice in!
If your teammates dig up any Chests on an island, it's good to have the Ship nearby, so that your Crewmates can leave the Chests on the shores to be picked up with the Harpoon. You can also retrieve your teammates and even enemy Pirates with the Harpoon. If your teammate is bringing the Chest to your ship, you can tell them to turn their back to the Harpoon while carrying the Chest, so that you can pick up both them and the Chest at once.
Harpoons are also very good at precise maneuvering of your ship. When you are close to Islands or larger sea structures like Rock formations, you can essentially perform an Anchor Turn without dropping the Anchor by having the Helmsman turn the Wheel to the desired side and having a Deckhand pull the ship around the corner by harpooning any solid surface structure. You can also utilize the Harpoon to pull your ship closer to an Island or away from it. The surrounding area of all Islands has shallow water, so you can use the Harpoon to turn your ship around quicker by having one of your Deckhands shoot the ground below water with the Harpoon and pull you to a desired position.
The Harpoon is also valuable at keeping up with other ships or positioning your ship around them. Try to grab moving Ships with your harpoon to catch up speed or pull yourself closer. The Harpoon has to be pulled in constantly to get closure, because a slack Harpoon will easily disconnect with its target. Interestingly, an anchored Ship harpooned to a sailing Ship will pull the other ship behind with you, effectively also anchoring them. When positioned right, you can have one crewmate Harpoon the back of a turning Ship and pull it, keeping the Ship in range of your Cannons and away from the other team's Cannons.
Anyone handling a Harpoon has to be careful, since they are immobile and make for easy targets for Cannons or Weapons. A Harpoon latch can be disconnected by damaging the Harpoon itself with any Weapon, Throwable or Cannonball. If you get Harpooned by another Ship, try to shoot at it or throw a Blunderbomb towards it to make it let go.
There is also a Harpoon on each Ship's Rowboat. If your Ship is stuck, but there is something to Harpoon behind it, you can use the connected Harpoon Rowboat's Harpoon to pull your Ship in reverse.
Ship Combat
Ship to Ship Combat is more streamlined in the Arena game mode, as you have neither Cursed Cannonballs nor Gunpowder Barrels, so you have to rely on careful maneuvering, Boarding and Cannon fire. When approached by enemy ships, or when approaching one yourself, try to position your Ship with your sides either in front or behind their ship. This is fairly easy to achieve if the enemy ship is Anchored so try to get your Boarder on their ship, ready to lower the Anchor and guard the enemy team from picking it up or raising it. On a Galleon, if you can get all four crew-mates on each Cannon to aim at and barrage a ship at range, then you are more than likely to sink the enemy ship very quickly. This is an ideal scenario though. In real Arena fights, you will have to guard yourself from enemy Cannon fire, have someone on Repairs and lose Deckhands to Boarders or boarding. Nonetheless, try to have at least two people on Cannons for maximum efficiency.
If you are close to an enemy Ship, but do not have the necessary mobility to get to the right angle, have one of your crew-mates grab the opposing ship with a Harpoon. The Harpoon is ideal for pulling your ship out of the enemy Ship's Cannon range or into your own, to keep up in speed with their ship or to simply stop them from moving. You can also pull your ship closer to an escaping Ship and allow for boarding opportunities.
On open seas you have to take the wind position to account and manage your Sails accordingly. Since all Ships share their typing in Arena matches, your maneuverability is equal, but correctly angled Sails can make just the right difference to get away from, or catch up with a less-skilled enemy crew. Use this knowledge against other teams.
Also note that if you want to guard the Sea Dog Seapost turn-in points, it is more advantageous for you to wait for your target to approach you, than it is for you to sail toward them, as they can easily pass you by, losing you the game.
If you are being chased by an enemy Ship and want to lose them, try to get your Boarders on their Ship unnoticed and have them Anchor that Ship, or simply keep the crew busy and away from managing their Ship.
A good crew will always keep an eye out for Mermaids and swimming sounds to spot Boarders and guard their ladders. Make sure you do this as well! Keeping an eye out for Boarders and guarding your ladders should be a top priority as a successful Boarder can easily cost you the game.
The Helmsman and Boarder should communicate ship positioning as sometimes you might need an angle ahead of the enemy ship, so your Boarder can try to Cannon themselves off and catch the moving ship's ladder.
Cannon Tactics
When it comes to Cannon fire there are three different spots that you want to aim at depending on the situation. A good Helmsman will know how to call out the right spot:
- If you want to sink a ship, you will have to aim below deck. The more (and the larger) holes the enemy ship has at different spots below deck, the faster they will go down. For maximum damage, spread out your shots at different parts of the hull, so that their repair crew has more holes to fix. You can also periodically keep hitting the same spot to keep the enemy crew from patching up that one hole and potentially even try to kill them while doing so.
- If you want to hinder a ship's activities, you want to aim top deck. While aiming top-deck does not make a sink ship, you will want to keep their crew away from all the important areas. If you see an enemy pirate going for their cannons, aim at the cannons and see if you can shoot them off or kill them before they get any hits on you. This is especially important in Sloop Arena, as successful hits can also knock their Cannoneer off the Ship. If you want to stop a ship from moving, you will have to prioritise aiming towards their Capstan area. By aiming at this area, you keep opposing Crews from raising their anchor. Additionally, the Capstan can lose up to three pins (one on Sloop) from Cannon fire, allowing less people to raise it once lowered. On a Galleon, this area is also where the staircase to bottom decks is located and can offer cover for your boarders to keep the enemy team from moving up or down their top and mid deck. If you want to go the extra mile, you can also aim for the enemy ship's sails and wheel, although this should be done with Chainshot for maximum efficiency. Each Sail and Wheel can take up to three points of damage from Cannonballs.
- On a Galleon, your last priority should be to fire the mid-deck of a ship, however there are some advantages to this. Of course, the more holes the enemy ships has on their mid-deck, the faster they sink after filling up to second level. You can also aim at the ladder area to keep enemy pirates from climbing back on their ship or to cover your own Boarders. The last option is to simply farm Cannonball points by hitting a ship mid-deck, as this will keep the Ship afloat longer. The mid-deck at the back of the Sloop can still fill the Ship with water though. On a Sloop, hitting this area can hinder the Crew's movements up and down their Ship.
Remember that each Cannonball that hits an enemy ship is worth +40 Silver. Every shot that is not taken is a potential 40 Silver lost so try to take pot-shots and fire at difficult angles. Cannonball points are very lucrative in Arena and sometimes simply stopping your ship next to an idle or anchored ship and emptying all your cannonballs at it can get you enough points to win a game. You have 594 Cannonballs on a freshly spawned Ship (396 on a Sloop). If you hit every single one of those cannonballs, you can get 23760 Silver on a Galleon or 15840 Silver on a Sloop. A clever Helmsman can position your ship either right next to an opponent's ship, or just out of range and have the crew offload their cannons on the top deck so that the opposing ship won't sink. If all four players are firing at the same time on a Galleon, you will make 1600 Silver if you each hit all 10 cannonballs.
You can also use Cannons on Islands, Forts and the Sea Dog Outposts, so make sure you have Cannonballs with you even when you're off your ship.
When it comes to launching people from Cannons, you can have one player aim the other to help them land a shot more precisely.
You can shoot Firebombs out of Cannons, however they are better saved for close combat on Ships as each Ship has a small stock of these and Cannon shots may not be as accurate at causing the intended damage. Firebombs are less effective against Sloops, as it can easily be extinguished, however, it can be effective on a Galleon as the longer Fire is left unchecked there, the more difficult it becomes to get rid of and the more helping hands it requires. Remember not to use Firebombs in Storms, because the rain will immediately put out any fires, making the bombs near useless.
Blunderbombs can be used with Cannons to blast Ship Hulls and sway Ships off-course. Shooting the back of a ship can make the Ship turn and crash into yours, allowing for boarding opportunities. Shooting the front of a ship can push the Ship away from Cannon range.
Chainshot are very valuable, as they will immediately break any Mast, Capstan or Wheel that they hit. The downside is their lower firing arc and distance, requiring precise aim.
If you feel like your Cannon fire isn't as up to snuff as you'd like, you can practice the firing arc, angles and movement in Adventure mode by trying to hit adjacent islands or rocks when at sea.
Supply Management
You have plenty of Supplies on board of your ship. Each Arena Galleon is packed with 198 Cannonballs per Barrel, 2 Firebombs, Chainshot & Blunderbombs per Barrel, 198 Wooden Planks, 198 Coconuts per barrel and a limitless Ammo Chest, so make sure you have your pockets full and your weapons loaded before getting into any fights. It is good to call out a reminder to get Supplies right after you get your anchor up and the sails down. If boarders are confident enough, they can try to board other ships to steal their supplies. A good time to do this would be right at the beginning of a game if adjacent ships are slow enough to get their anchor up. The Barrels that spawn on islands have the same contents as Adventure Mode Barrels (with the exception of Cursed Cannonballs), so you can stock up on better Fruit and even Bait when looking for Chests. Be mindful that Sea Dog Chest turn-in points have no Supply Barrels of any kind, but they do have Cannons on each side so it is advisable to take Cannonballs with you if you can line up a shot from them. It is also advisable to familiarise yourself with the placements of the Ammo Chests on Islands and Forts. Players cannot get any additional Throwables or Chainshot from Barrels, so these need to be either stolen from other Ships or reacquired once a Ship sinks.
Resource management is not as important in Sloop Arena, since the amount of Resource items per Ship is the same as in Galleon Arena and the Sloop takes up to 4 times less supplies to manage than a Galleon. With just one Cannon, but 198 Cannonballs, a crew has more than enough firepower to last them the entire match. The only Resource Item to take note of in Sloop Arena would be the 4 Firebombs, Chainshot and Blunderbombs (2 in each Barrel). Players should carry these in their inventories, as these are limited in supply and can be used against you when boarded.
Firebombs are essentially useless in Storms, because the Rain quickly extinguishes any started fires. They do deal some damage to Players, but they are better off saved for causing wide-spread Fires.
Food and Bait
When it comes to Food, it is also possible to catch Fish and kill Animals or Sharks for their meat and cook it on Stoves on your ship or islands. While this is time consuming, it is a valid tactic when you have nothing else to do while sailing as this will give your close combatants the valuable boost of health regeneration. This should not be considered as a tactic for every game, as there is rarely time for getting meat in Arena games, only do this if you know you have enough time to kill.
As a side-note, it is also possible to get different kind of Bait from Barrels on Islands or dug up from the ground. Bait is quite useless in Arena when it comes to catching fish, as none of the different fish types provide any additional health benefits. It is, however, possible to eat bait to regain small amounts of health and make your pirate sick. Vomit can be used as a diversionary tactic against foes at Close Combat, although its rarely effective. Other than that, Bait heals for 10% health and you can have 10 of it in hand (with additional 1 on the Fishing Rod), so if the sick does not bother a player, they can use it as extra Food.
Other Tactics
Close Combat
Despite what some Arena players think, Close Combat is actually secondary in the Arena. Close Combat alone will not win you Arena matches, however good PvP skills definitely help in slowing down enemy Crews or defending yours. The importance of Close Combat vs Ship Combat is reflected by the measly +5 Silver that you get from killing an enemy player vs +40 Silver for landing Cannonball hits. Therefore, if you want to win you should not focus your game plan on simple PvP on board of ships, camping the spawn points for the duration of the match (although it is a valid tactic for hindering any real competition). Close Combat should be approached more creatively in an Arena game, as should your choice of Weapons.
The main situations where Close Combat is favoured is either when you board or get boarded, or when you need to defend a Glorious Sea Dog Chest or kill someone digging one up or turning one in. You might also want to leave a Boarder on a turn-in Seapost to prevent approaching Crews from selling their Chest. Clever players make use of the Hide & Sneak Emote Bundle Emotes to hide on Seaposts or Islands and lay in wait for unwitting Pirates. Despite Boarders doing all the heavy lifting in Close Combat, it is advisable to get practice in this form of PvP regardless of your role, as you will have to defend your own ship or chests from enemy boarders no matter who you play as.
Many pirates swear by the Cutlass as a mainstay of their arsenal. This is due to the increased mobility it offers (Sword lunges can get you off ships, on ships, away from trouble and even kills). If you are favouring a Cutlass, make sure to learn how to block and dodge as well. Generally, Pistols, Eye of Reach and the Blunderbuss are used as secondary weapons, but it is also possible to fight effectively with two guns. For example, you can kill an enemy pirate if you can land both an eye of reach and pistol shot in succession. Ship ladders are fairly easy to guard with an Eye of Reach and Blunderbuss combo. A pistol-Eye of Reach combo is especially good underwater if the enemy is carrying a Cutlass and/or a Blunderbuss as you can pin them down before they can ever reach you. Double-gunning can also be effective at land combat if you can keep enemy players at a distance. The main weakness of double-gunning is the loss of the mobility gained with a Cutlass and your dependency on Ammunition, which can be difficult to replenish depending on your situation.
Throwables can be used to disrupt various actions. Both Firebombs and Blunderbombs can prevent a full Crew from raising a Capstan. Blunderbombs can also be used to knock back anyone guarding Ladders, or knock boarders off them instead. Since Blunderbombs do 50% of damage on a direct hit, they can also effectively be used as a tertiary weapon, but be careful as it will also damage you if used in tight spaces like at the bottom of a Ship.
Glorious Sea Dog Chests
Last, but not least, we get to the main objective of the Arena game-mode: The Glorious Sea Dog Chest! These chests will currently earn you 1000 Silver, meaning that each chest that you turn in, is worth as much as 25 Cannonball hits or effectively a single sinking of your ship. Every Crew should prioritise acquiring these Chests and turning them in for the extra points. If not that, then they should at least stop the enemy Crews from turning in these chests. A good strategist will always keep an eye on the Title Cards on who digs up a Chest and where the Chest is at all times itself. Since the Chest has a constant purple Light Beacon attached to it, it is difficult to hide the Chest or attempt to sneak it away with a Rowboat, although it is possible. If you want to keep enemy teams from easily taking your Chest, you can leave it on top of the Crow's Nest so that they have to take a few seconds to climb up.
When turning in Sea Dog Chests, consider if there might be any castaway players on the Turn-in point. If the possibility is there, have a player check the seapost for any Mermaids or Enemy Players before you sell your Chest.
Time Management
Every Arena match lasts for 15 minutes. You will be notified of remaining time in the match-up after every quarter. While generally 15 minutes is just enough for one Arena match, it is during the last minutes when you might have to pay close attention to how much time is left in the match. Try to accustom yourself with how long it takes you to dig up and retrieve Chests from Islands, how long it takes to sail from one place to another and how long does it take for your team to get to the turn-in point without resistance. These are all important factors in the late game as you might have to switch up your strategy on the fly depending on your circumstances.
Scuttling or sinking the Ship
Scuttling or having your ship purposefully sink in an Arena match is a controversial tactic as it will lose you 1000 points, but there are some situations where it might be advantageous. If you get a bad spawn in a match, your crew could gamble with scuttling a ship and hoping to get a better spawn. As you have no points at the beginning of a match, this move will only cost your crew one or two minutes, but be ready to raise your anchor again. If you are far ahead in points (we are talking approximately +2000 points ahead), then you can also allow your ship to sink if you want to get away from the clutches of an enemy ship or a chaotic situation and get a fresh spawn. Remember, since every enemy cannonball hit gives them +40 points, you can sometimes save yourself from a situation where the enemy team can simply get ahead by getting stuck on your ship and not letting you sink. Scuttling can also help you to replenish your ships supply for the cost of 1000 points. If you are running low, but still ahead in the competition, you can consider sacrificing your ship by ramming it in a destination or enemy ship and going full close combat.
Rowboats
Every Ship spawns with one Harpoon Rowboat of their team colours. A Crew can only have one Rowboat per match and will not respawn with one. There are not too many situations where a Rowboat is useful in 15 minute Arena matches, but it can be put to clever use in certain situations. The main purpose of the Harpoon Rowboat is probably to offer Players a method of salvaging a Glorious Sea Dog Chest after a Ship battle where all Ships were sunk or lost. The Rowboat does not offer Players enough protection from other Crews as the Chest is always visible on the Map and from a distance.
The Rowboat could be used in an instance where numerous Ships are locked in battle and a Crew can spare one Player who would sneak away with the Rowboat and attempt to go and steal the chest unnoticed.
Another use for the Rowboat is its Harpoon. If a Ship is stuck and has something that can be harpooned at the back, the Rowboat Harpoon can be used to pull the Ship in a reverse direction. The Harpoon can also be used to stay attached to sailing ships from behind.
The Rowboat Chest will appear Empty, but can be filled with Supplies.
Trivia
- While it is not possible to take damage or die in the Arena lobby, you will still get the fall damage screen notification when dropping down from heights.
- Many of the features shown in the The Arena trailer did not make it into the game mode, such as Explosive Barrels, The Devil's Roar nor Captain's Chests.
- Continuous Arena Matches usually use the same Map, evidenced by any lit Beacons still staying lit throughout matchups.
- It is possible to fish up Treacherous Plunder in Arena, however nothing can be done with it.
- The Midnight Prowl was a ship that got removed from the arena. It is rumored that it got removed because it was too hard to spot at night.
- With the addition of Pirate Emporium, Ancient Skeletons can be encountered in the Arena Game Mode as well.
Tips from the Tavern
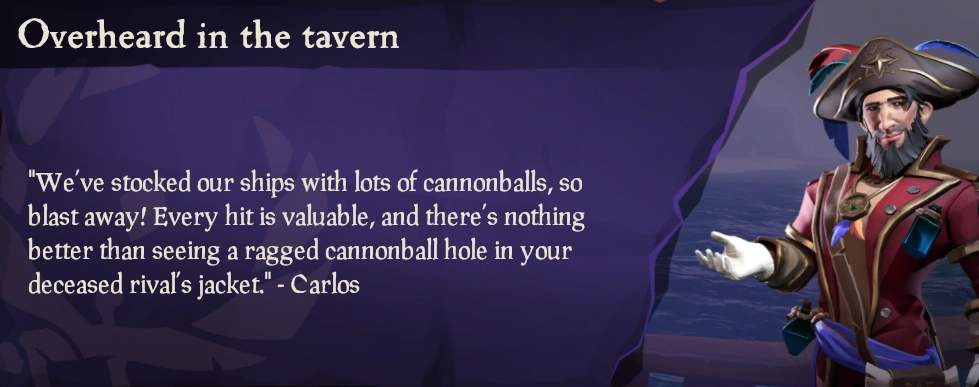
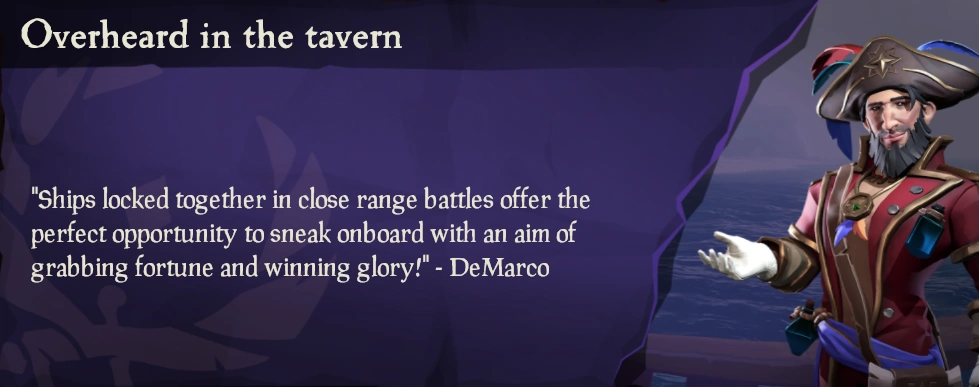

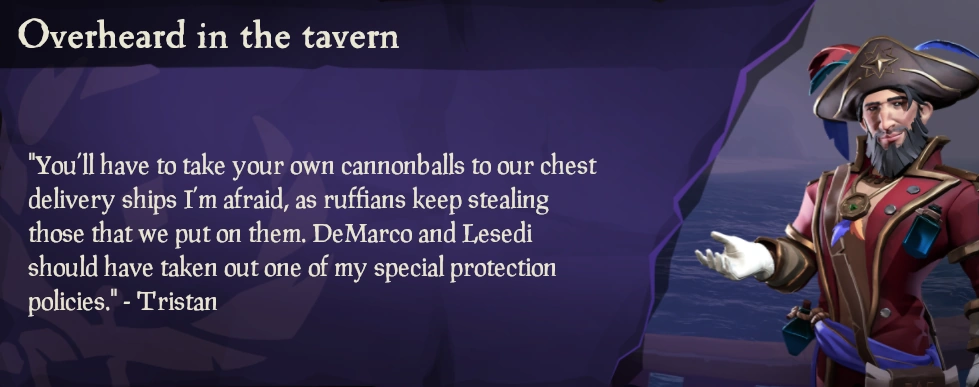
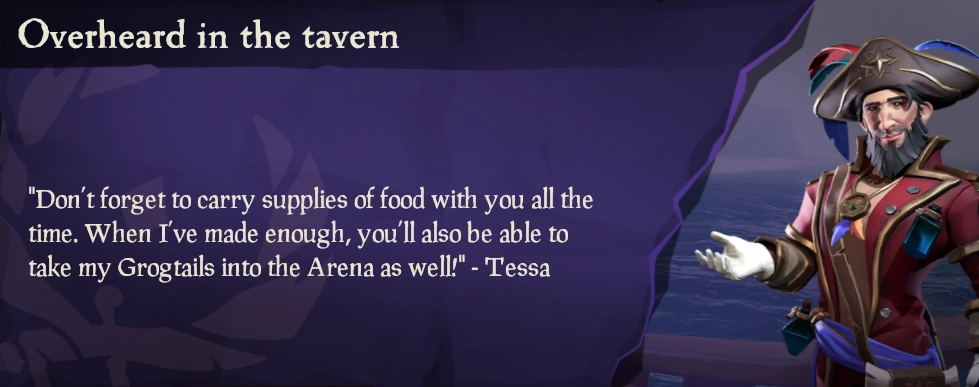
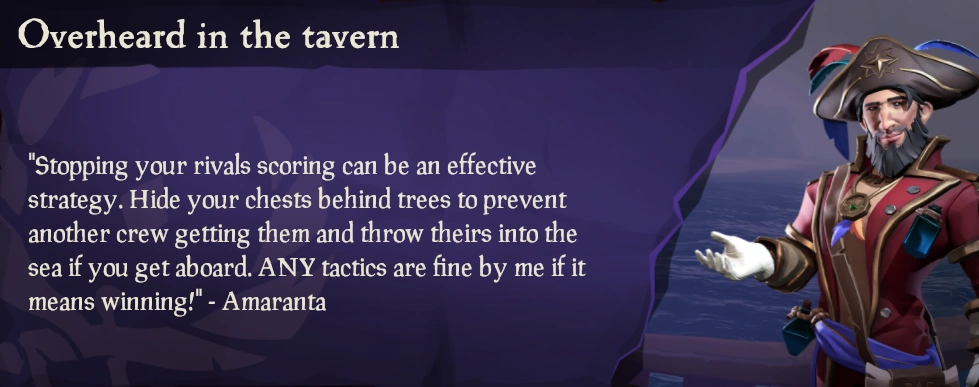
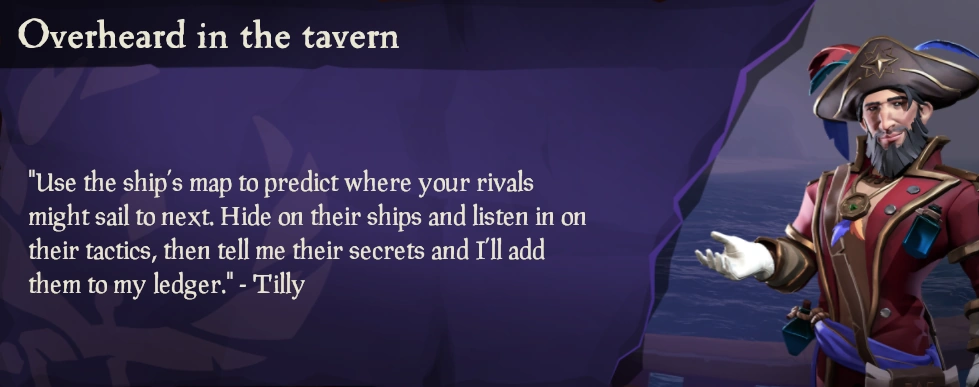
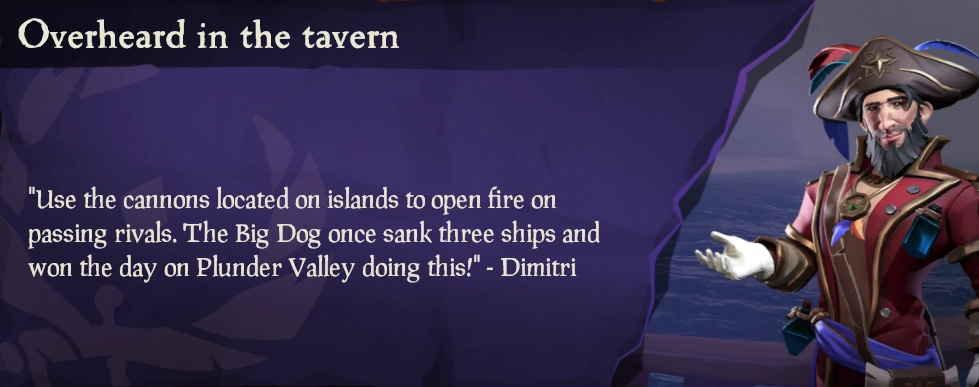
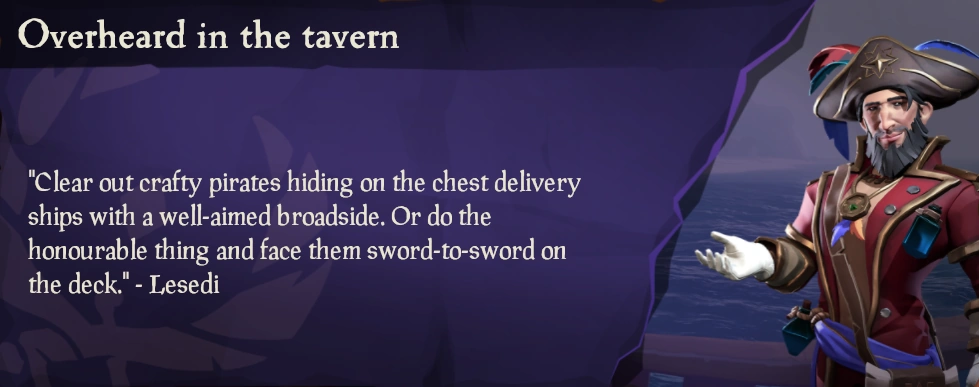
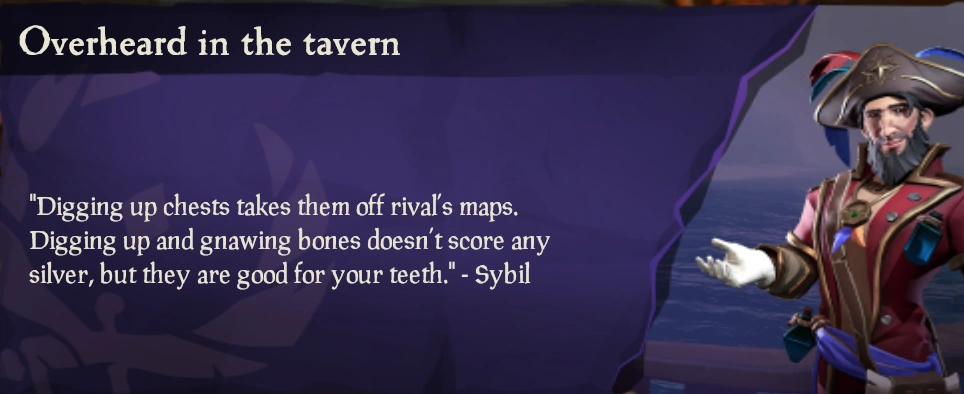
Patch History
- Arena 2.0 Introduced.
- Glorious Sea Dog Chests – Treasure Maps have been removed and crews will now be fighting over a single Glorious Sea Dog Chest, visible for all to see via a beacon of light. This Chest replaced the Sea Dog Chest (Legacy).
- Contest Map Size – All contest locations updated, with smaller Contest Maps and turn-in locations lowered from two to one per Map.
- Contest Duration – Arena contests reduced from 24 minutes to 15 minutes.
- Increased Silver – Silver gains for hitting Ships with Cannonballs increased from 25 to 40 .
- Penalty for Quitting – Players who quit contests too often will be temporarily suspended from playing in The Arena. While inside The Arena, receiving an invite to a different session will warn players that this will also count as a quit contest.
- Achievement and Commendation Rebalancing – The Fortune & Glory achievement and the Seeker of Silvered Loot, Keeper of Silvered Loot and Treacherous Sea Dog Commendations have been rebalanced in line with the improved Arena experience.