Tag: Visual edit |
Dannenheim (talk | contribs) m (Reverted edits by 205.207.179.212 (talk) to last revision by Dannenheim) Tag: Rollback |
||
| Line 150: | Line 150: | ||
The trail of [[The Ashen Dragon]] and [[Captain Randal Stone]] can be picked up from sailing to the [[Island]] where the Alliance between Martha Jane's and Randal Stone's Crew was formed. The location of this Island can be deducted from Martha Jane's Dying Memories in the [[Tale Book]]. You may need to step foot or at least sail to the Island's title card range to once again ''see the trail''. |
The trail of [[The Ashen Dragon]] and [[Captain Randal Stone]] can be picked up from sailing to the [[Island]] where the Alliance between Martha Jane's and Randal Stone's Crew was formed. The location of this Island can be deducted from Martha Jane's Dying Memories in the [[Tale Book]]. You may need to step foot or at least sail to the Island's title card range to once again ''see the trail''. |
||
| − | Once back on track, you will be lead to Randal Stone's final |
+ | Once back on track, you will be lead to Randal Stone's final resting place, where you need to once again make use of your '''Tools''' at hand to free the soul of Captain Randal Stone. |
| − | |||
| − | ng place, where you need to once again make use of your '''Tools''' at hand to free the soul of Captain Randal Stone. |
||
After freeing Captain Randal Stone, the Crew will acquire The '''A Foiled Ambush''' Commendation. |
After freeing Captain Randal Stone, the Crew will acquire The '''A Foiled Ambush''' Commendation. |
||
Revision as of 04:07, 17 June 2021
SPOILER WARNING!
This article contains information that may ruin your enjoyment of discovering the game's secrets for yourself. Read at your own risk! |
Read at your own risk!
| This article is about the Tall Tale. For the Content Update of the same name, see The Seabound Soul (Content Update). |
| The Seabound Soul | ||
|---|---|---|
| ||
| Type | Tall Tale | |
| Issuer | Sir Arthur Pendragon | |
| Story arc | Ashen Age | |
| Part | 1 | |
| Reward | 8,000 | |
| Tale chronology | ||
| ← Previous | Next → | |
| – | Heart of Fire | |
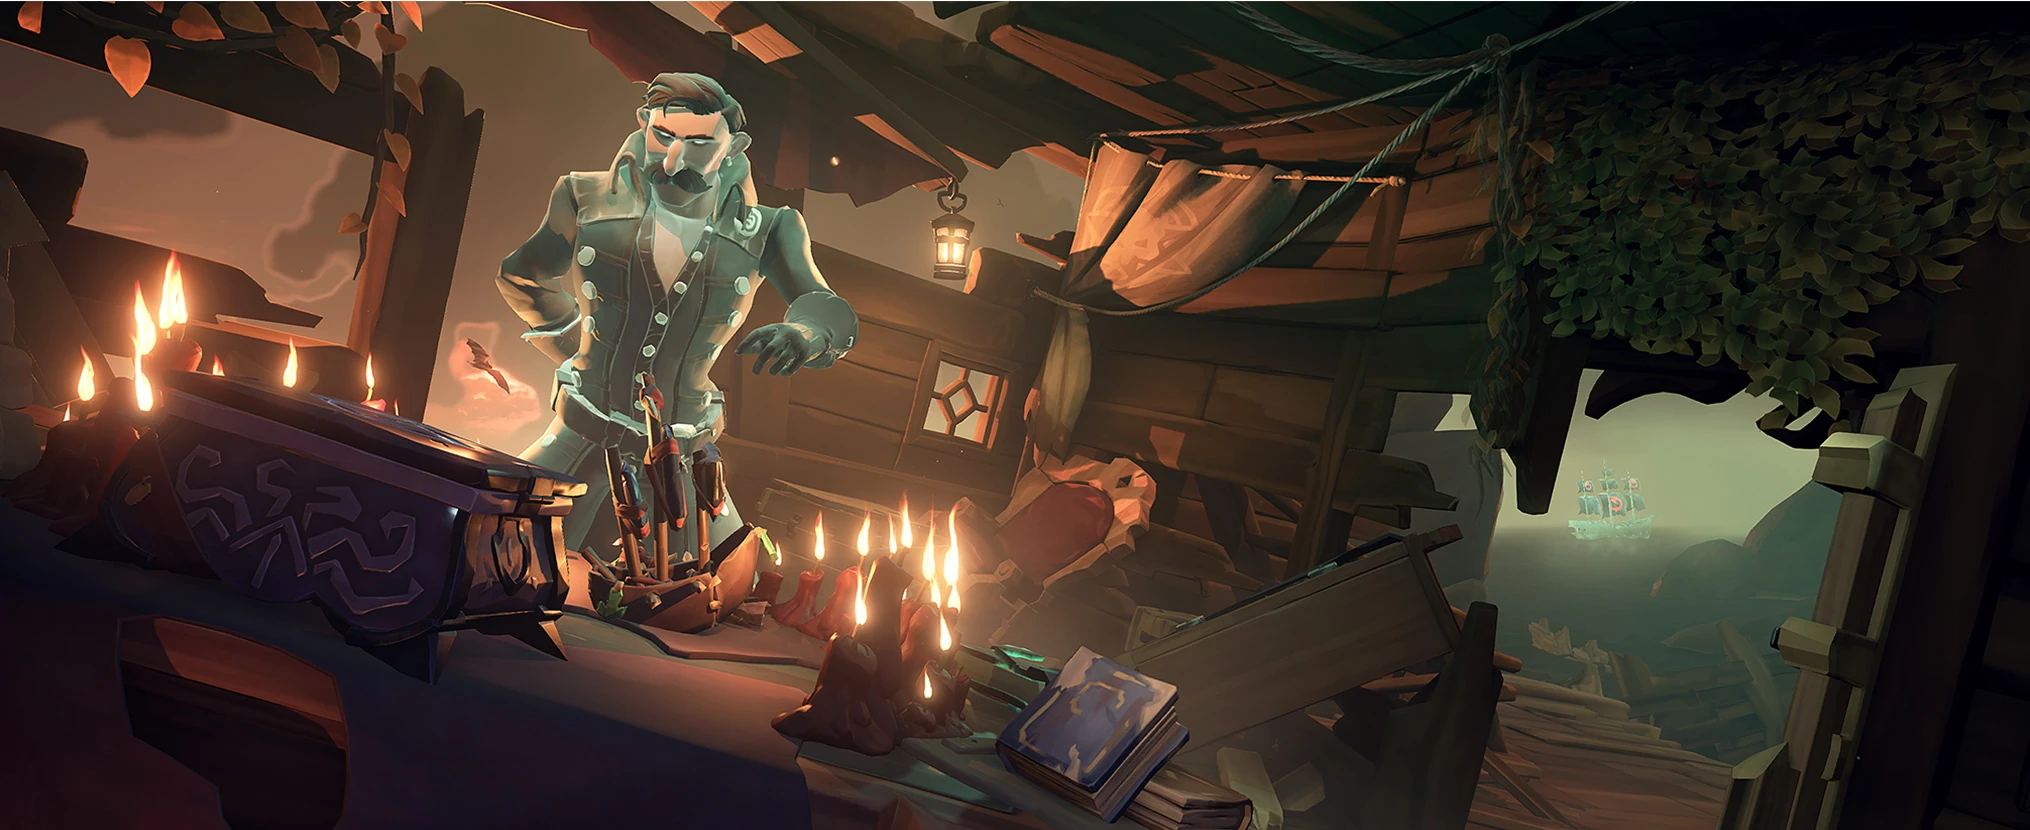
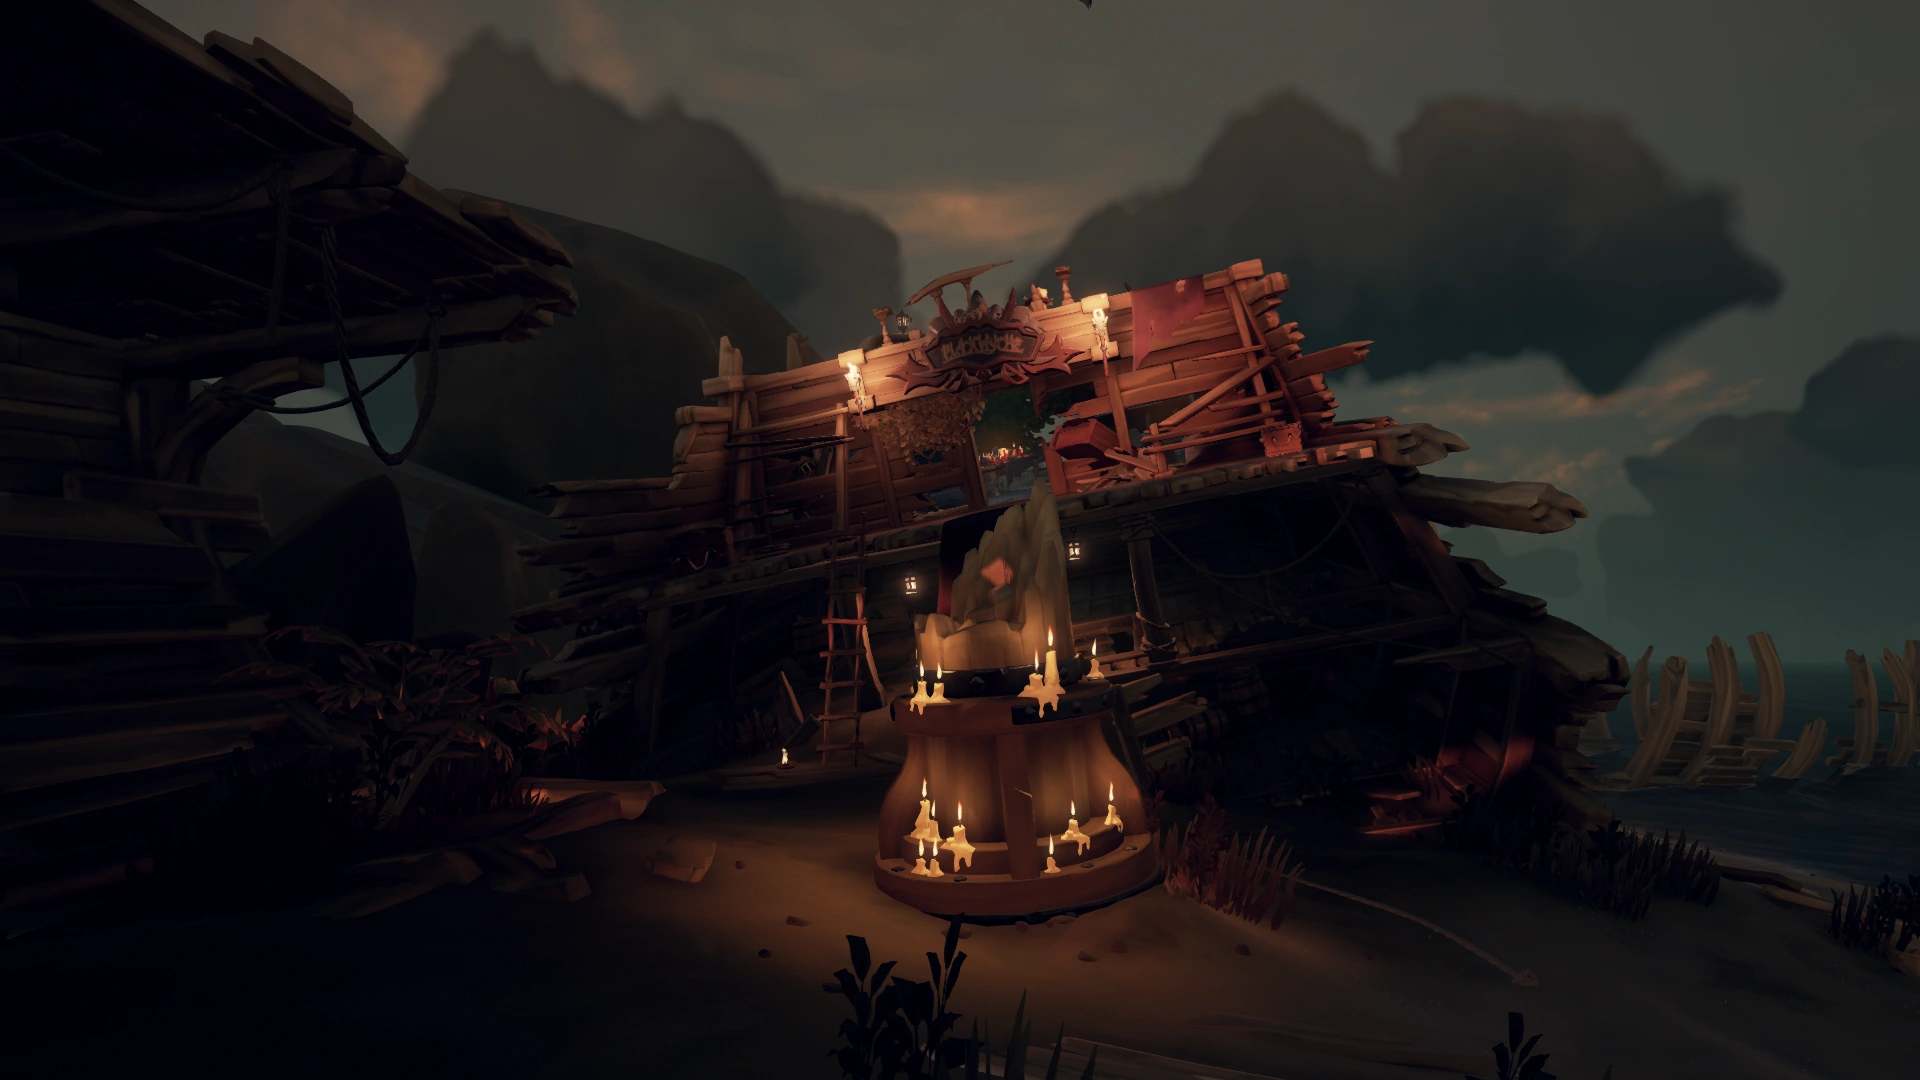
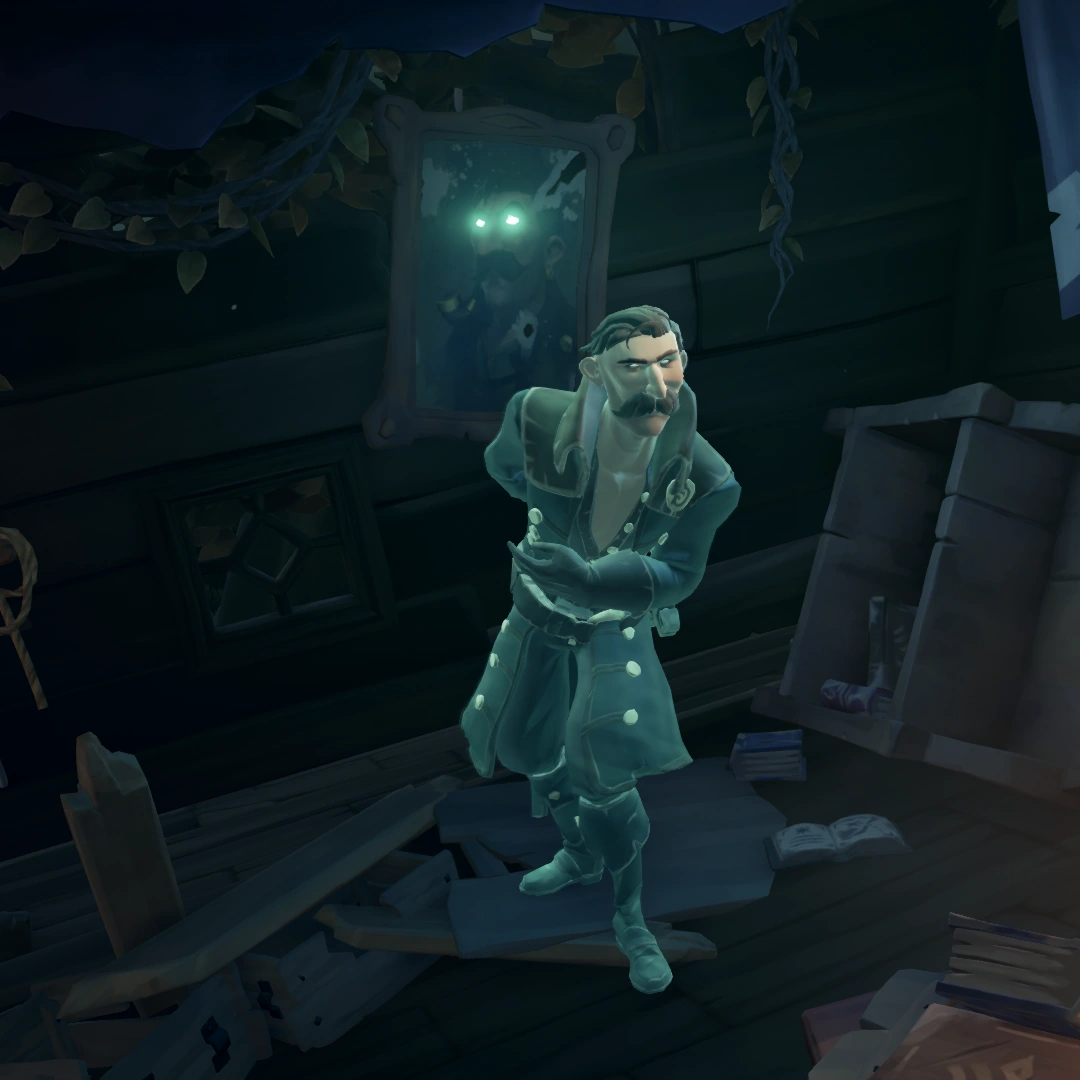
The Seabound Soul is a standalone Tall Tale released with the November 2019 The Seabound Soul (Content Update). The Tall Tale can be found and voted for on a Ritual Table found inside the Captain’s Quarters of the wreck of the Blackwyche on Shipwreck Bay. The Tale Giver is the ghost of Sir Arthur Pendragon, who had been sealed inside the portrait next to the table, but has been now released by a strange fellow. The details on the location of the Tale Book and the Commendations and any related unlockable Items are all presented in the Tall Tales Reputation menu.
The Seabound Soul story is followed by the Standalone Heart of Fire Tall Tale.
The Seabound Soul
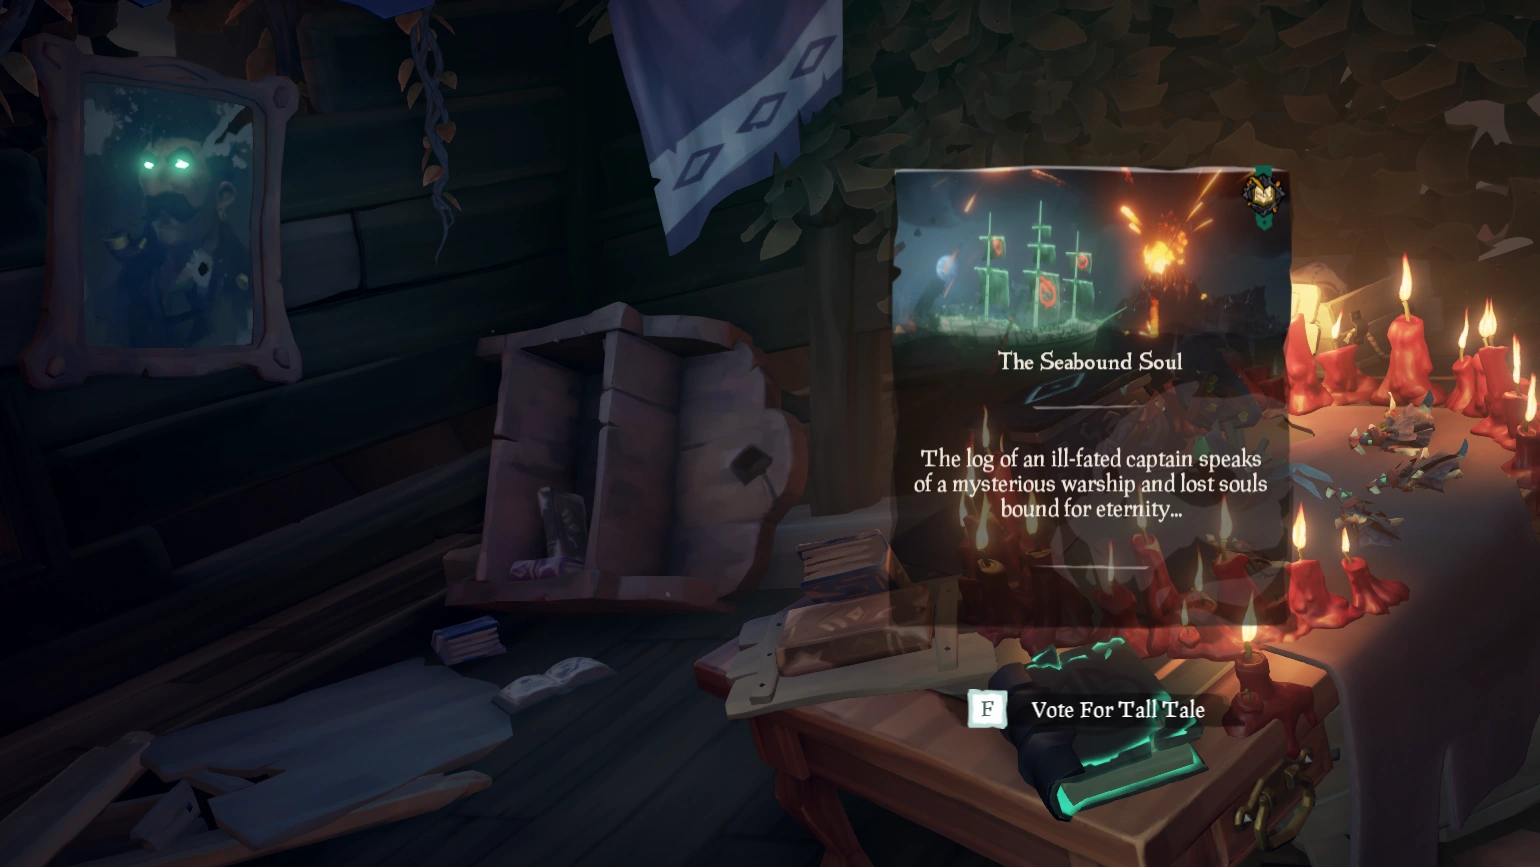
The Tale Book can be found and voted on at Shipwreck Bay.
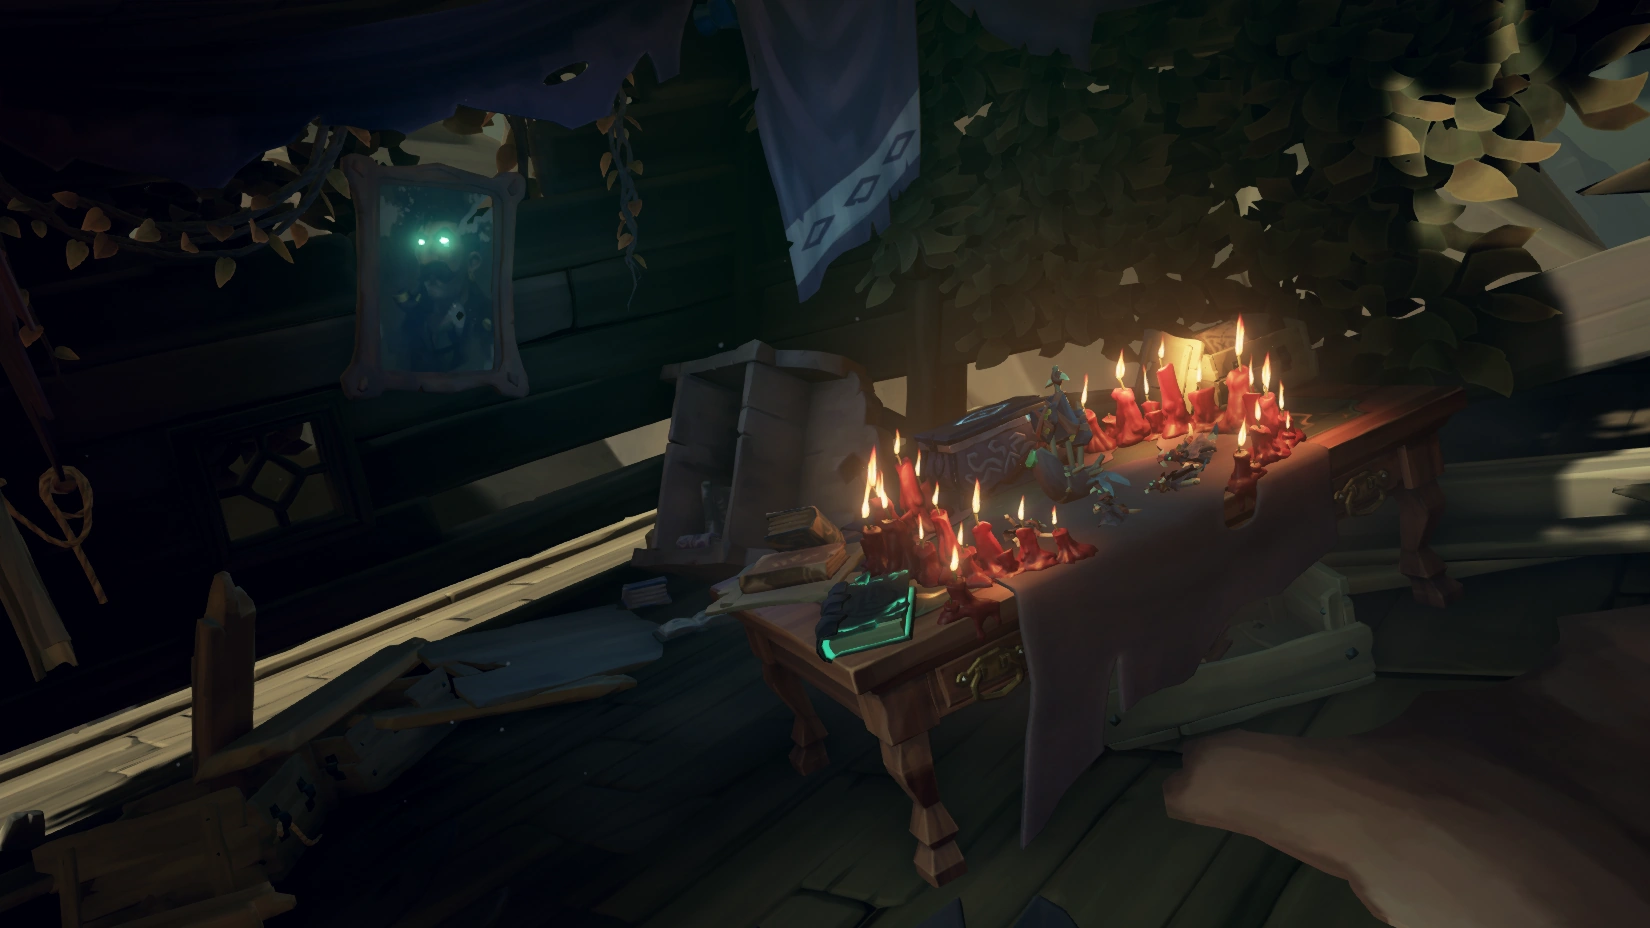
The Tale Book can be found at Shipwreck Bay, in the Captain's Quarters of the wreck of the Blackwyche. The Book is on a table with various Dark Relics on it with the Portrait of Sir Arthur Pendragon's eyes glowing.
Once the crew has voted on the Tale Book, Pendragon will be released from the Portrait.
SIR ARTHUR PENDRAGON
Hold just a moment! Let me look at you… Hah, yes, I recognise a fellow pirate when I see them.
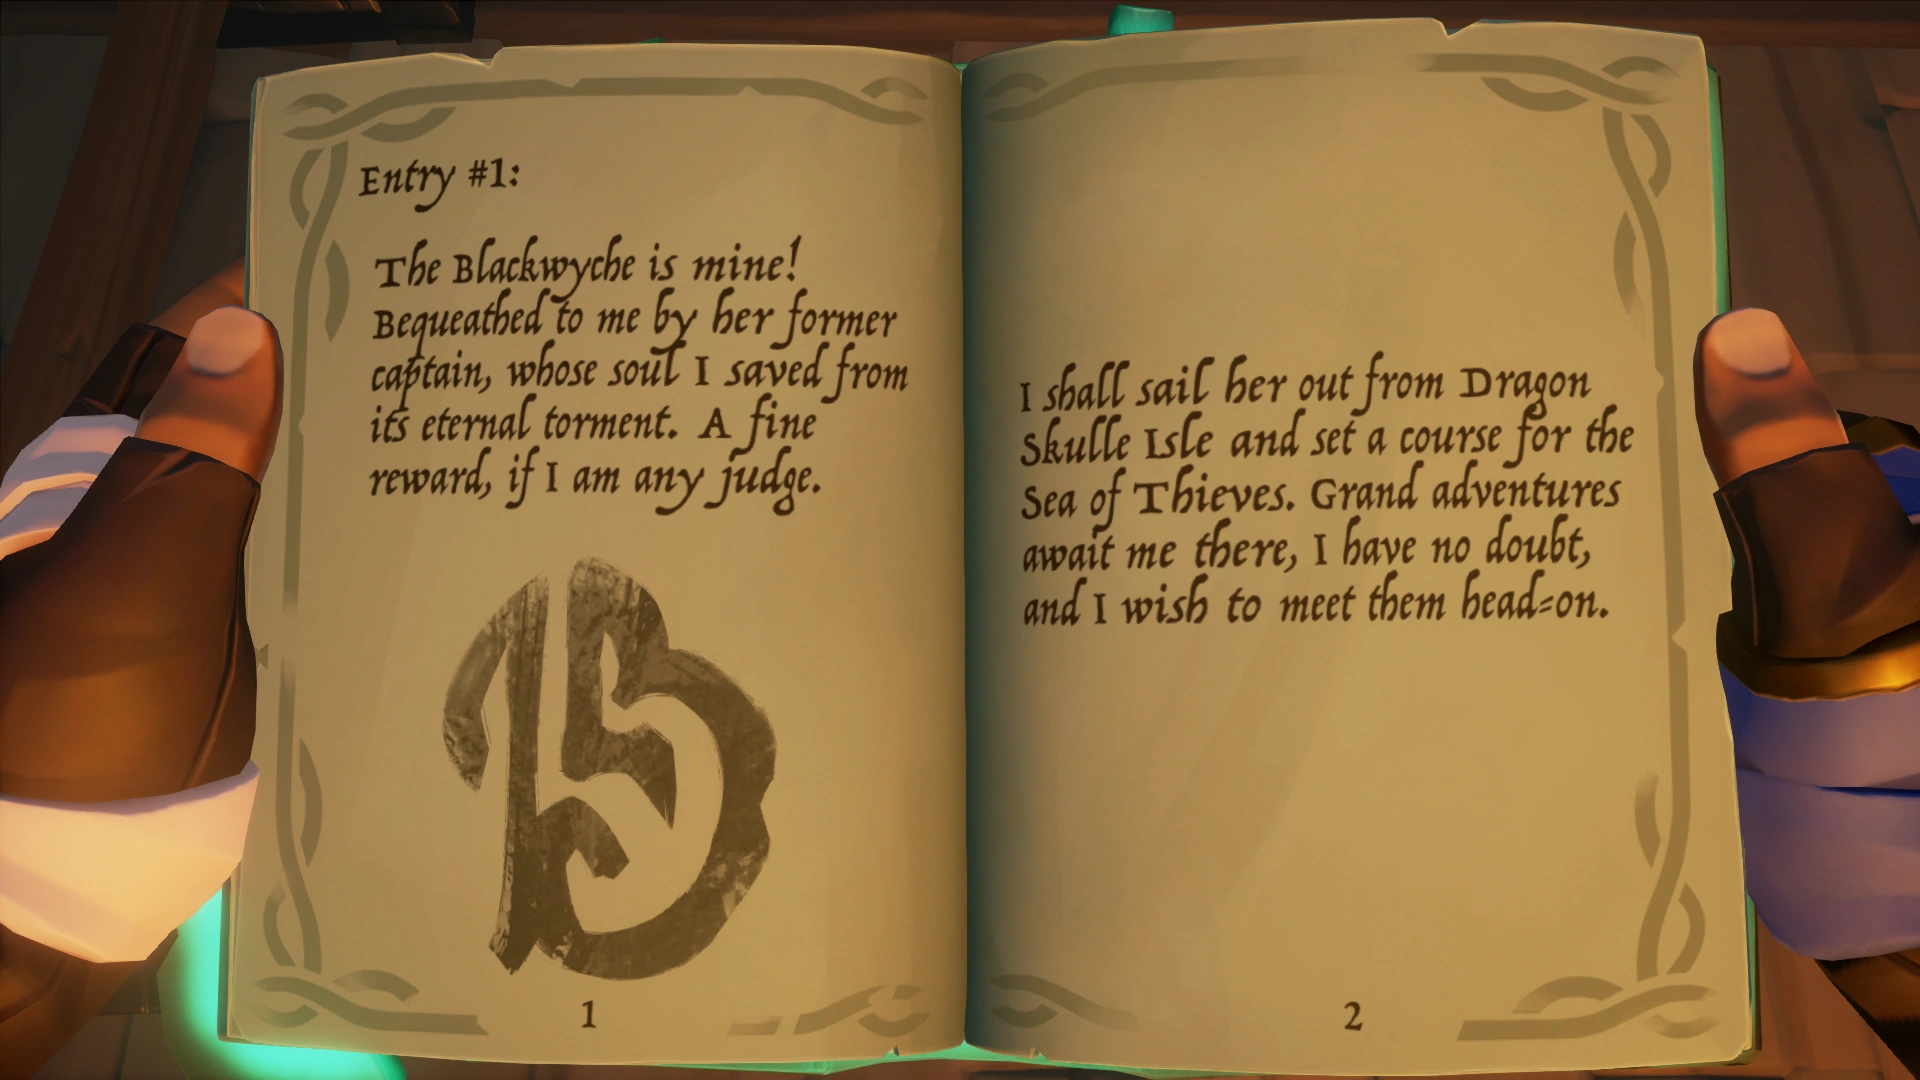
Allow me to introduce myself. Sir Arthur Pendragon at your service. Captain of the Blackwyche, though I’m afraid she and I have both seen better days.
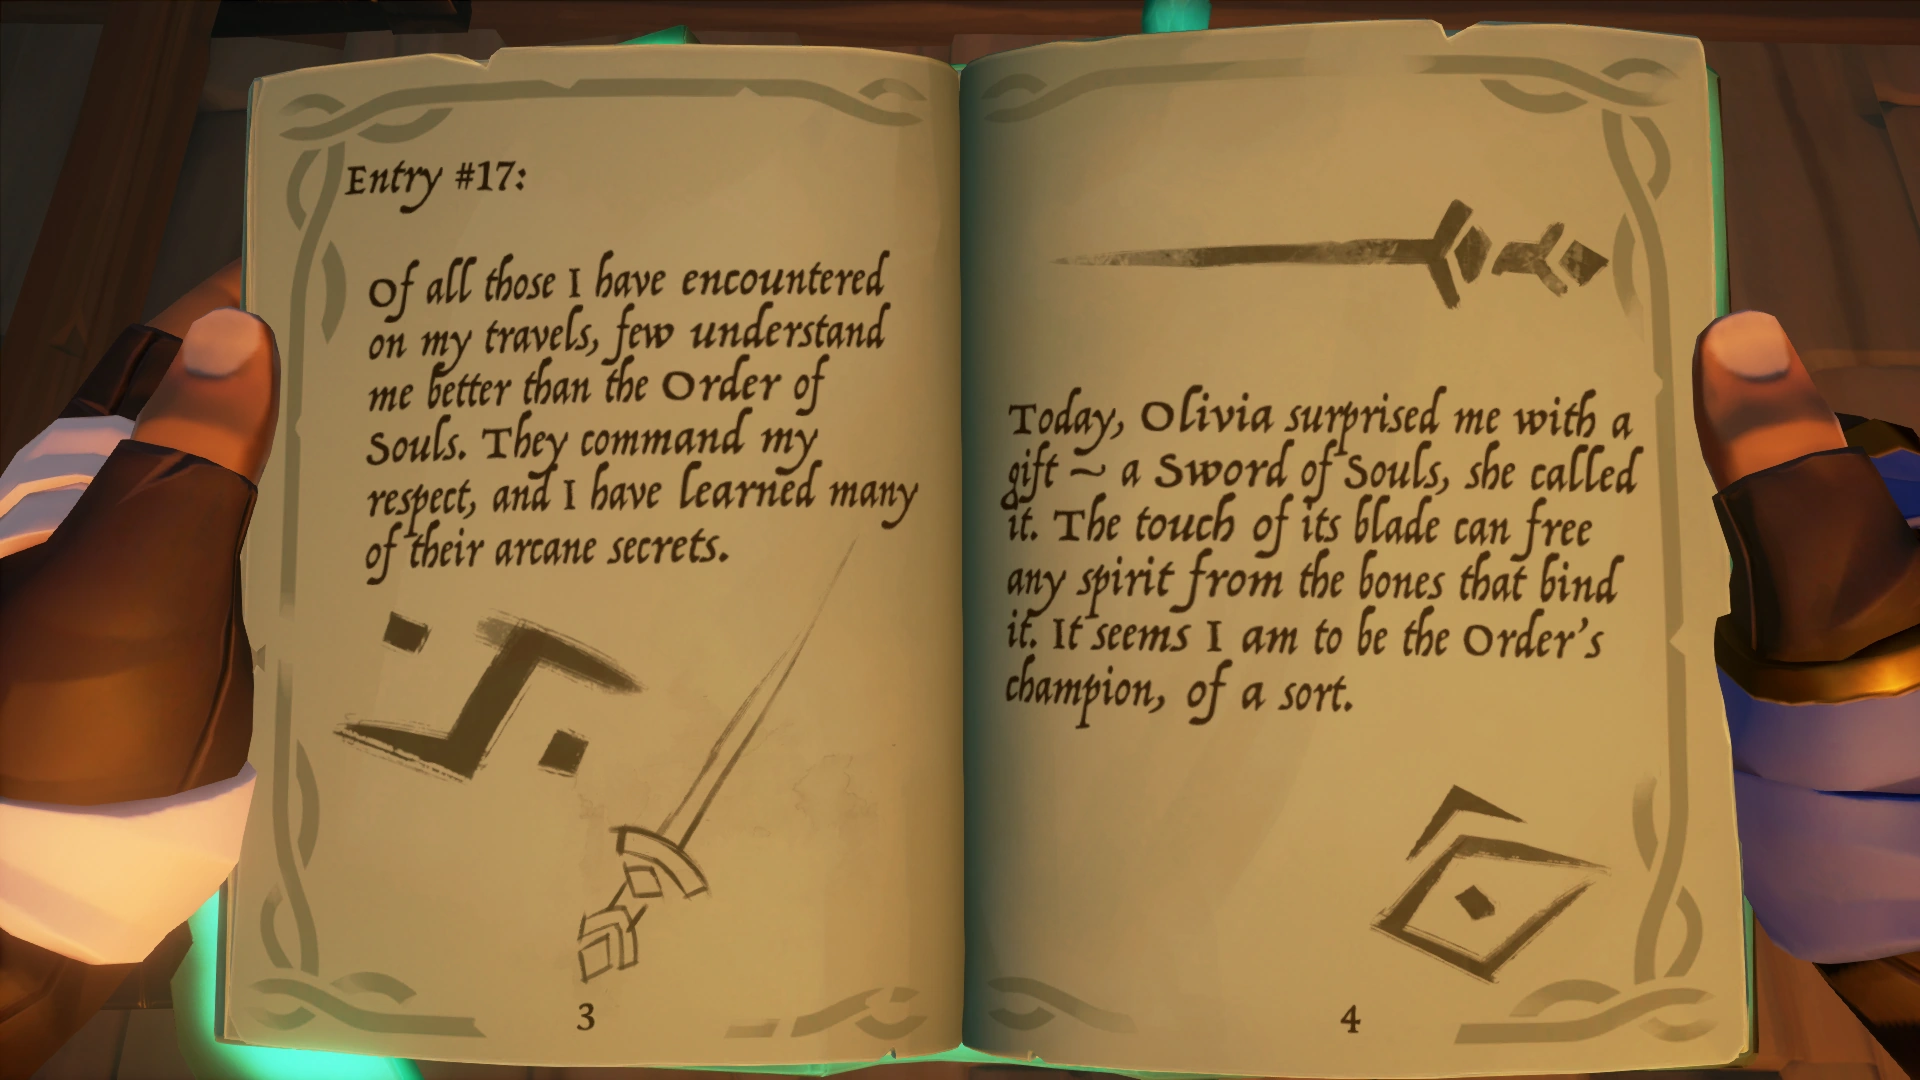
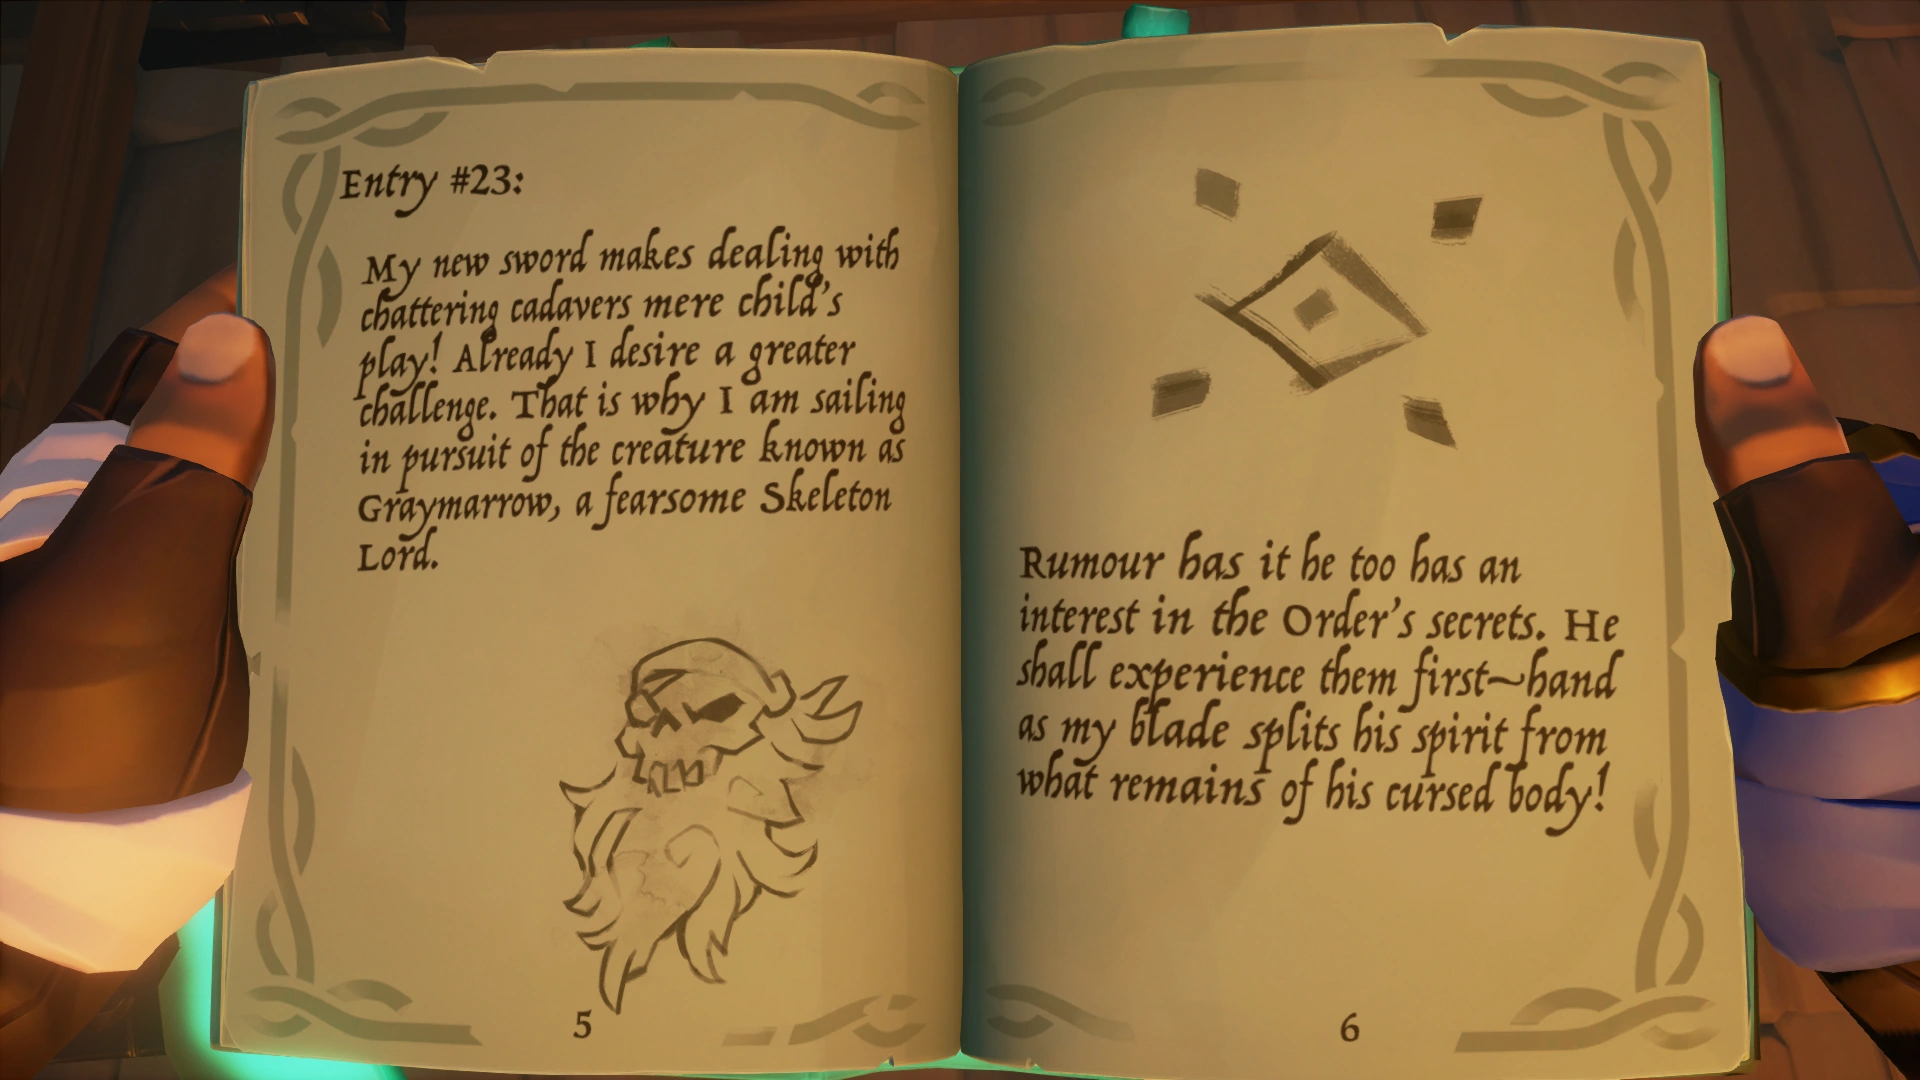
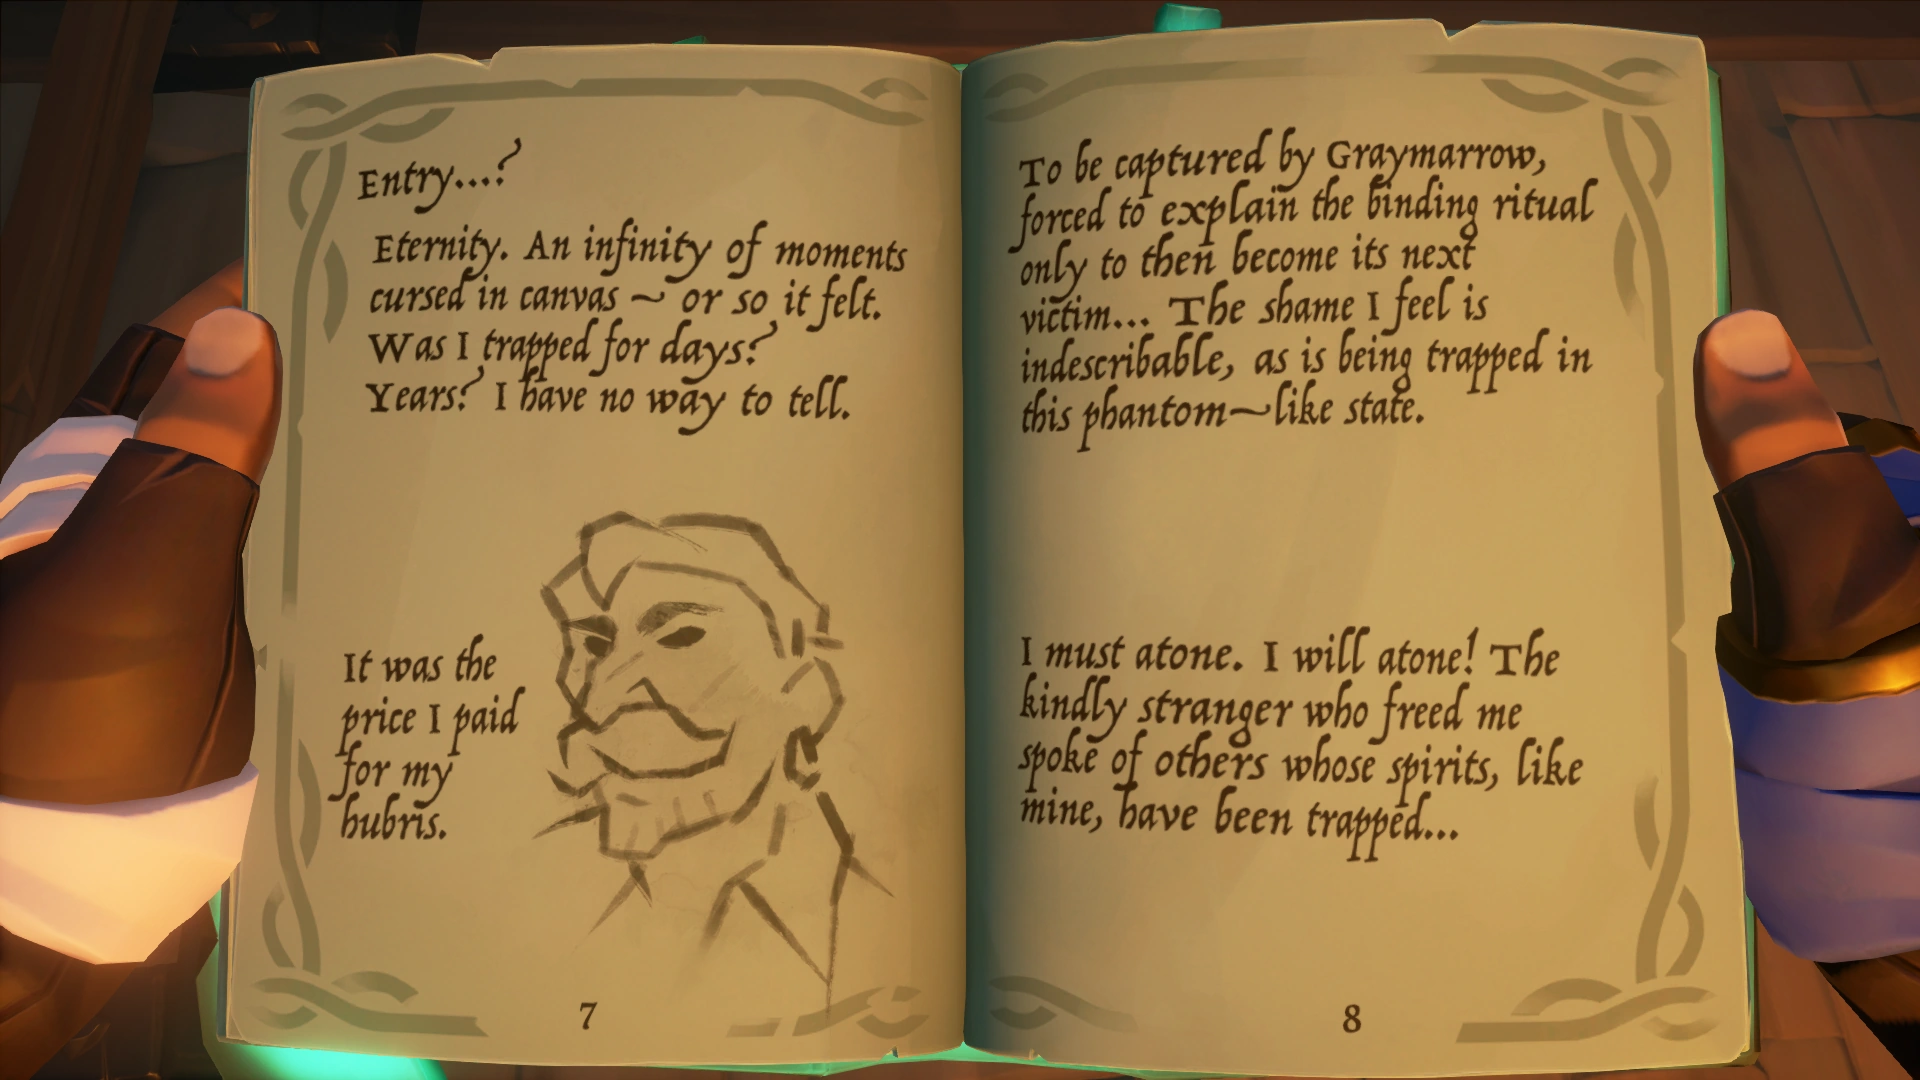
Once, I sailed The Sea of Thieves, laying trapped spirits to rest with my trusty blade - until the day I crossed paths with a cadaverous captain named Graymarrow and he bound my soul to this portrait.
I’d still be trapped in canvas if not for that strange fellow and his box of relics.
Never did catch the man’s name, but he knew just the magical mumbo-jumbo to set me loose.
Now that I’m a free spirit, so to speak, I plan to make up for lost time and help other trapped souls across the Sea of Thieves.
And thanks to your timely arrival, I finally have the means.
This lantern’s a gift from an old friend, but I can’t even touch it as I am now.
If you’ll join me on my quest then you can wield it in my stead. You do the searching, I’ll do the saving!
The chap with the box spoke of three captains, each cursed during battle with a ship named the Ashen Dragon.
I jotted it all down in my old journal so we’d best bring that along too.
Don’t worry about me, I know a few supernatural shortcuts. Just follow the lantern, retrieve the Captains’ skulls, and my Sword of Souls will do the rest.
Let’s go!-
-
-
-
Note: During the Tall Tale, 5 Journals will be hidden on select Islands and need to be found and read to finish The Ashen Journals Commendation. The first of these Journals can be found in the same room as the Tale Book, with the next locations hinted within the pages of the Journal. See The Ashen Journals section below for more information.
The Tale Book
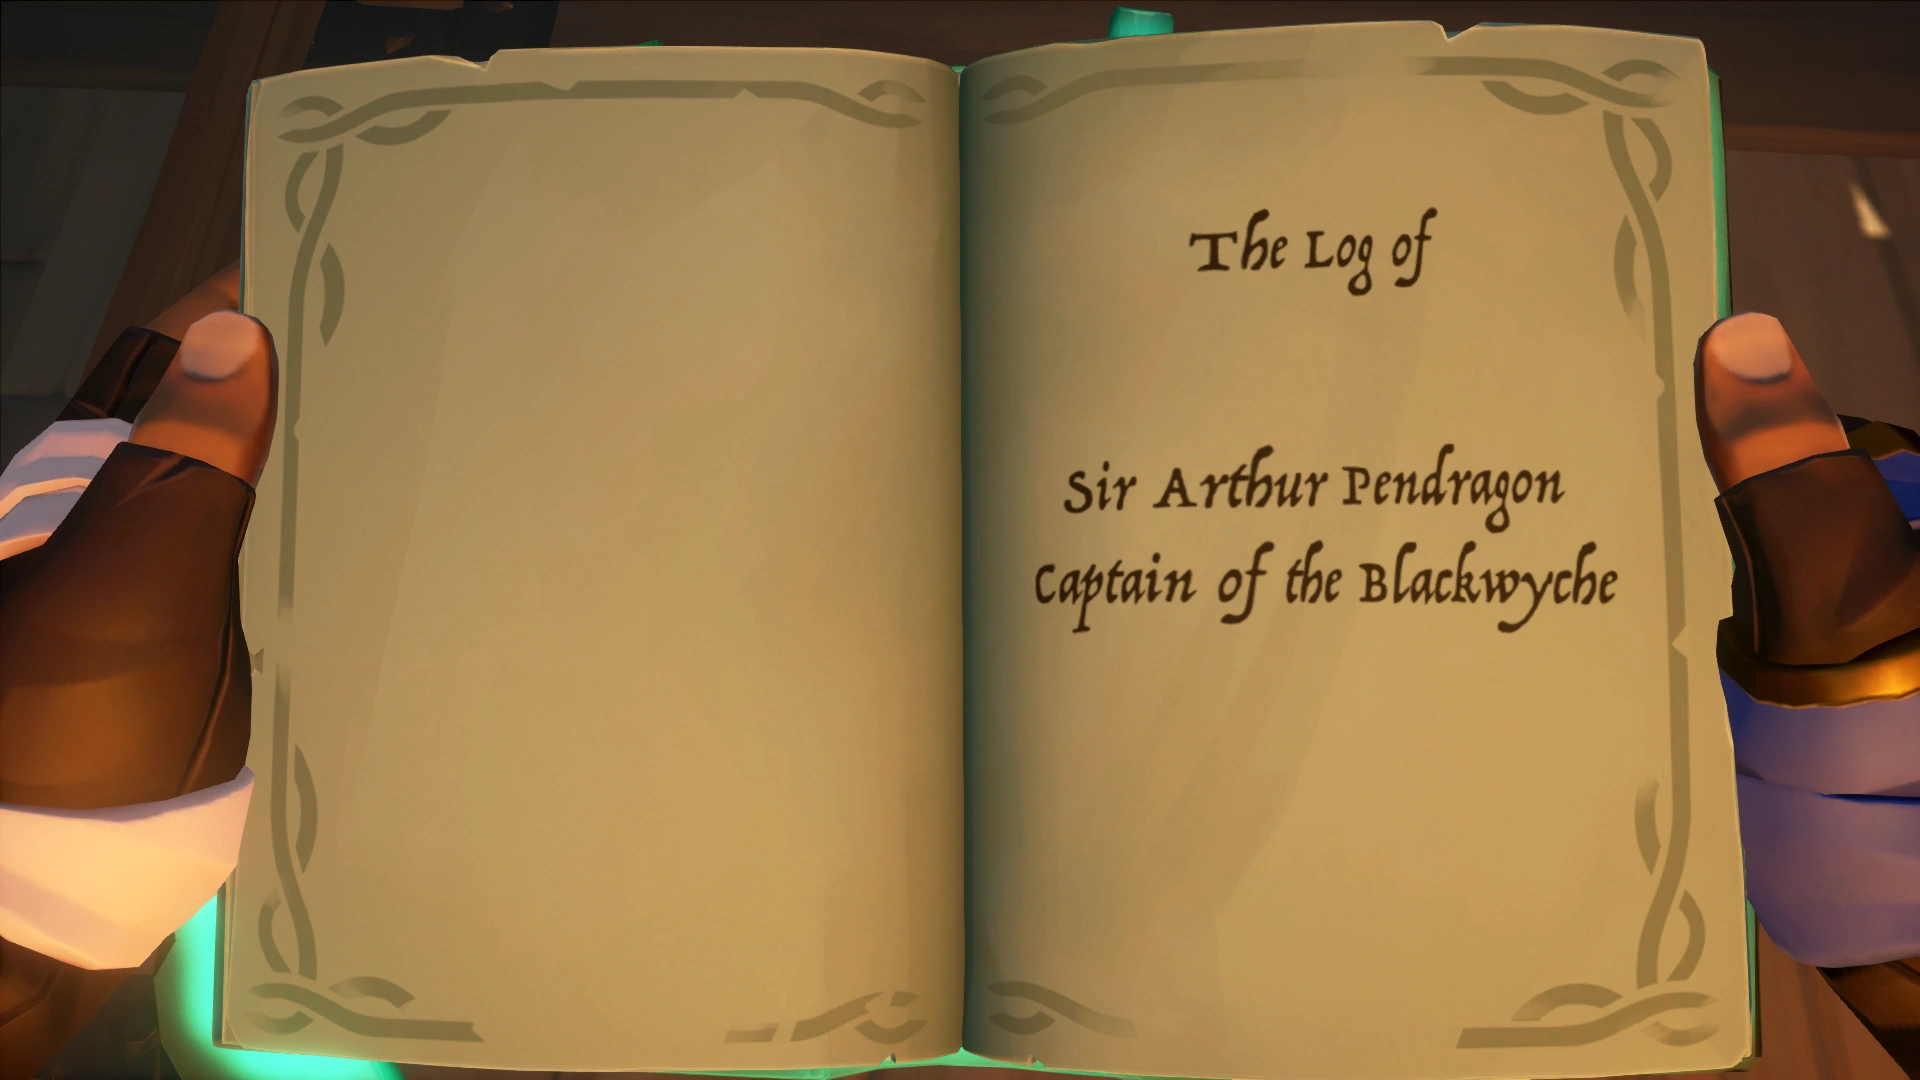
After the introduction, the Crew is given The Log of Sir Arthur Pendragon, Captain of the Blackwyche Tale Book, which they can find and take out in the Map Radial menu. Any Tale Book can be viewed with the Primary Use button (Left Mouse Button/Right Trigger). Once taking a closer look at the Tale Book, it's pages can be turned with the Q and E keys on a Keyboard and the Left and Right buttons on a Controller.
Note that players will have to stand next to Pendragon and listen to the whole speech to be able to progress further in the Tall Tale. If you rush off early and can't figure out what to do, head back to Pendragon.
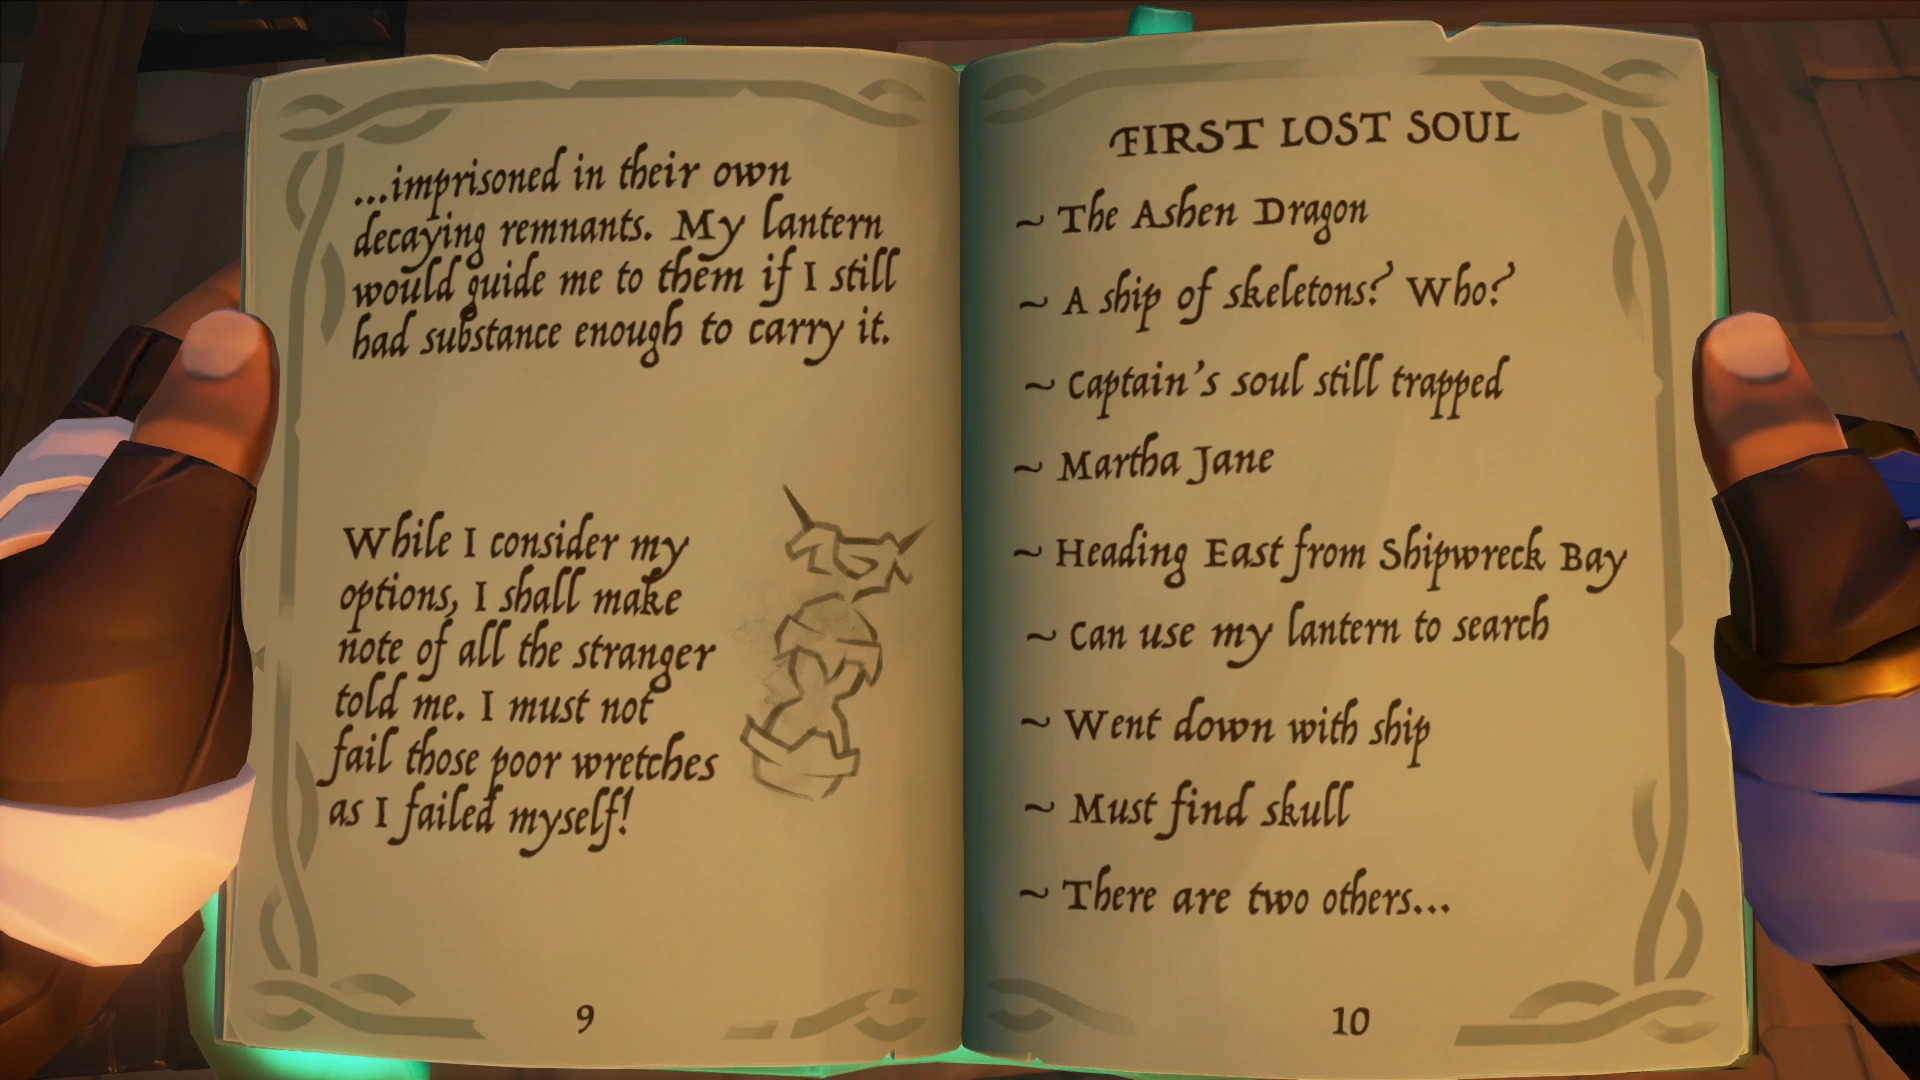
The first pages of the Tale Book will always be the same:
The Enchanted Lantern
In addition to the Tale Book, the Crew will also acquire Pendragon's Enchanted Lantern, which acts identical to the one received as a part of The Fate of the Morningstar Tall Tale.
This Lantern can also be found and equipped from the Map Radial menu, just below the Tale Book. The Lantern interactions are the same as any other Lantern's interactions, however Raising the Lantern with Secondary Use will surround the Player with a ghostly mist that will show past events relevant to the Tall Tale. This Lantern will show the players the way or help them solve certain puzzles related to the Tall Tale.
A Watery Grave
The Tale Book details Sir Arthur Pendragon's adventures to find and free trapped souls and how his soul became trapped in his Portrait in the Blackwyche instead. The final page details the Kindly Stranger's instructions on how to find the location of the first of three lost souls. The first task of the Crew is to make use of the Tale Book and the Enchanted Lantern to track down the first lost soul of Captain Martha Jane, retrieve her skull and free her soul.
After freeing Captain Martha Jane, the Crew will acquire The Watery Grave Commendation.
Hints, Walkthrough & Images
Below are a handful of Clues and Hints to complete this section of the Tall Tale. If these are not clear enough, then a full Walkthrough with images is provided below.
Hints
Everything you need to know is on the 10th page of the Tale Book. You should be able to see what you need to follow on the horizon.
So far, the ghostly wreck of Captain Jane's Ship has been found nearby Shiver Retreat, Crooked Masts, Shark Tooth Key and Liar's Backbone.
If you see the wrecked ship of Martha Jane dive down and use the tools at your disposal to find her final resting place. Alternatively, look for a white glint.
See if you can find Pendragon on the shores of the nearby Island, he will tell you what to do next.
CLICK FOR WALKTHROUGH AND GALLERY
|
|---|
Walkthrough
The first part of this Tall Tale is quite straightforward. Everything you need to know is presented on the 10th page of the Tale Book. The Tale Book states that you need to track a ship of skeletons called The Ashen Dragon, the crew of which managed to trap the soul of Captain Martha Jane, who headed East from Shipwreck Bay. Supposedly she went down with her ship. You will need to find her ship and make use of the Enchanted Lantern to find the Skull of Captain Martha Jane.
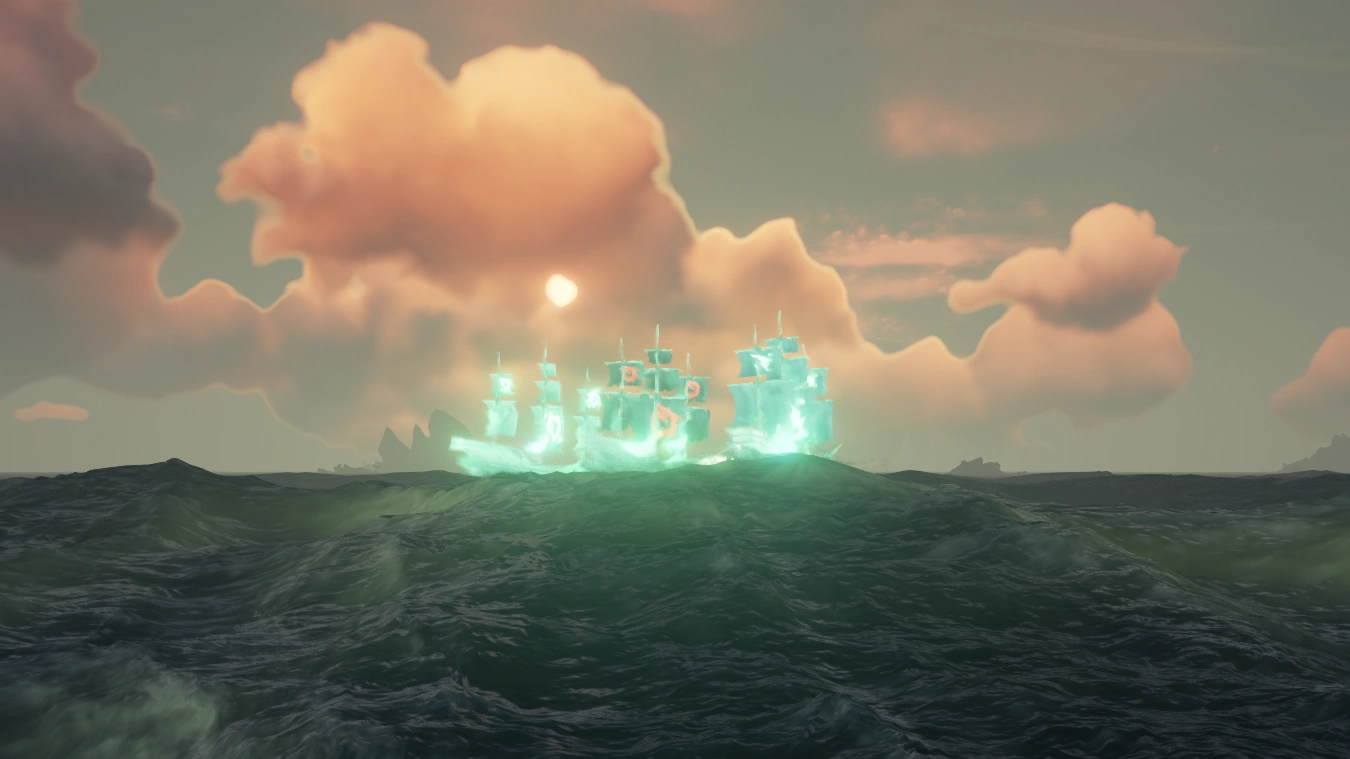
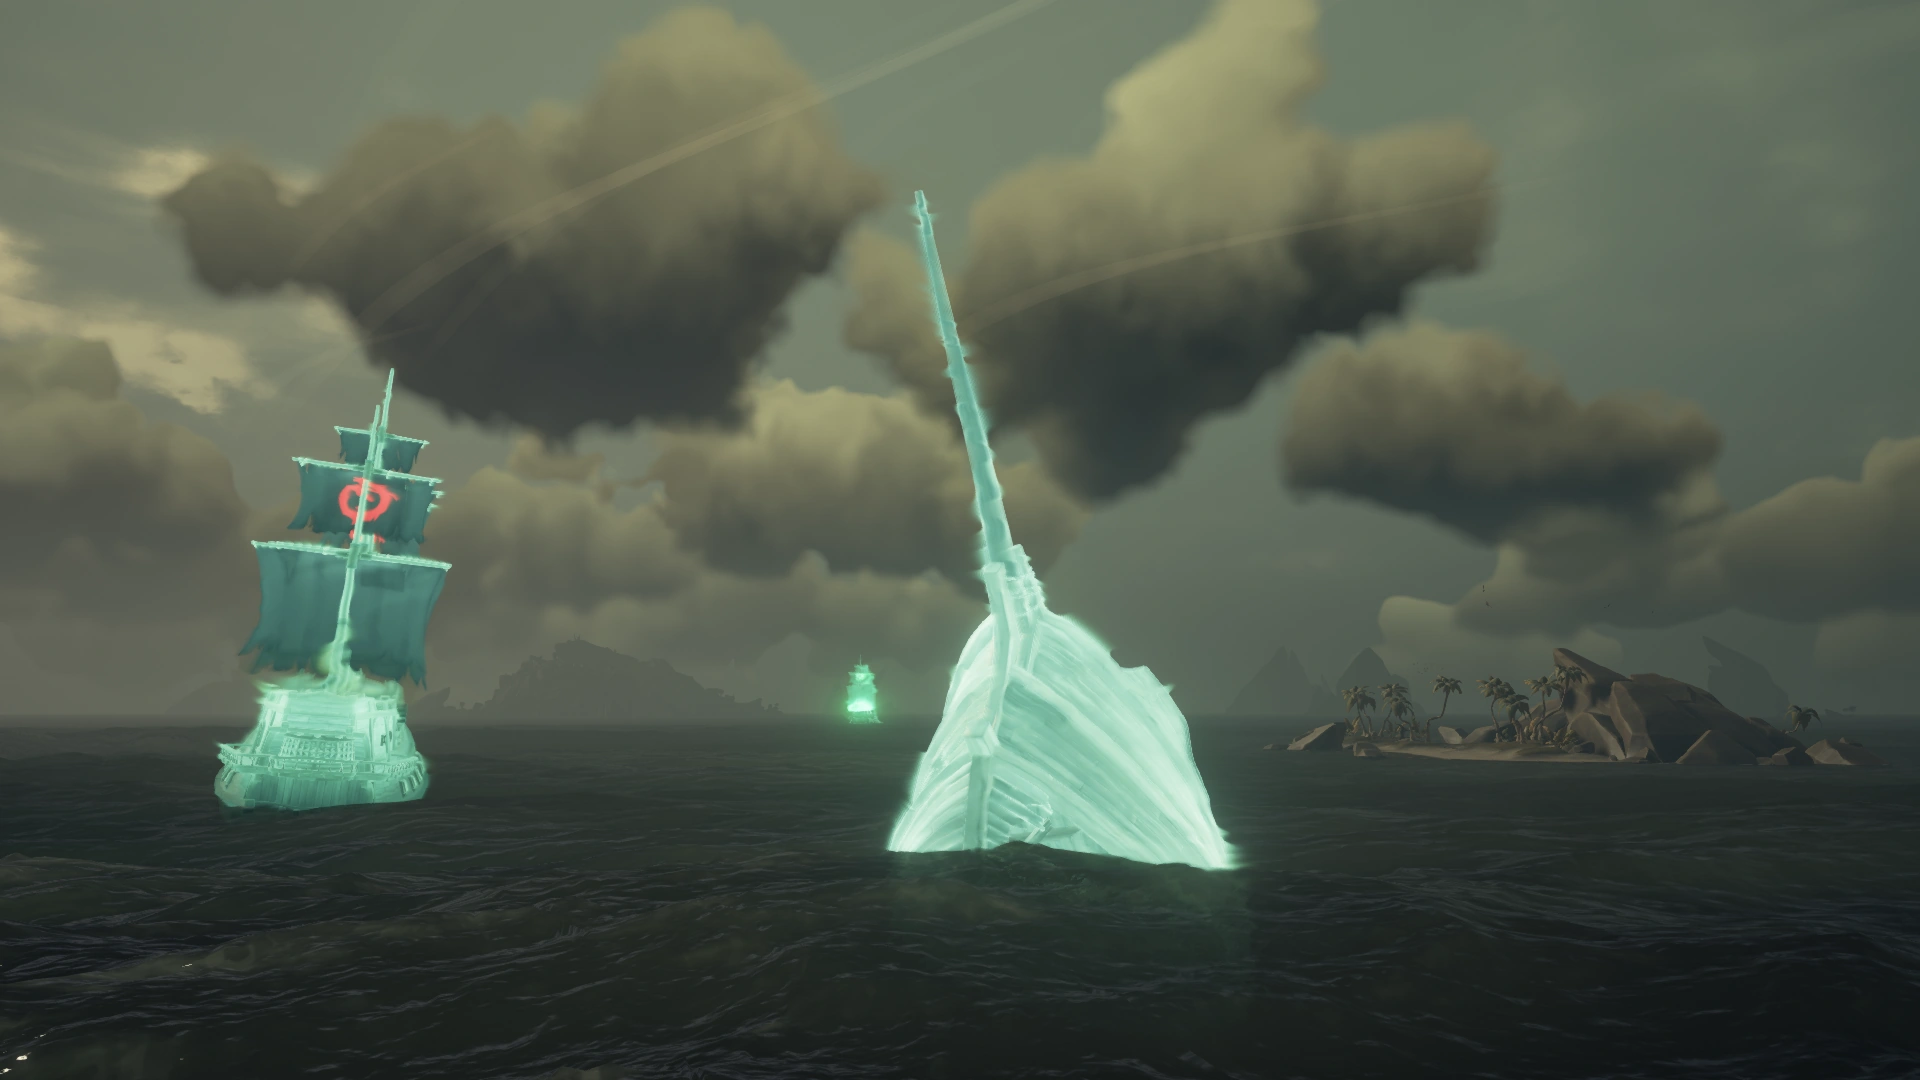
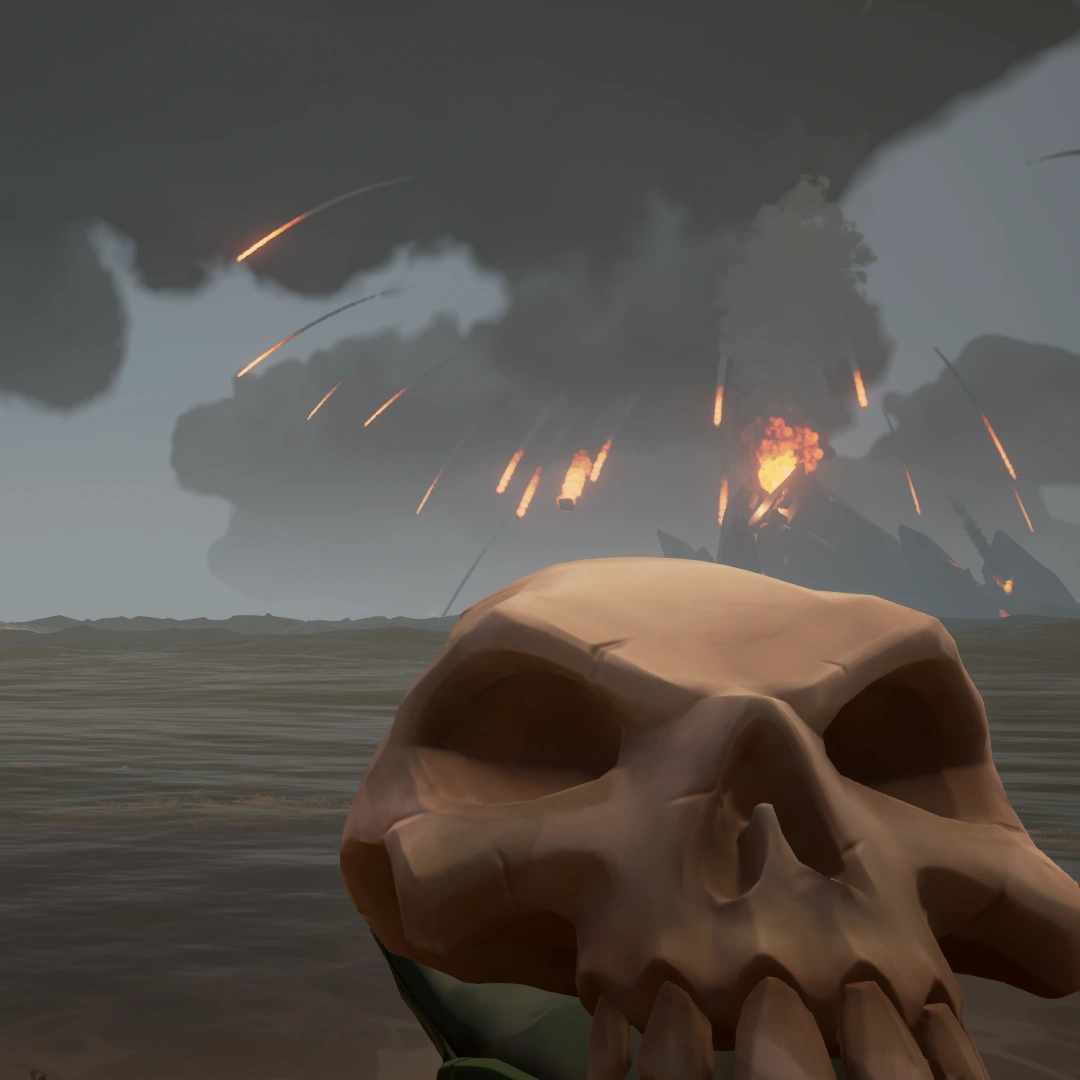
Simply head out East from Shipwreck Bay with your Ship and you should see three Ghostly Galleons battling on the open seas. These are The Ashen Dragon and the two Galleons of Captain Martha Jane and Captain Randal Stone. Your first task is to find what happened to the ship of Captain Martha Jane. Follow these Ghostly Ships. Once you get close enough, the ships will vanish and re-appear somewhere on the horizon. Do this 2-4 times and you should finally find a scene with one sinking ship aside The Ashen Dragon by an Island in The Wilds and the other Galleon sailing away in the distance. That is the location of Martha Jane's Ship.
So far, the ghostly wreck of Captain Jane's Ship has been found nearby Shiver Retreat, Crooked Masts and Liar's Backbone.
Note 1: The second and third Ashen Journals can be found on Shiver Retreat and Liar's Backbone respectively. These are the possible locations of Martha Jane's Skull. See The Ashen Journals section below for more information.
Note 2: An Ashen Artefacts can be found on Tri-Rock Isle nearby. See the Ashen Artefacts section below for more information.
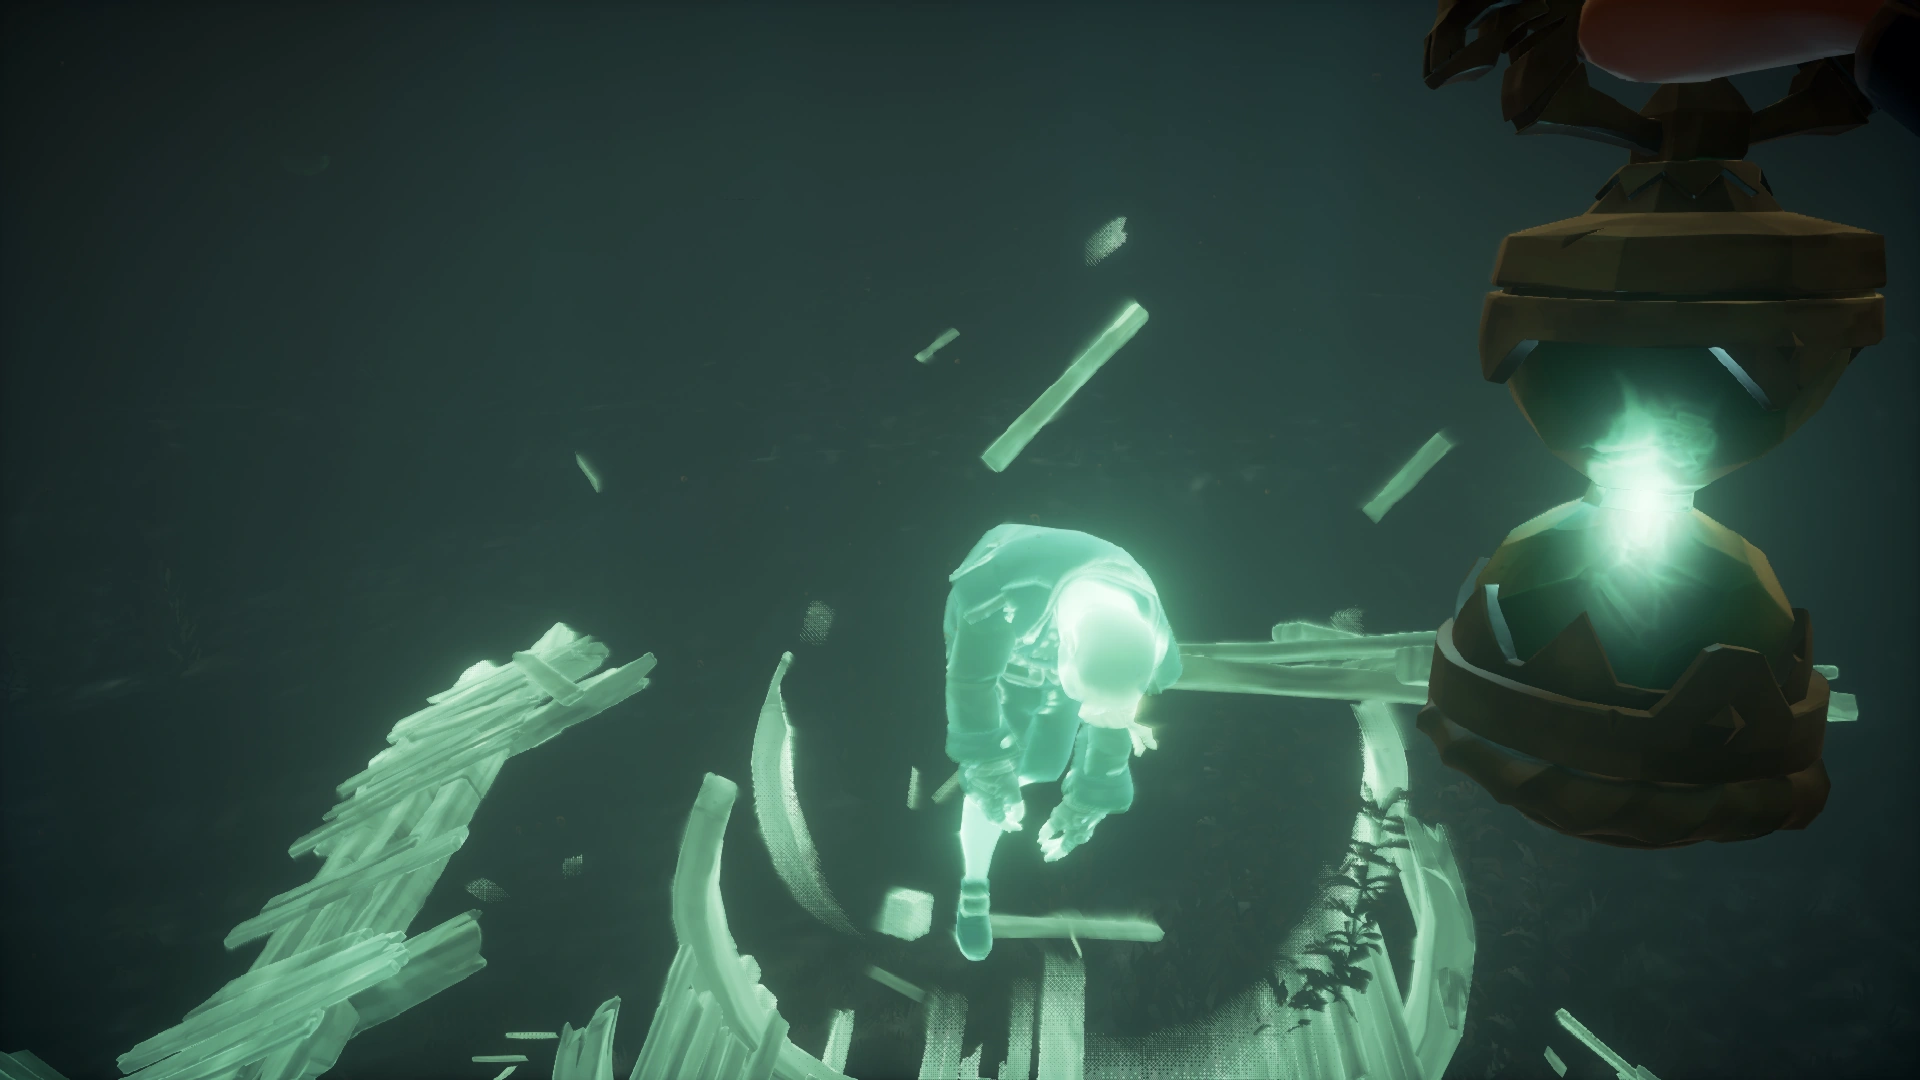
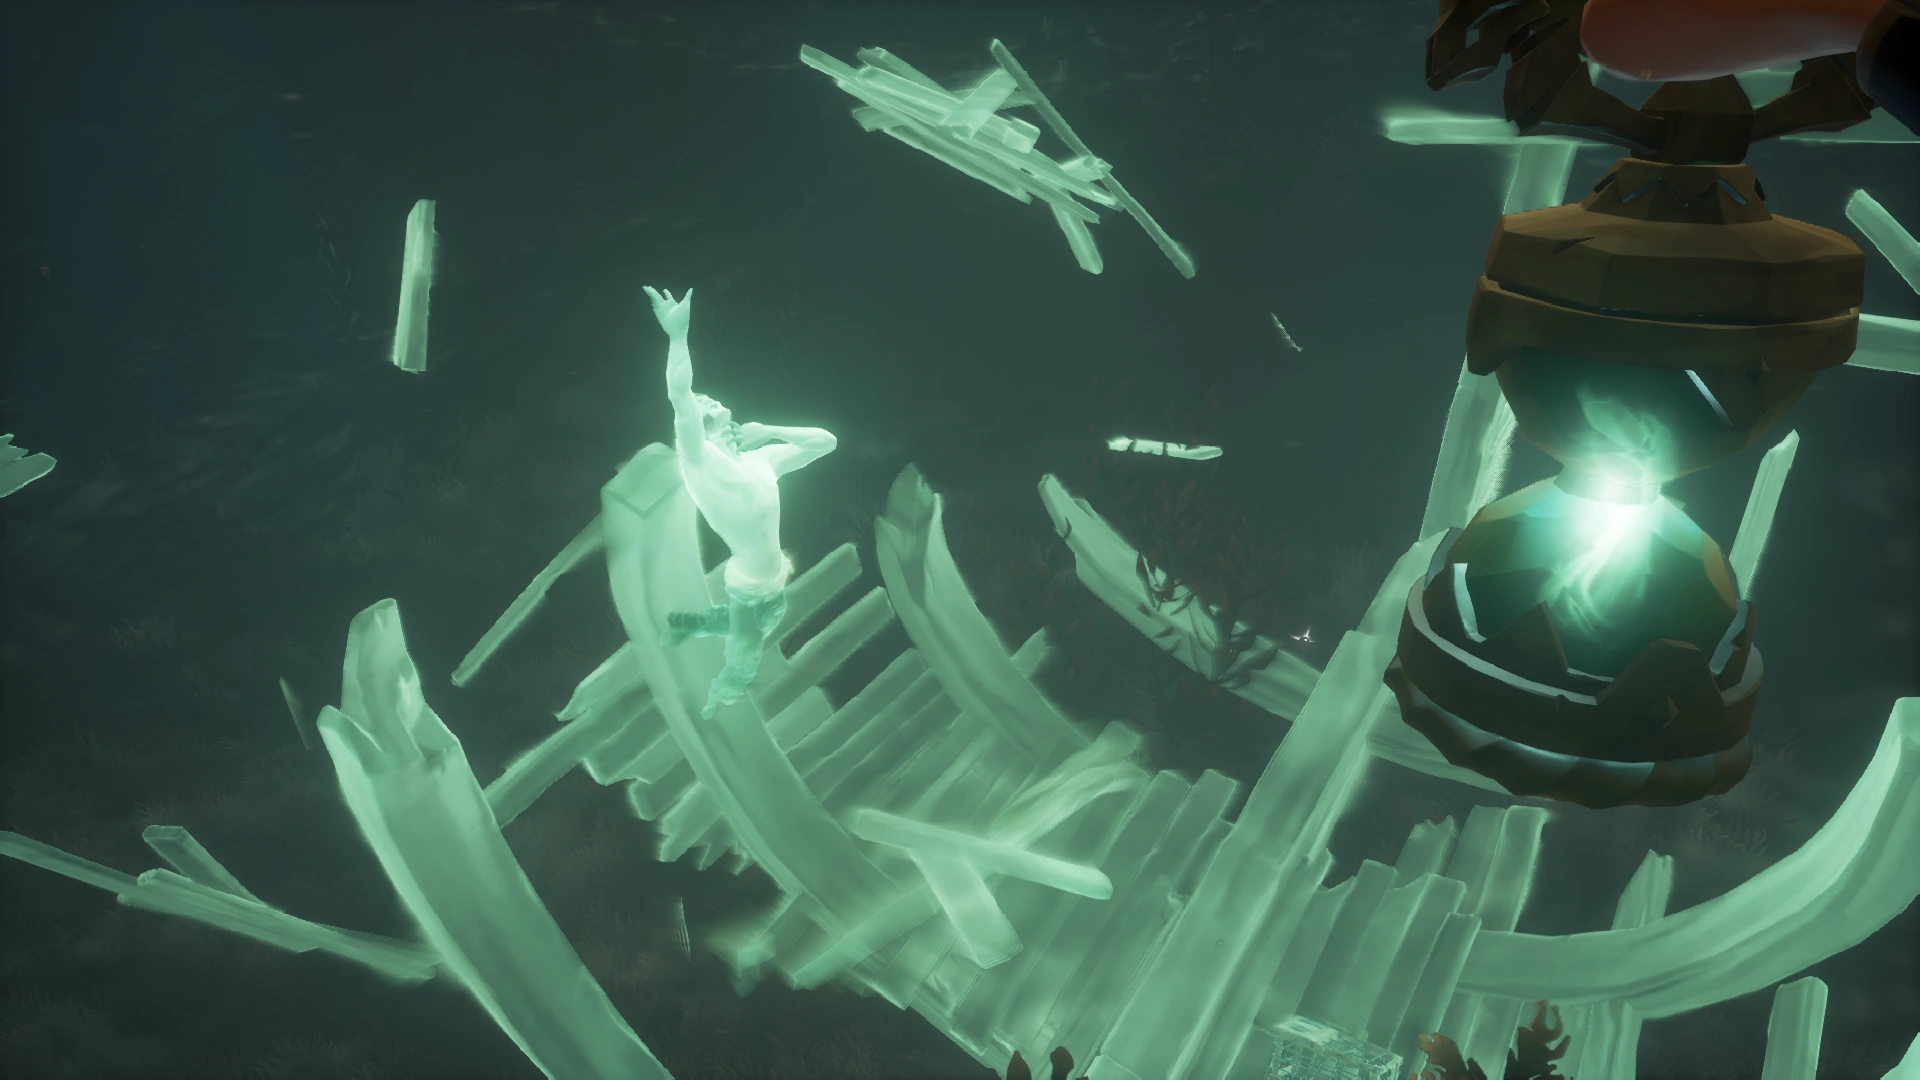
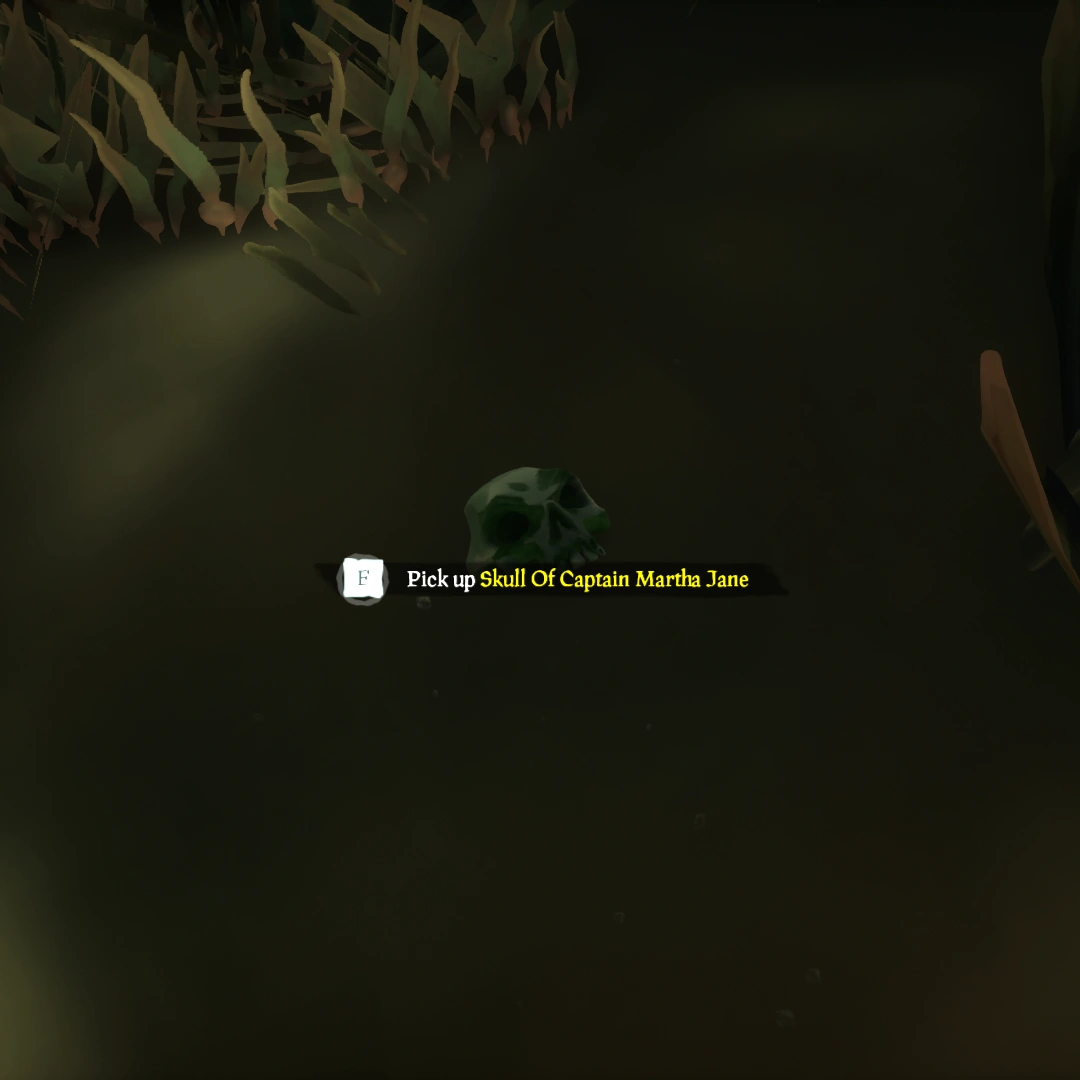
Dive down to the Shipwreck, take out and Raise your Enchanted Lantern to see the fate of the Ship's Crew. At the very end of the wreck you will see Martha Jane's last moment, right above where her Skull rests. The Skull can also be seen without the Lantern from afar, as it emits a white glint.
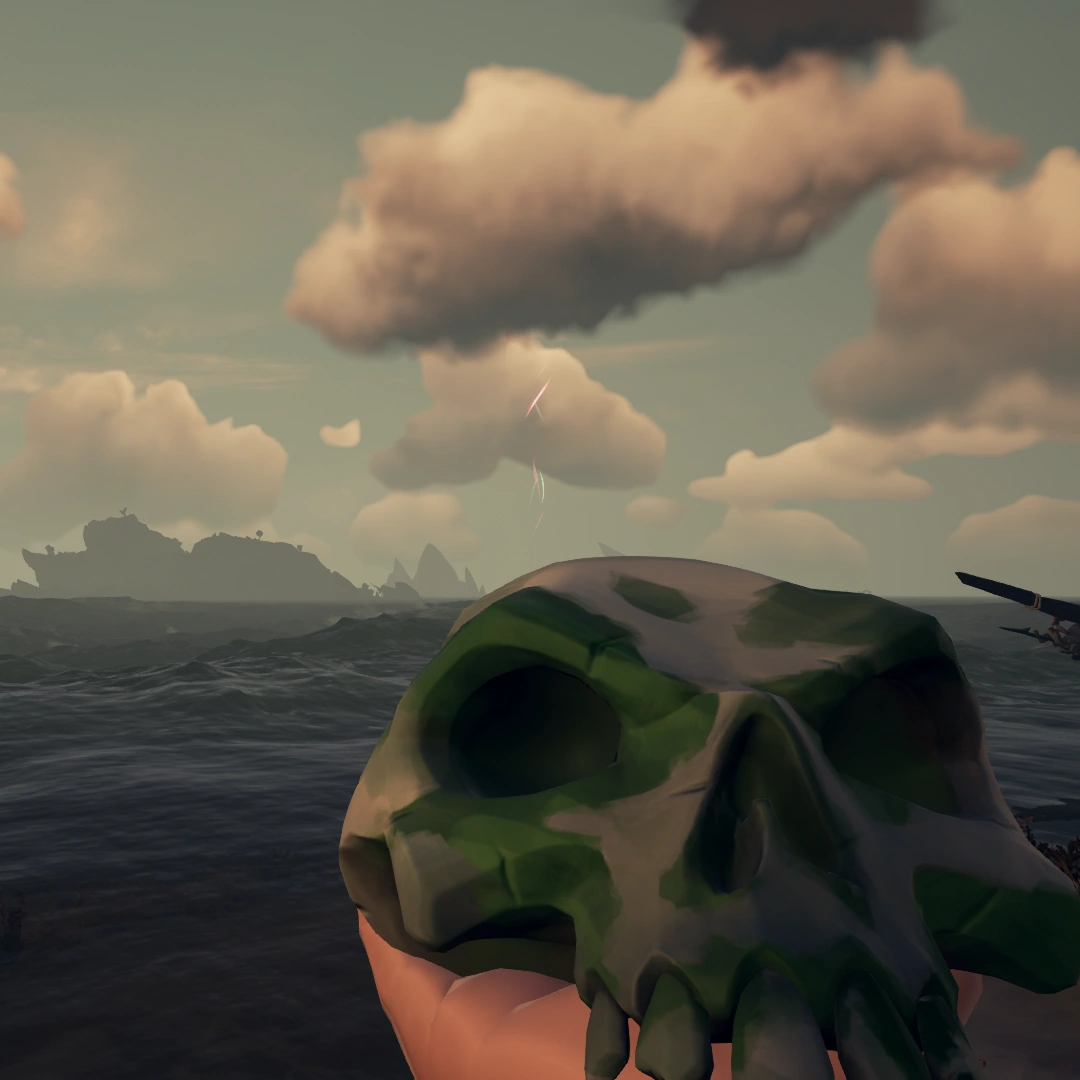
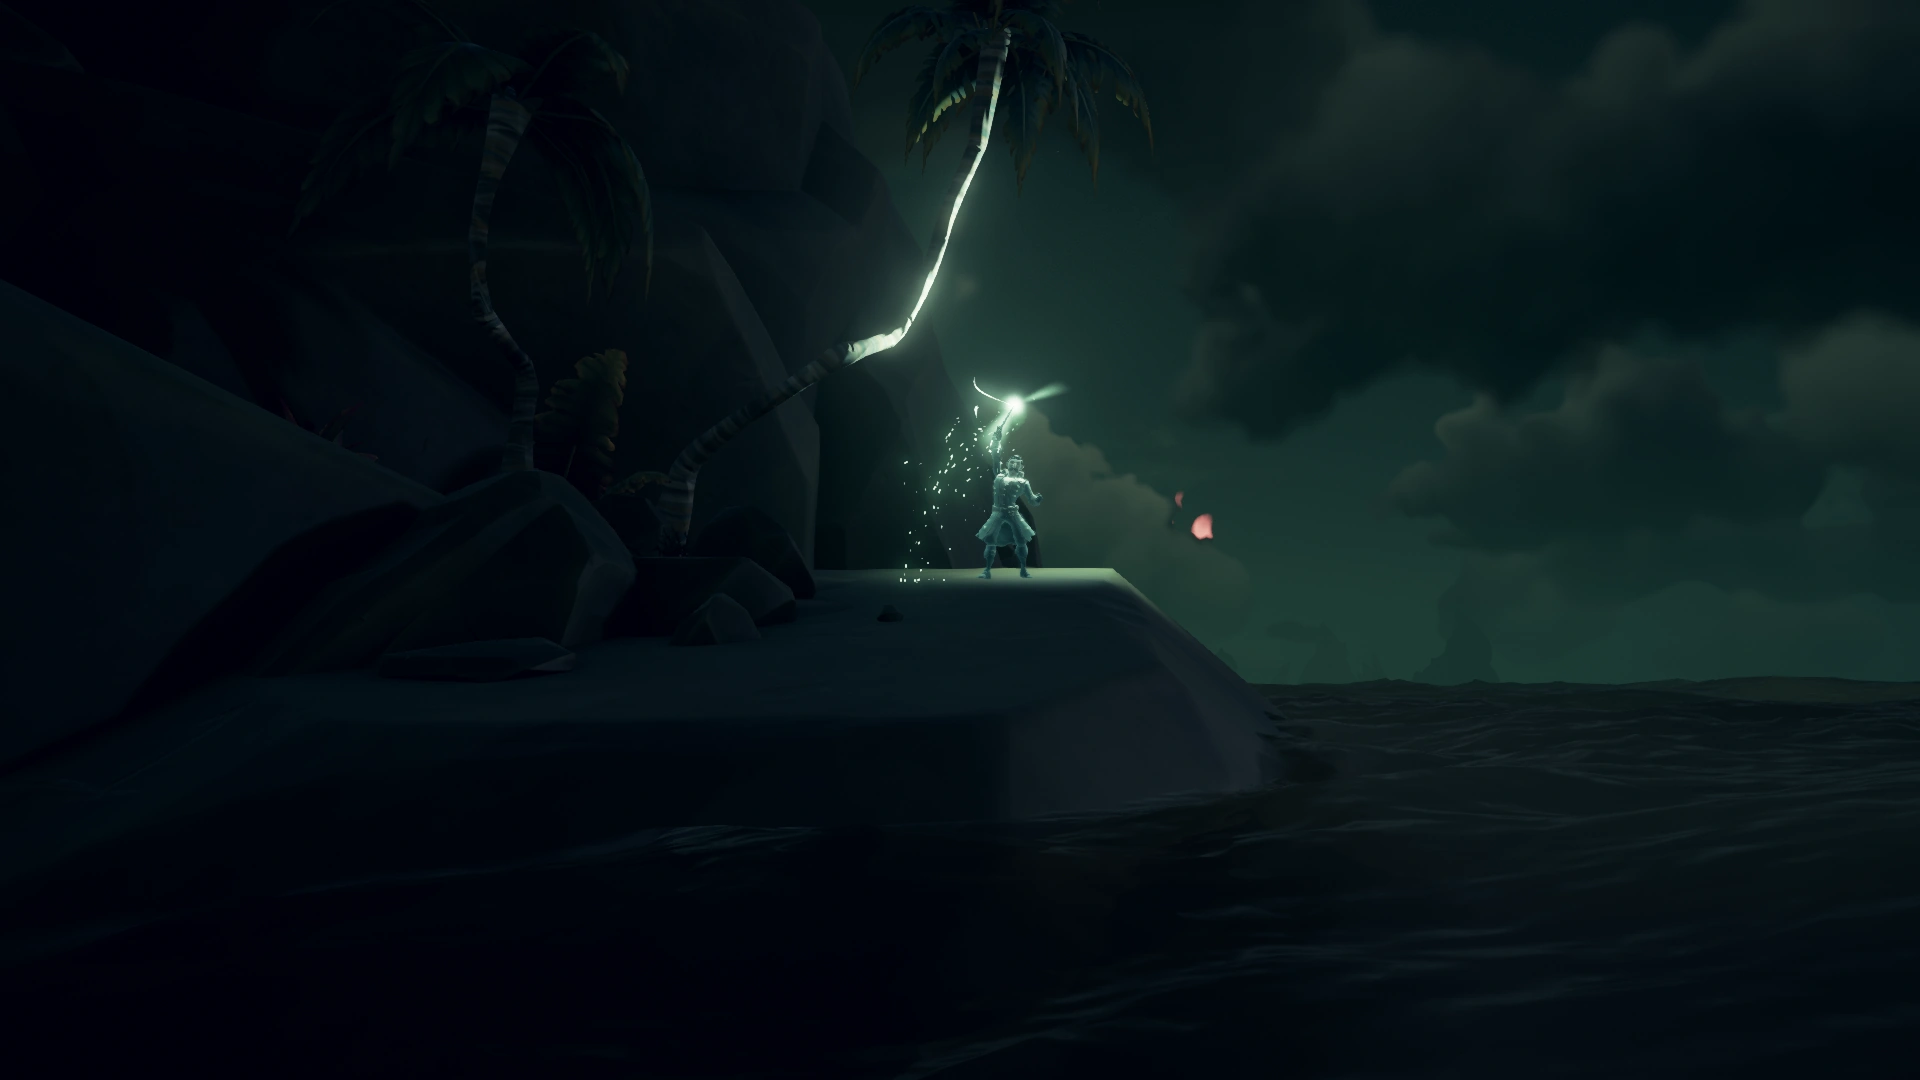
Pick up the sunken Skull of Captain Martha Jane and swim up to the surface. At this point, you should both hear and see Pendragon on the shores of the nearby Island, beckoning you to bring him the remains of Martha Jane:
Pendragon
Line 1
We meet again! Now it’s time to play my part. Bring me the skull;
-
-
-
-
Line 2
Ah, the captain’s remains! Bring them to me;
-
-
-
-
Line 3
That must be Martha Jane. Let me see what I can do.
-
-
-
-
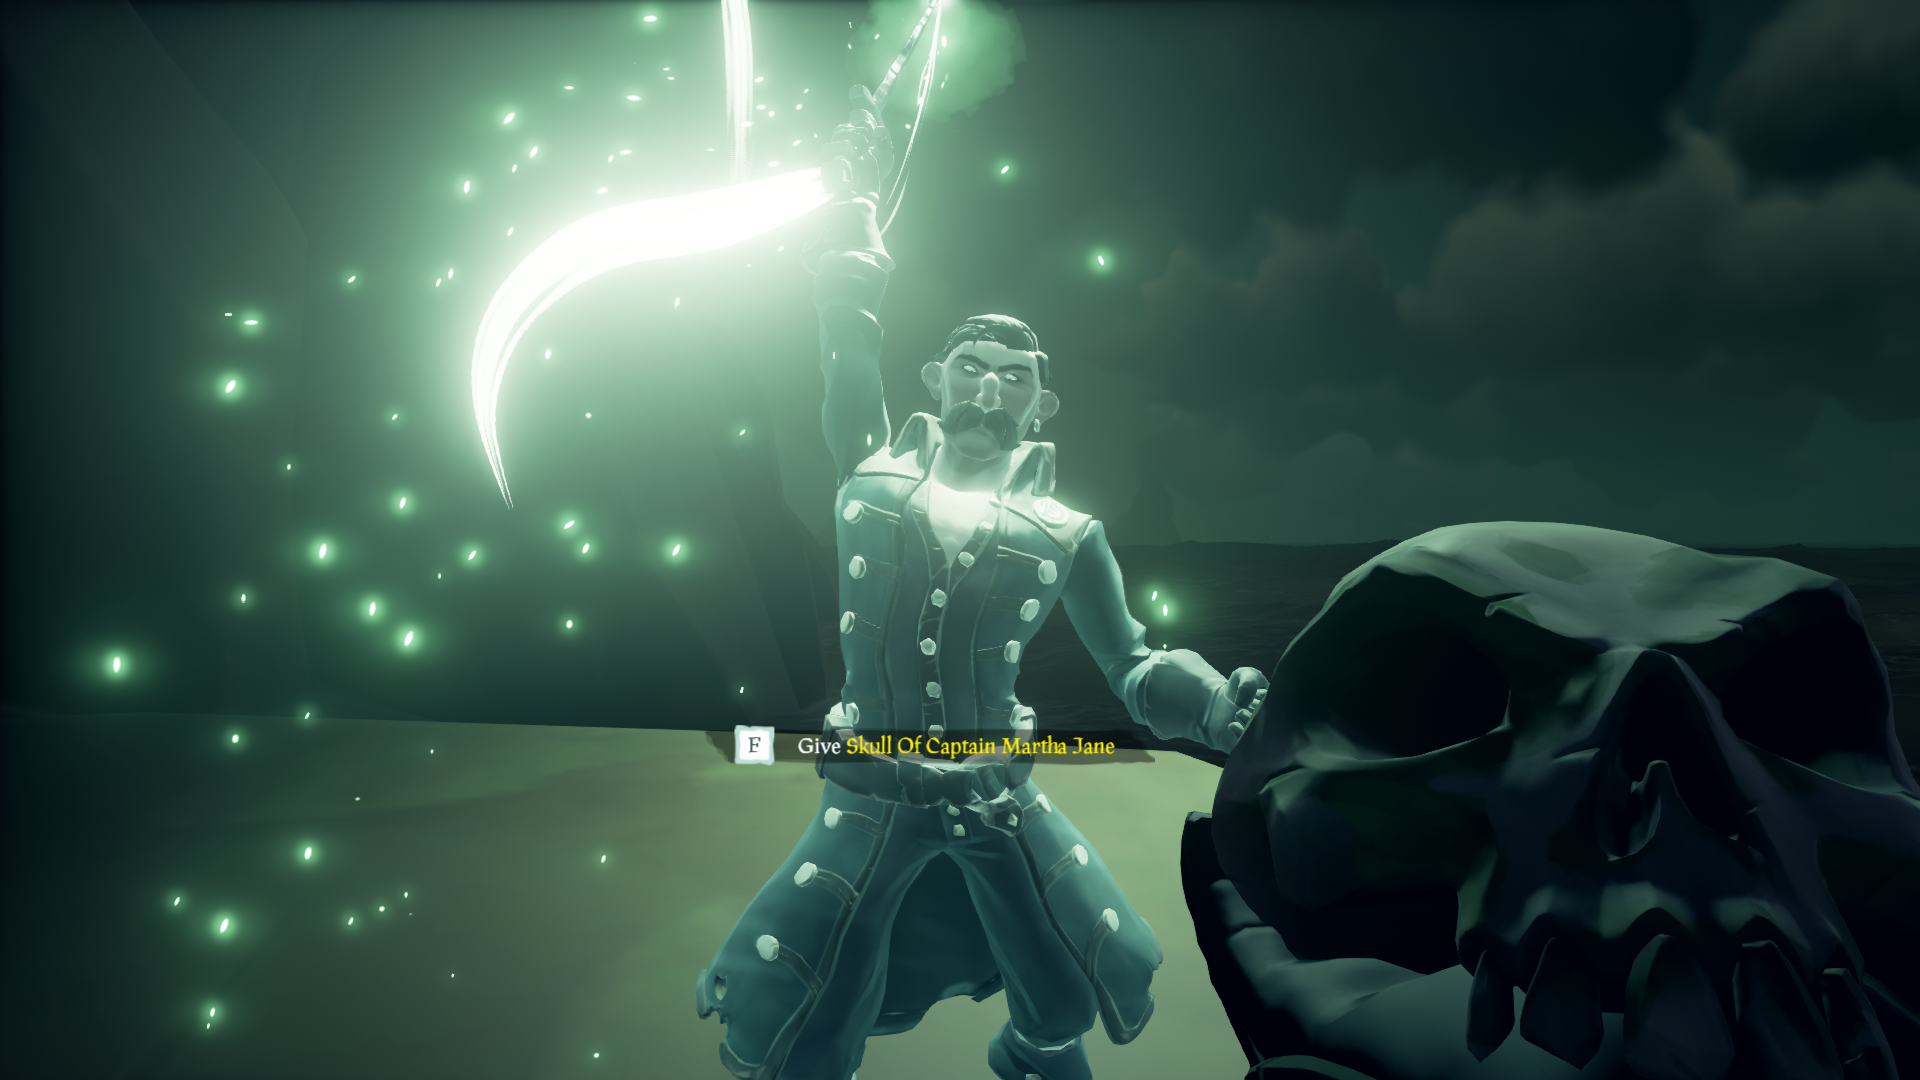
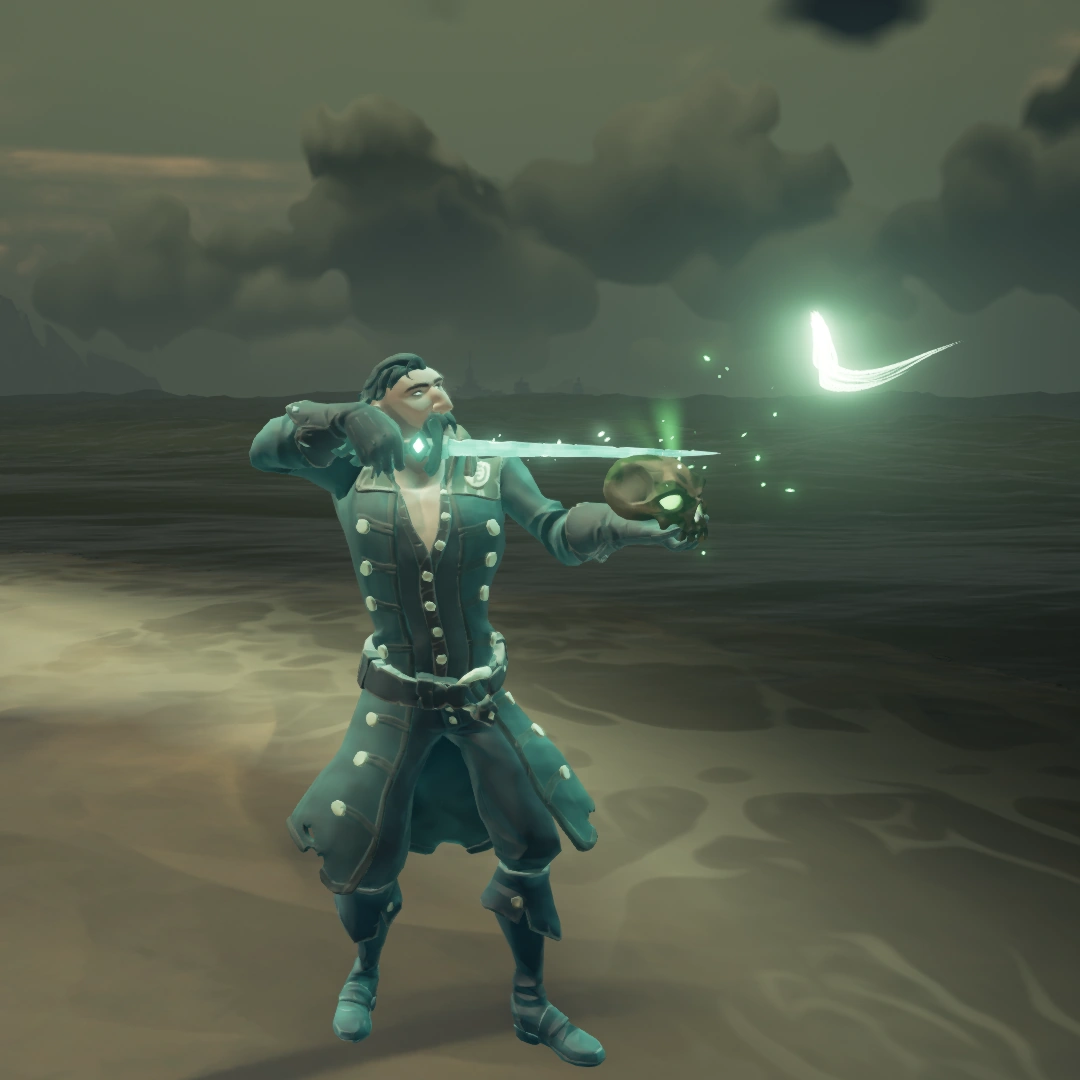
Go on shore and Give the Skull of Captain Martha Jane to Pendragon. He will use his Sword of Souls to release and free Martha Jane's soul. You can then listen to her tale of an alliance between her and Captain Randal Stone:
Pendragon & Captain Martha Jane
Pendragon
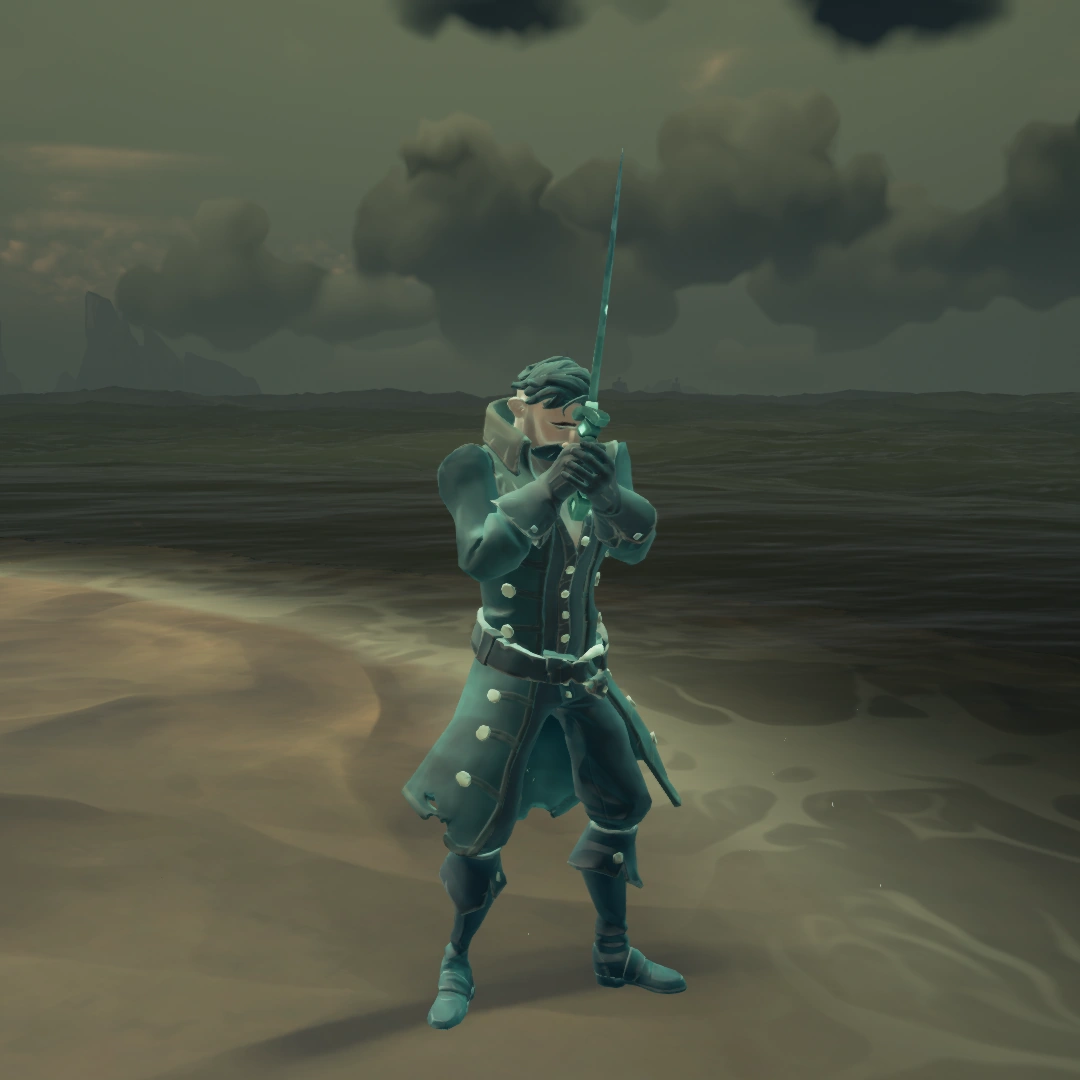
Captain Martha Jane.... I can sense her soul swirling around in there. Let’s see If my Sword of Souls can’t bring an end to her torment...
-
-
-
-
Martha Jane
A ship of the damned, wreathed in hellfire… What impossible treasure must it contain? My crew and I sought to know the truth.
For six nights we sailed in pursuit of the Ashen Dragon. Countless times we thought we had lost the scent, only to spot her ominous flames on the horizon.
On the third night we encountered Captain Stone and his crew, who also meant to hoard the fire ship’s secrets for themselves.
Grudgingly, they accepted our offer of an alliance. -
Finally, we saw our chance, and struck! It was the last mistake of our lives.
Our lust for wealth had blinded us to the true nature of our prey - skeletal pirates,
Who burned as though the flames of Hades were consuming them before our eyes.
Upon witnessing the horrors we now faced, Stone and his crew turned tail and ran.
Our plans were in ruins even before the Ashen Dragon turned and unleashed its cannons upon us.
We were boarded in great numbers as our hull was shattered by cannon fire. There was no time for repair, nor for escape as our world broke apart around us.
My last hope is that Stone’s cowardice may, in some way, return to haunt him. I shall carry that hope with me as we sink into our graves...-
-
-
-
Pendragon
It seems this mysterious Captain Stone is our key to hunting the Ashen Dragon.
I’ll preserve Jane’s memories in my journal. They might give us a clue as to where we should head next.-
-
-
-
Image Guide

The wreck of the Blackwyche at Shipwreck Bay.
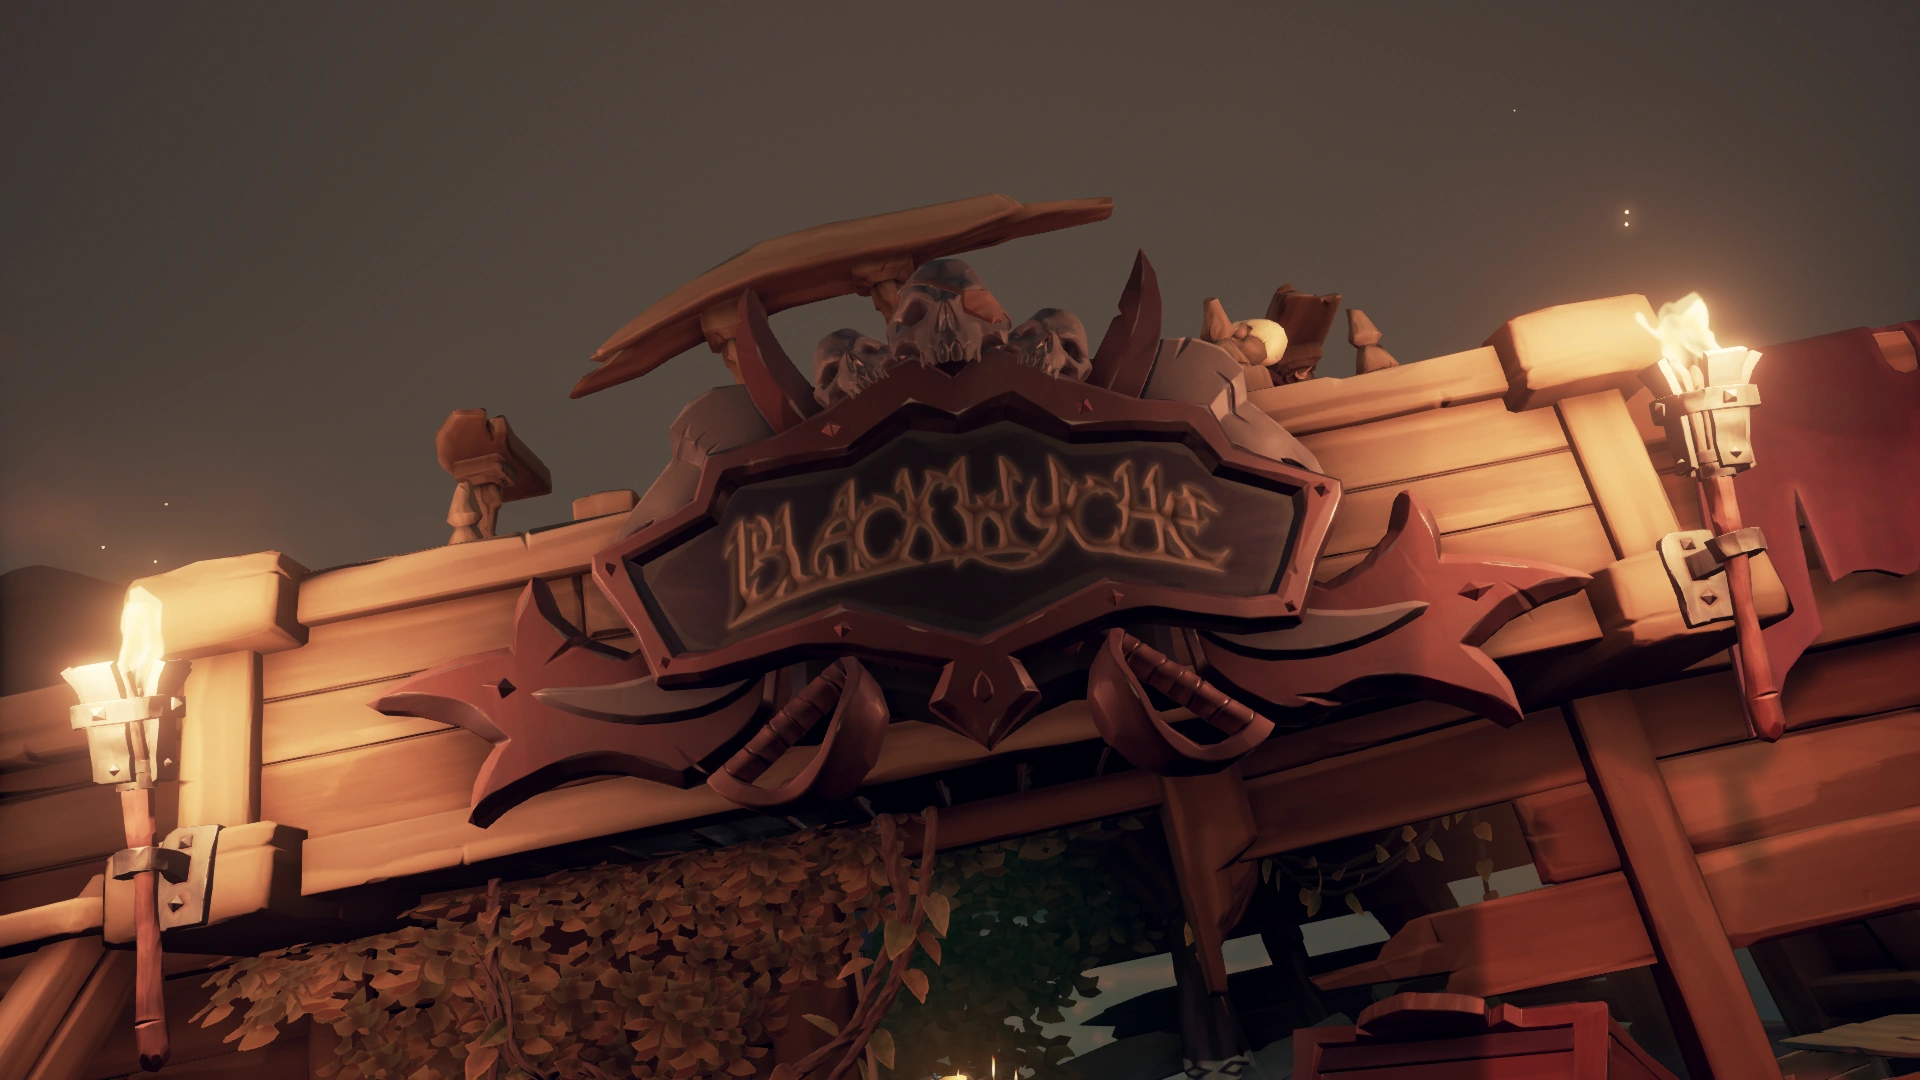
You can tell the name of the Ship by its nameplate.
The Tall Tale is on the Ritual Table inside the Shipwreck.
The ghost of Sir Arthur Pendragon. He will be accompanying your journey, appearing whenever he is needed.
You will need to follow the three ghostly Ships to find where Captain Jane's ship went down.
You can see the fate of her Crew and Ship by diving down with the Enchanted Lantern
Raise the Lantern if you don't see anything.
The scenery will guide you to where Jane sunk and died.
Pick up the Skull of Captain Martha Jane below. You can find it by its white glint.
Jane's Skull in hand, covered by kelp.
Pendragon will materialise on the nearby Island, holding his Sword up high as a beacon for you to see.
Give the Skull to Pendragon to proceed.
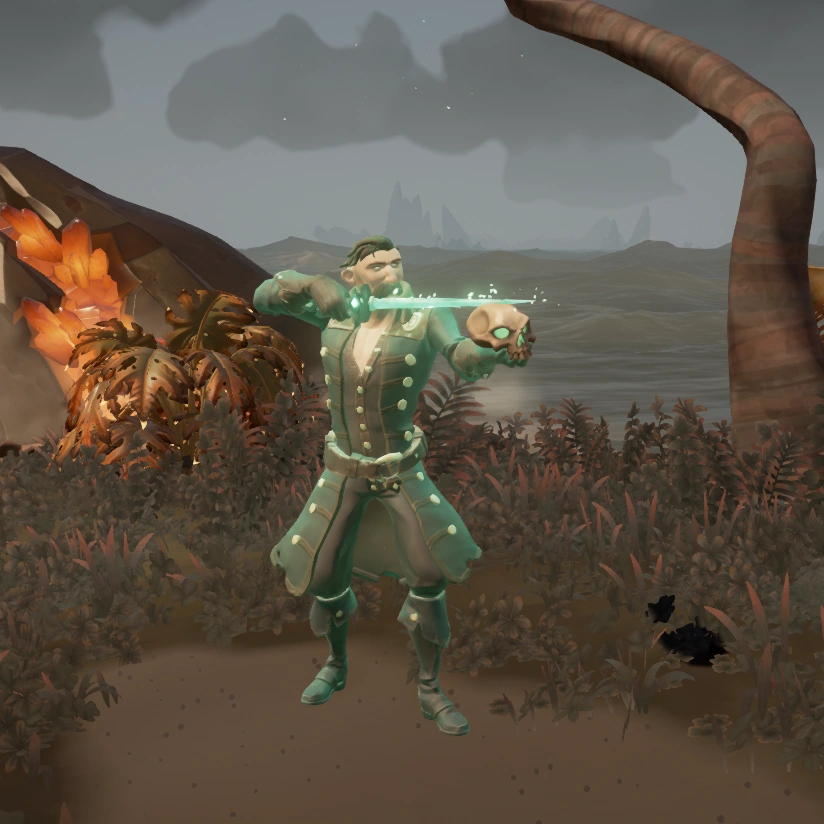
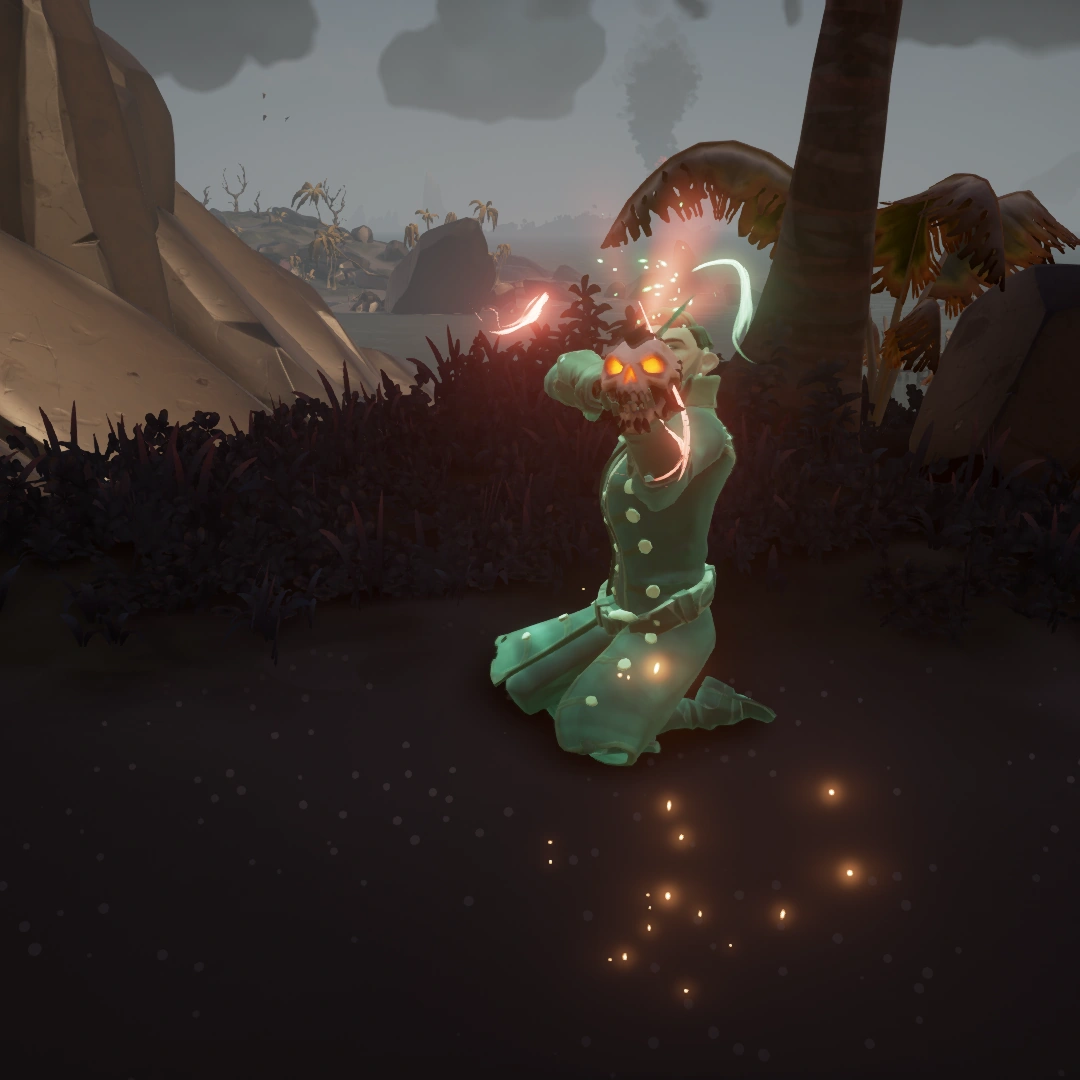
Pendragon will perform a Ritual with his Sword of Souls.
Pendragon will free Martha Jane's soul from her cursed skull.
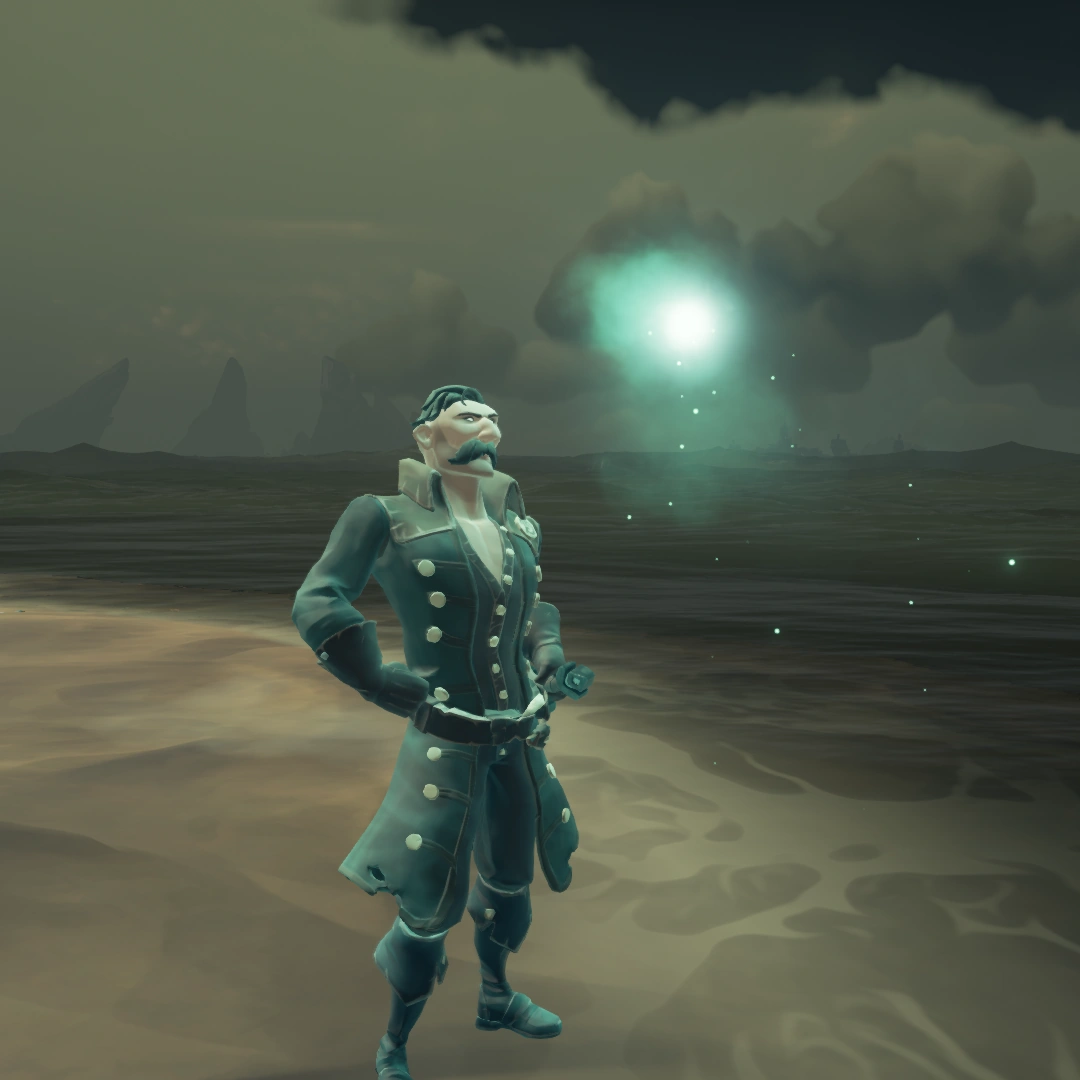
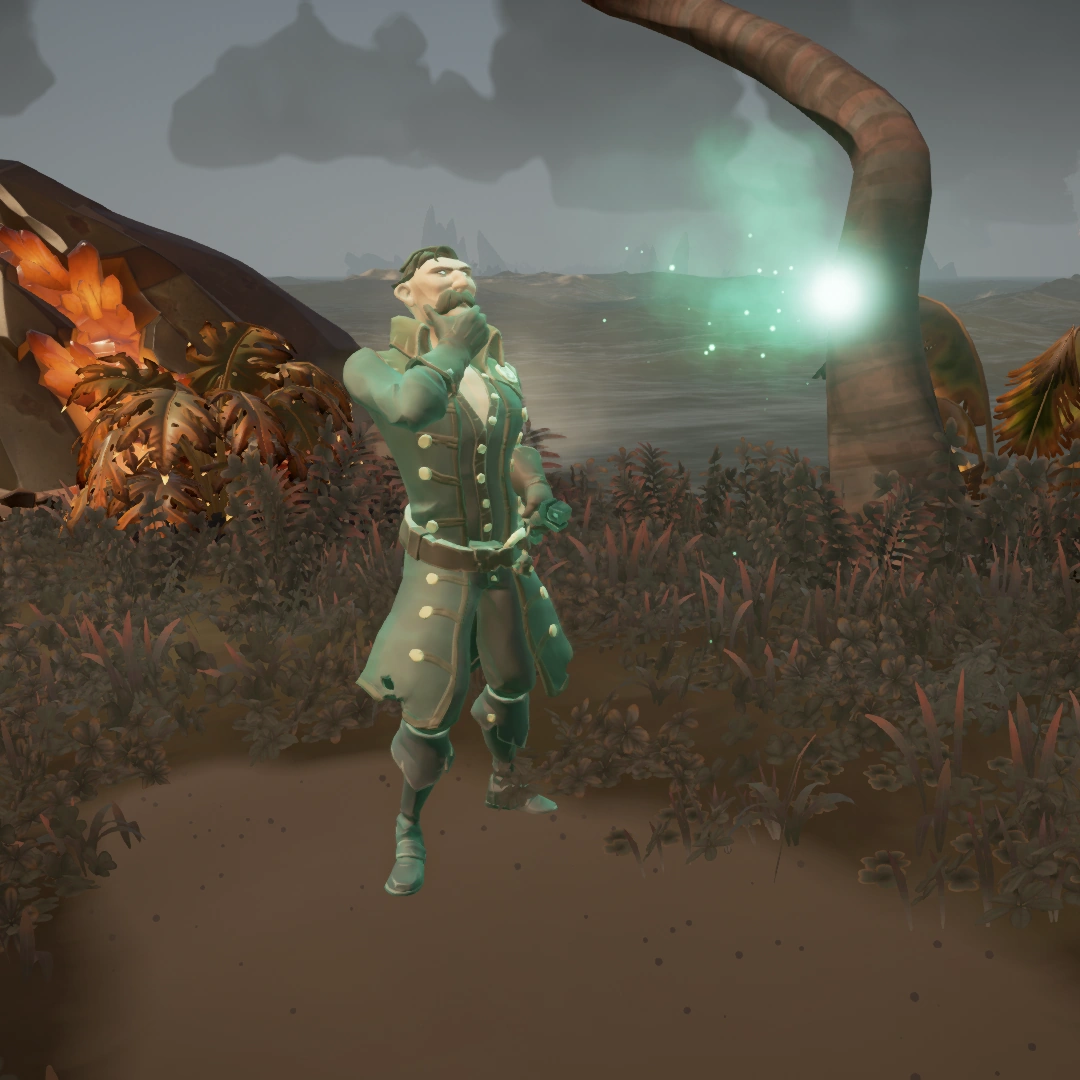
Martha Jane will appear as a wisp and tell you what happened to her and Captain Stone.

A Broken Alliance
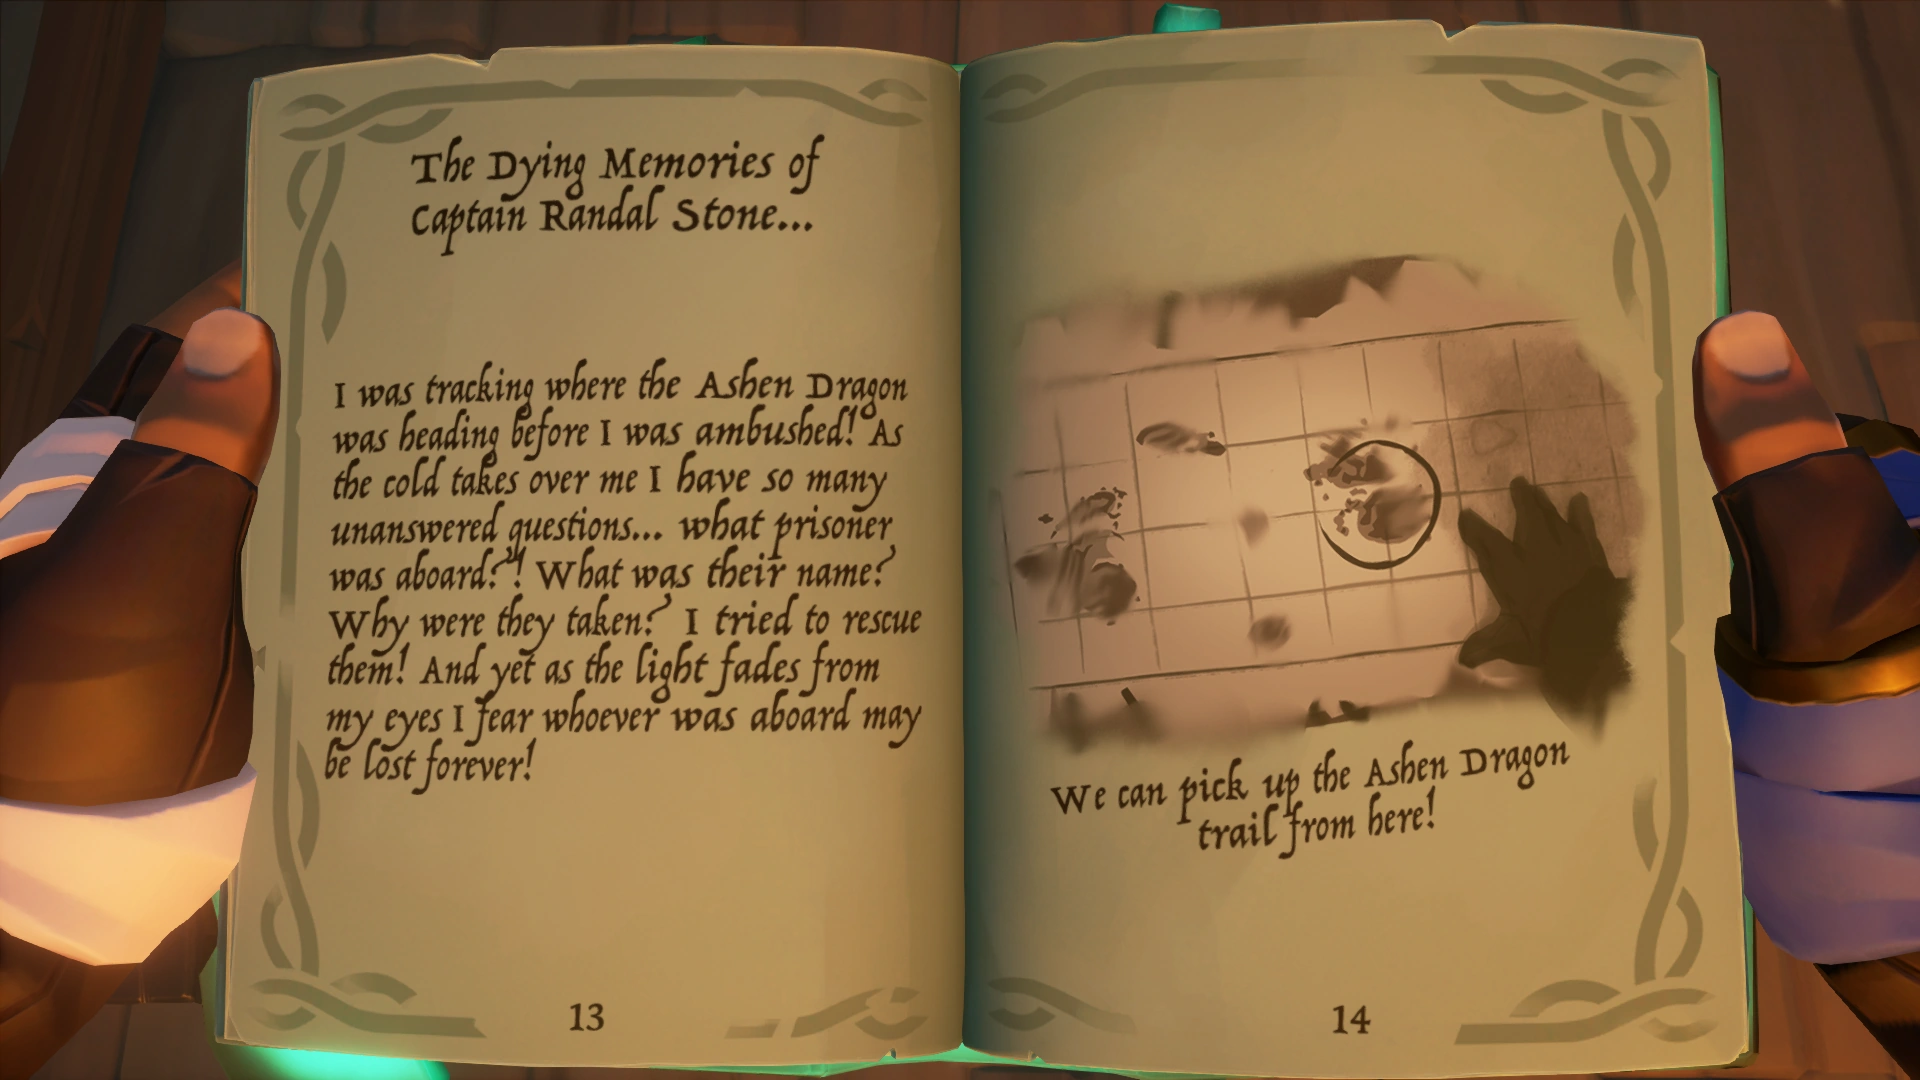
After setting the soul of Martha Jane free, Pendragon will mark down The Dying Memories of Captain Martha Jane... in the Tale Book as additional pages. The contents of these pages vary from Tale to Tale.
The trail of The Ashen Dragon and Captain Randal Stone can be picked up from sailing to the Island where the Alliance between Martha Jane's and Randal Stone's Crew was formed. The location of this Island can be deducted from Martha Jane's Dying Memories in the Tale Book. You may need to step foot or at least sail to the Island's title card range to once again see the trail.
Once back on track, you will be lead to Randal Stone's final resting place, where you need to once again make use of your Tools at hand to free the soul of Captain Randal Stone.
After freeing Captain Randal Stone, the Crew will acquire The A Foiled Ambush Commendation.
Hints, Walkthrough & Images
Below are a handful of Clues and Hints to complete this section of the Tall Tale. If these are not clear enough, then a full Walkthrough with images is provided below.
Hints
Everything you need to know is on the 12th page of the Tale Book. You have to look at the Island silhouette and go there to continue the Tall Tale.
You should look to the horizons for the ghostly ship of Ashen Dragon and follow it. Sometimes the ship won't appear until you actually set foot on the Island.
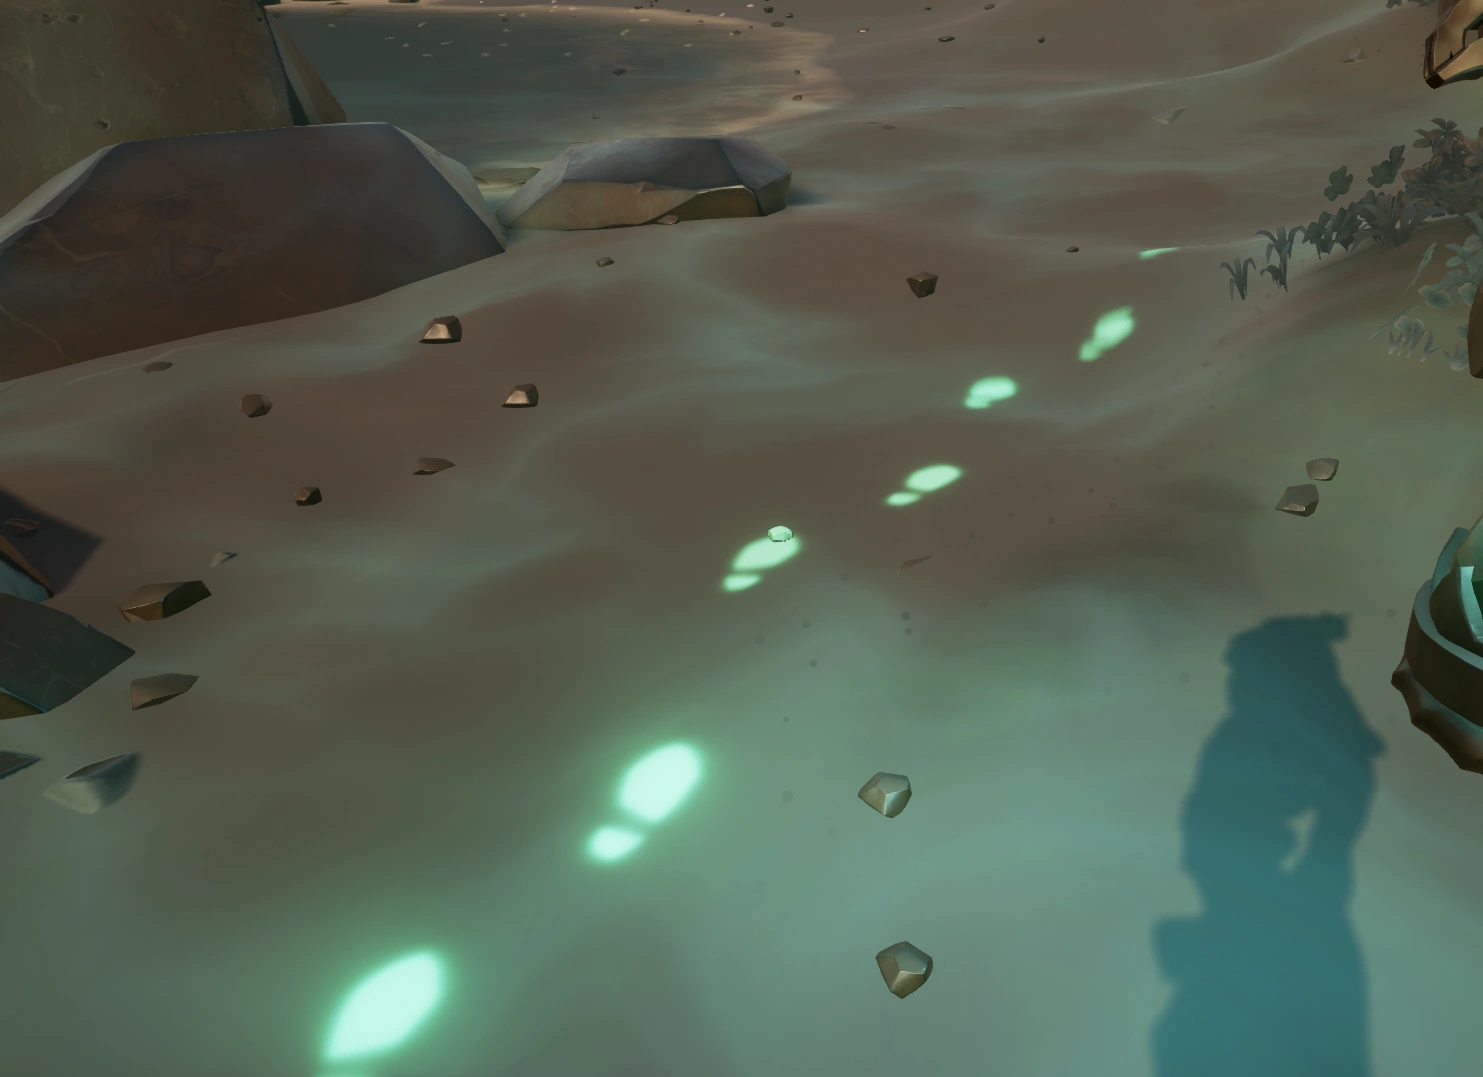
Take out your Enchanted Lantern once again to trace the footsteps of Captain Randal Stone.
Same as before, see if you can find Pendragon on the Island. He will tell you what to do next.
CLICK FOR WALKTHROUGH AND GALLERY
|
|---|
Walkthrough
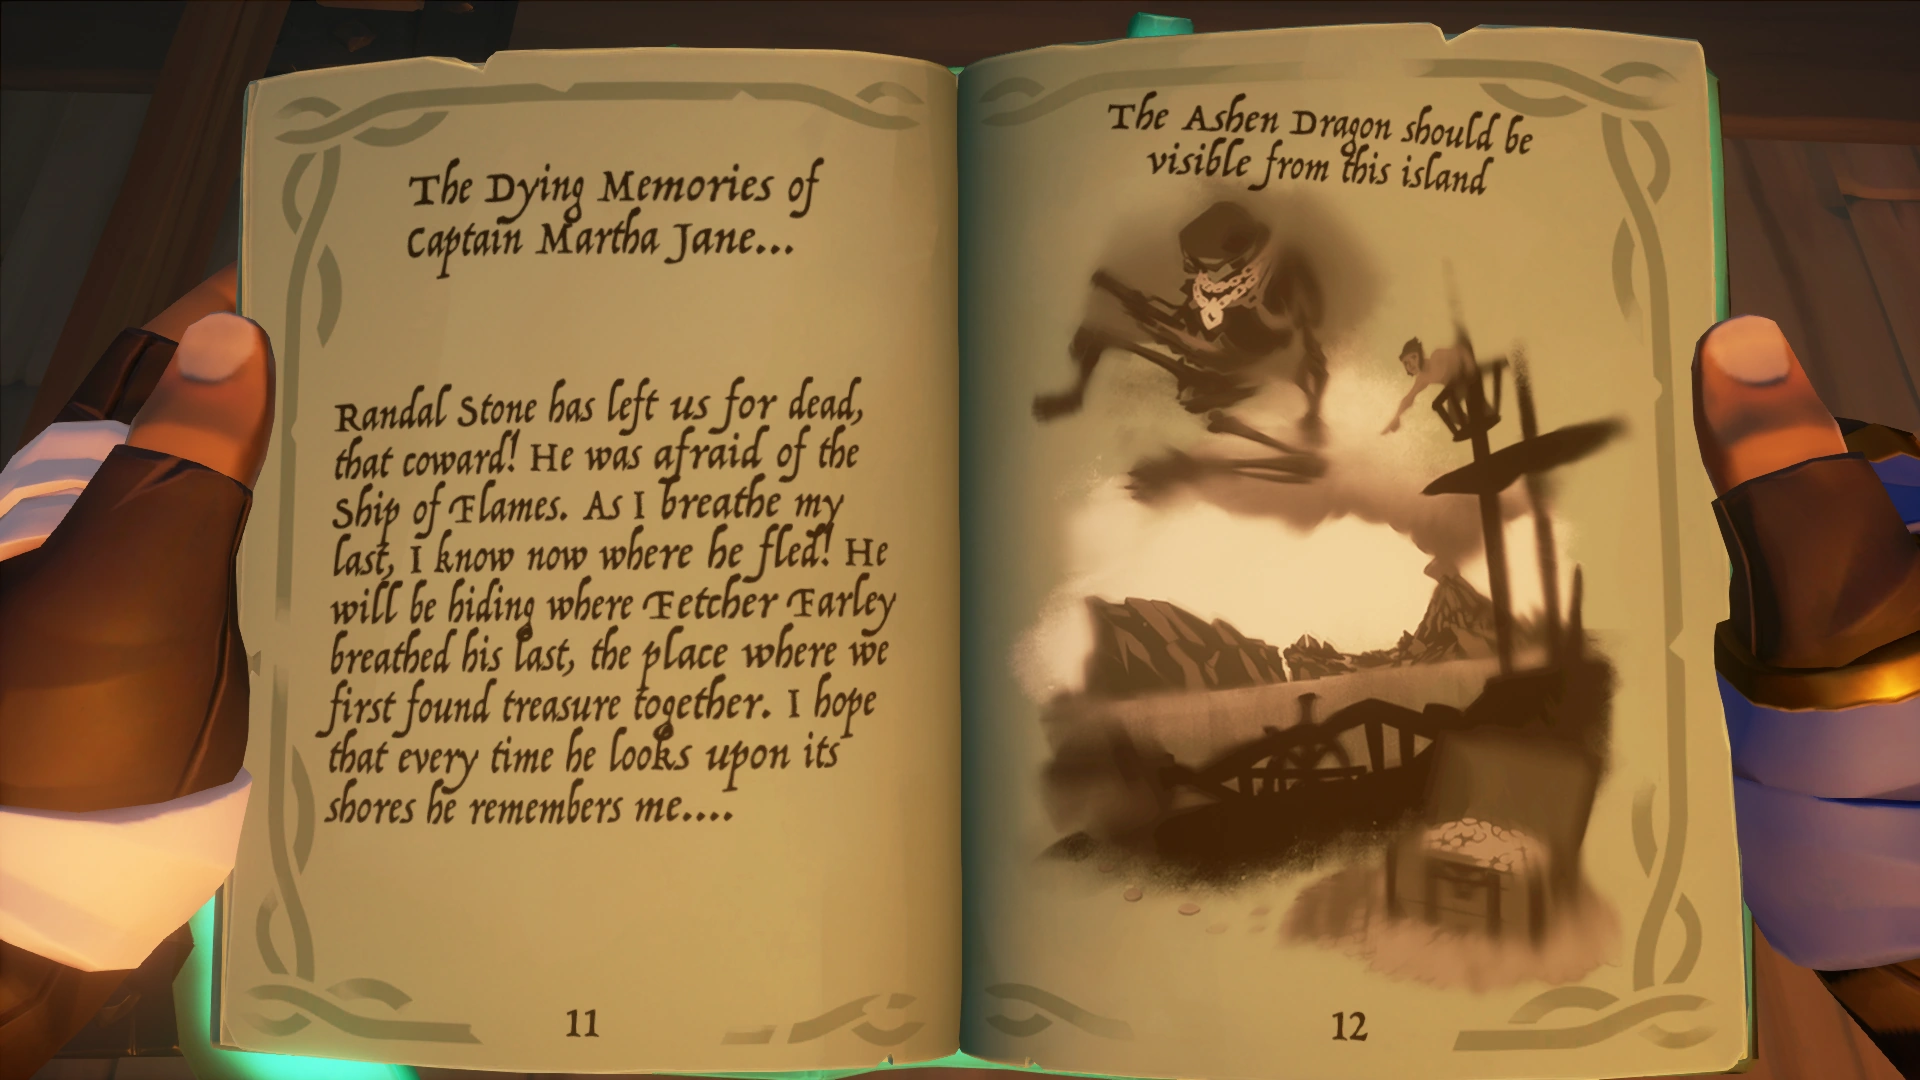
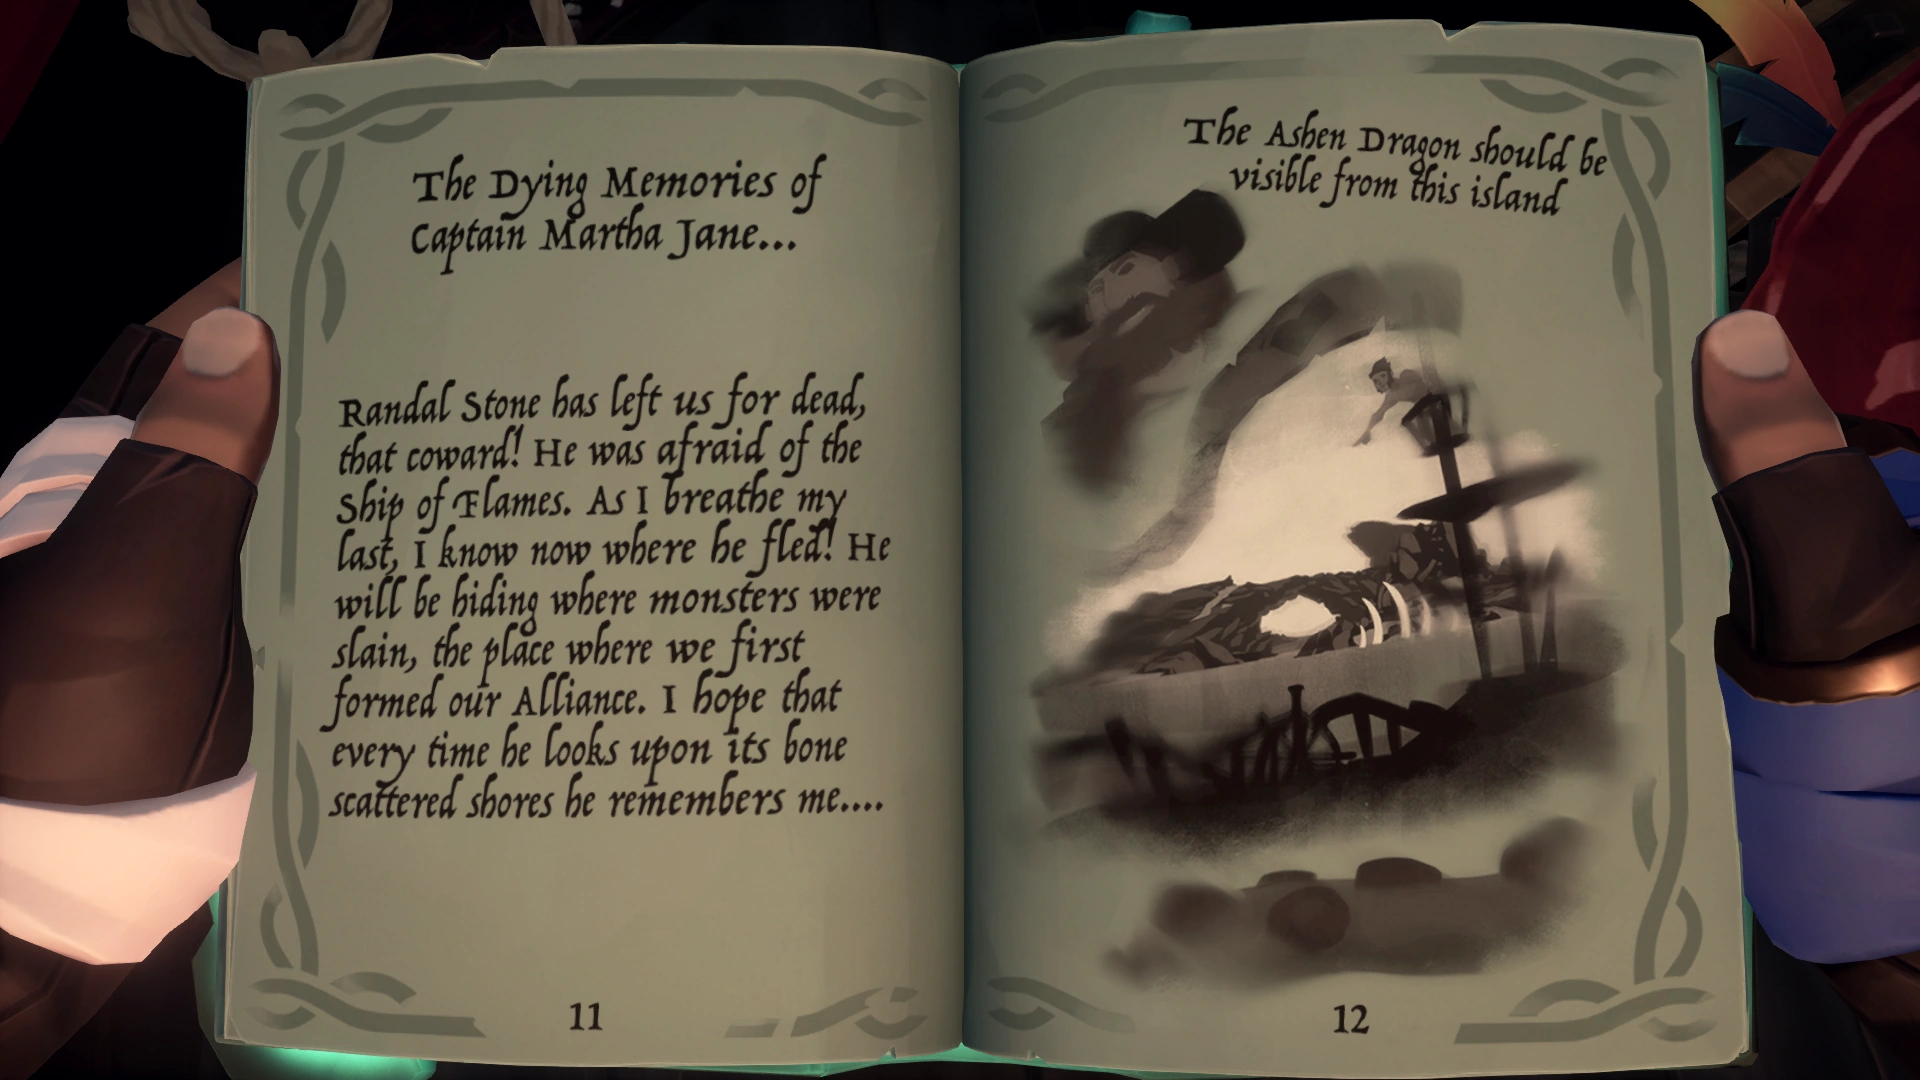
After setting Martha Jane free and receiving her memories in your Tale Book, take a look at the last page. It will have a drawn silhouette of an Island with additional hints either on the drawing itself or in the text.
So far, the drawings have been reported to lead to Kraken's Fall or Fetcher's Rest (see above for images of the Journals leading to either of these Islands).
The Kraken's Fall drawing clearly illustrates the large arch in the middle of the Island with the memories alluding to a bone scattered shore. The Fetcher's Rest Island drawing is harder to distinguish, however you can tell that the Island is in The Devil's Roar by the illustrated Volcano. You can also see a sketch of Fetcher himself above the sketch of the Island. Additionally, Jane's memories speak of Fetcher Farley's final resting place.
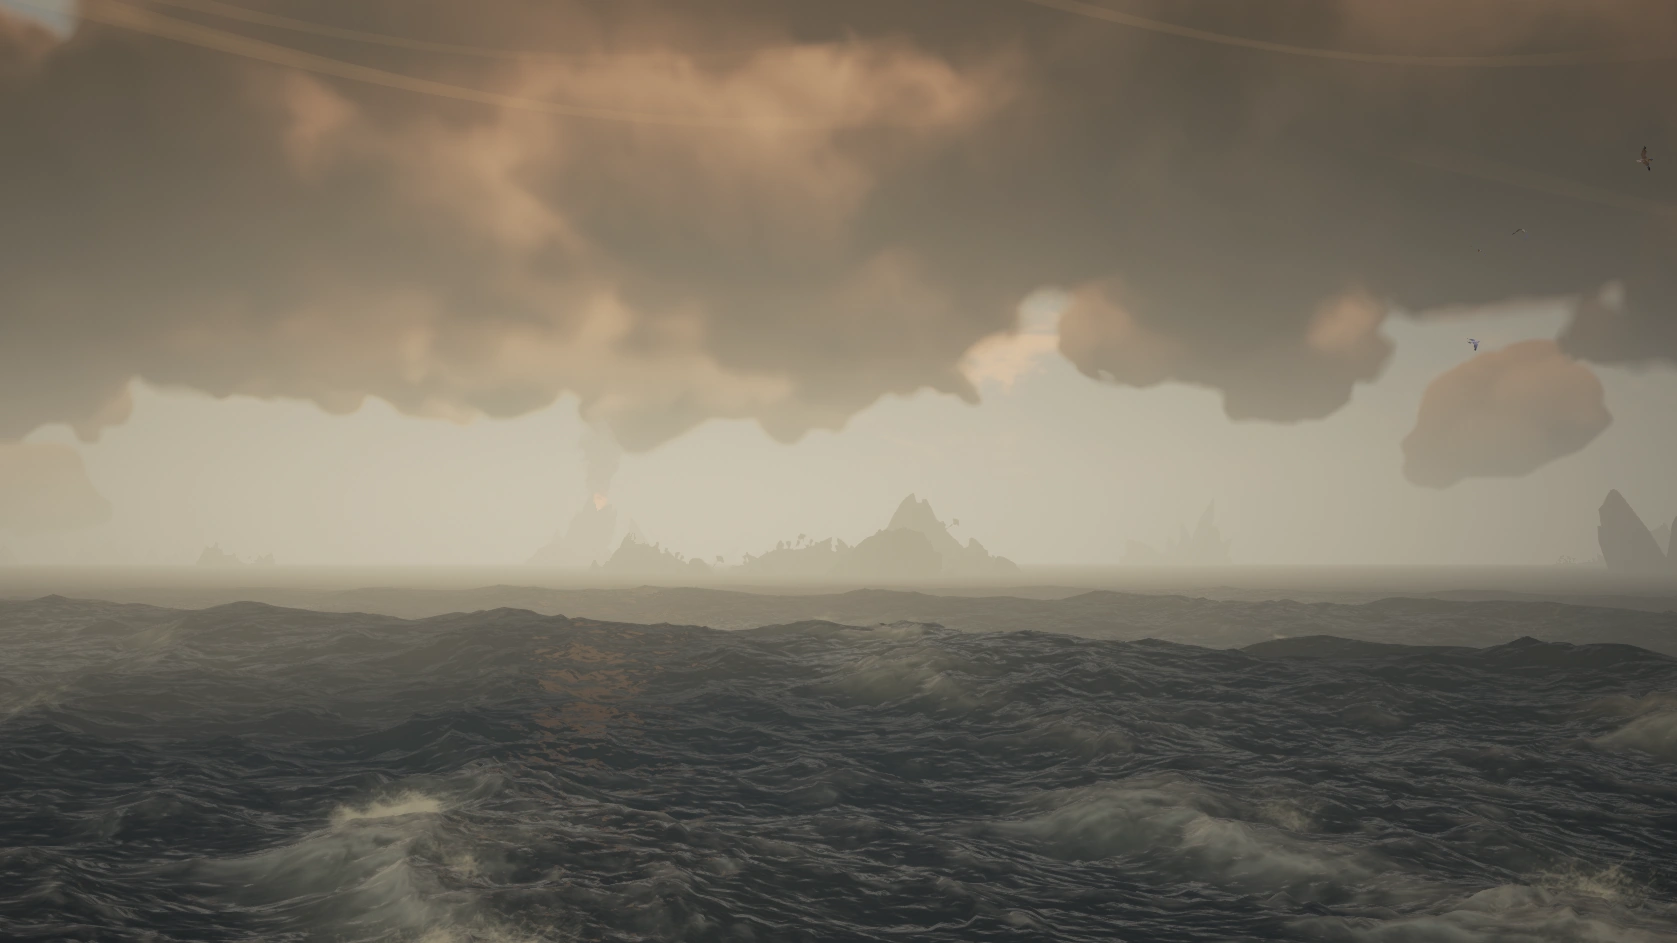
You will have to sail to the illustrated Island to once again see the ghostly figure of The Ashen Dragon on the horizons. Sometimes the Ship won't appear until you reach the Island's Title Card range or step foot on the Island itself.
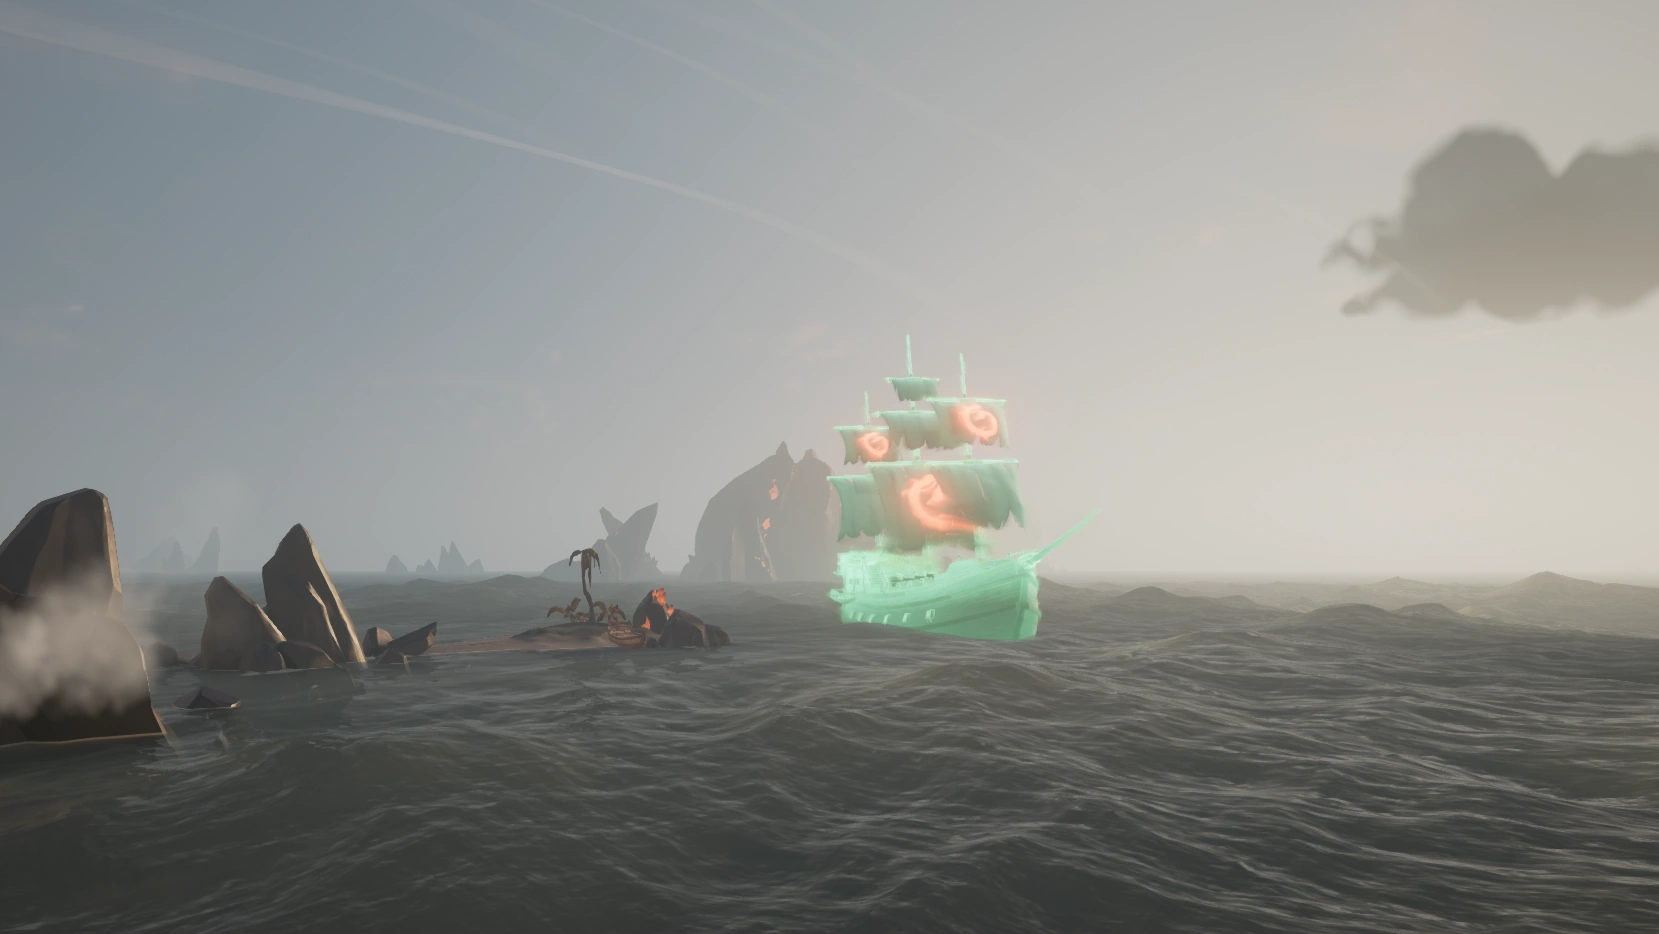
Pick up the trail once again. You will have to follow and sail to the location of the ghostly ship around 2-4 times once again to be taken to the final resting place of Captain Randal Stone. You will know the location when you see the Ashen Dragon stay still by an Island in The Devil's Roar with Randal Stone's ship upended beside it.
So far, the Ashen Dragon has been documented to lead players to Cinder Islet, Scorched Pass, Forsaken Brink and Cursewater Shores.
Note 1: The fourth Ashen Journal can be found on Scorched Pass, which is one of the possible locations for this section of the Tall Tale. See The Ashen Journals section below for more information.
Note 2: Two Ashen Artefacts can be found on Cinder Islet and Cursewater Shores, either of which are possible locations for this section of the Tall Tale. See the Ashen Artefacts section below for more information.
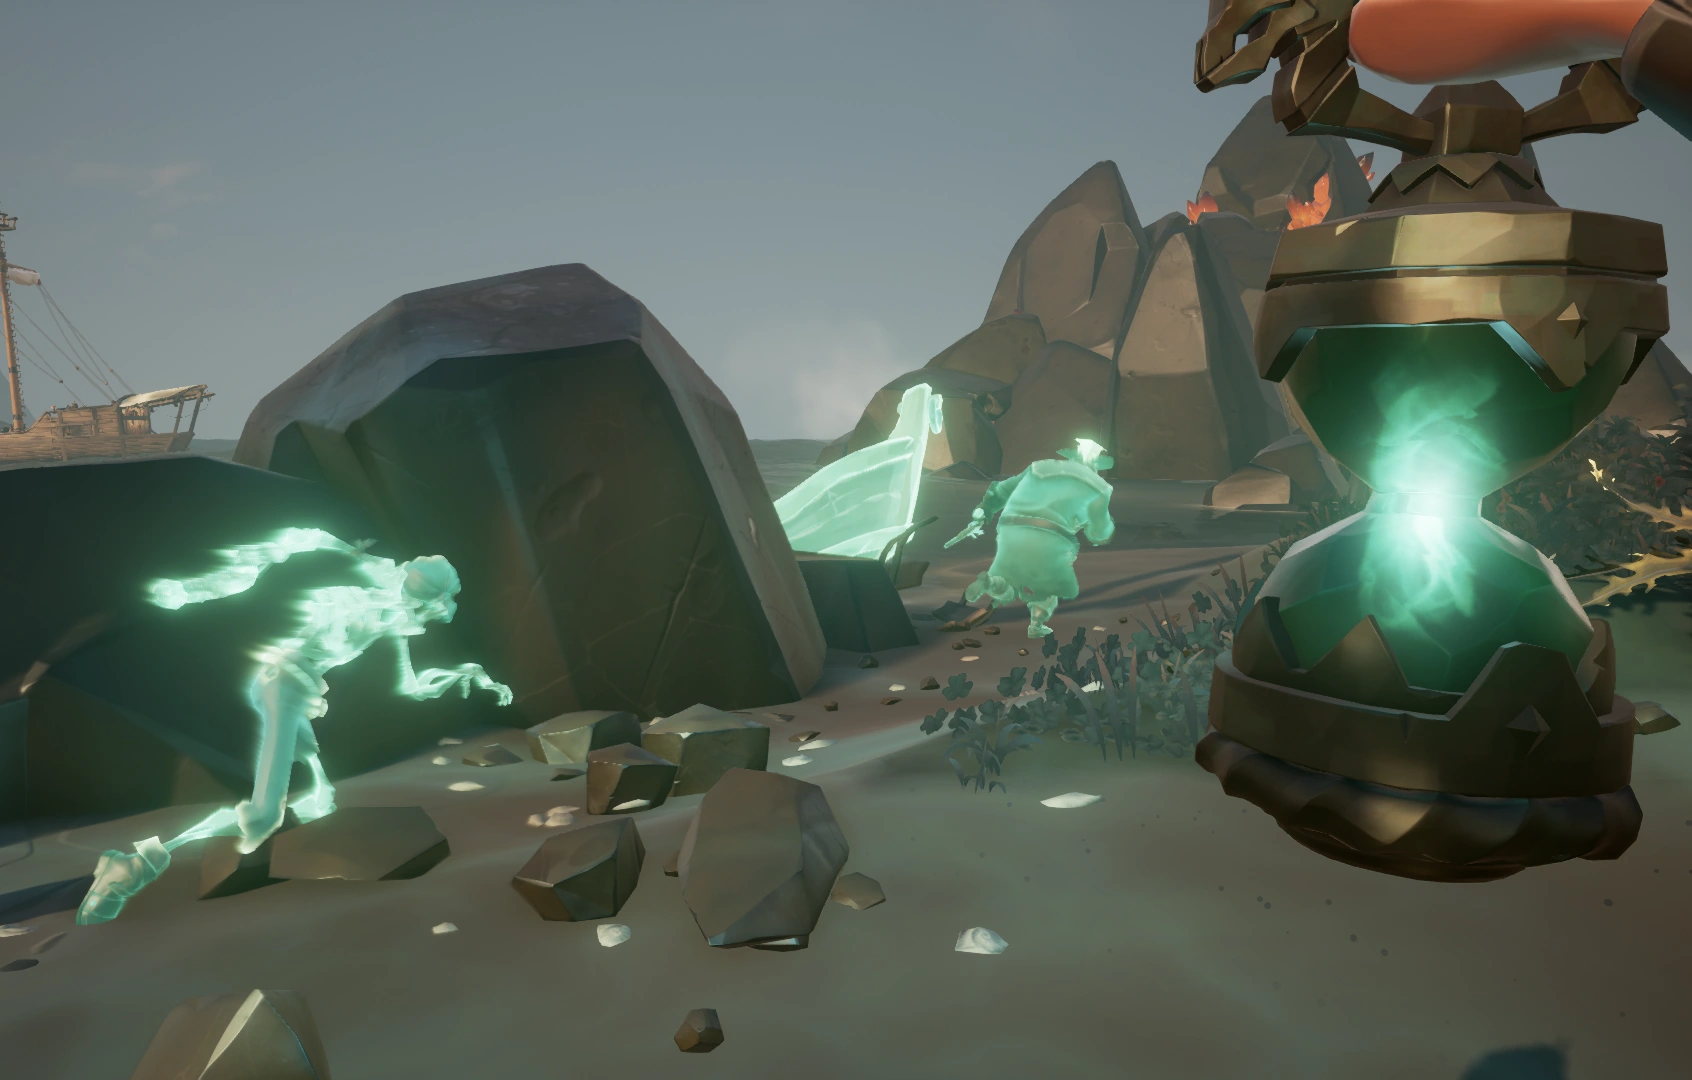
This time you will have to go on shore by where the Ashen Dragon anchored. Take out your Enchanted Lantern and raise it high to see Stone's Rowboat and a chase between him and a skeletal minion. Follow his ghostly footsteps to find his final resting place and dig with your Shovel. You should uncover the Skull of Captain Randal Stone. Just like last time, Pendragon will materialise nearby and beckon you to bring him the remains of Randal Stone:
Pendragon
Line 1
Well done! Now let me take a look at that skull.
-
-
-
-
Line 2
Another trapped soul? A touch of my blade should help!
-
-
-
-
Line 3
That must be the ‘coward’ Martha Jane spoke of. Pass the skull to me.
-
-
-
-
As before, Give the Skull of Captain Randal Stone to Pendragon so that he can use his Sword of Souls to release and free the coward's soul. You can then listen to his version of the story:
Pendragon & Captain Randal Stone
Pendragon
Bravo! Another trapped soul rescued from purgatory’s clutches. Allow my blade to do the honours...
-
-
-
-
Randal Stone
Yeah, yeah, I heard what you was callin’ me Jane! Randal the Vandal ain’t no coward, you savvy?!
But he ain’t stupid neither! That fight was a lost cause and we both knew it.
My ship may have been scuttled and me crew sent to the ferry, but I knew where the Ashen Dragon was heading next, and where I could lie in wait.
Those red-hot skellies ain’t half strong, though. I got in a few good shots but he just kept coming.
I had to run or I’d have been burned to cinders! Shame I didn’t run faster...
Maybe it’s for the best, though. I know the truth about that ship. I know who’s aboard her. And I know you’d have to fight through hell to reach ‘em...-
-
-
-
Pendragon
Only one Captain left to find. I’ll add Stone’s information to my journal so we can alearn where the Ashen Dragon was heading. We’ve come too far to lose her now!
-
-
-
-
Image Guide
The Journal Pages leading to Fetcher's Rest
This is the silhouette of Fetcher's Rest
The Journal Pages leading to Kraken's Fall
This time you have to chase just the The Ashen Dragon, finding Stone's ship flipped over by an Island.
Once you find The Ashen Dragon anchored at an Island, raise your Enchanted Lantern to find where Stone escaped.
You will have to follow Randal Stone's footsteps with the ghostly Lantern.
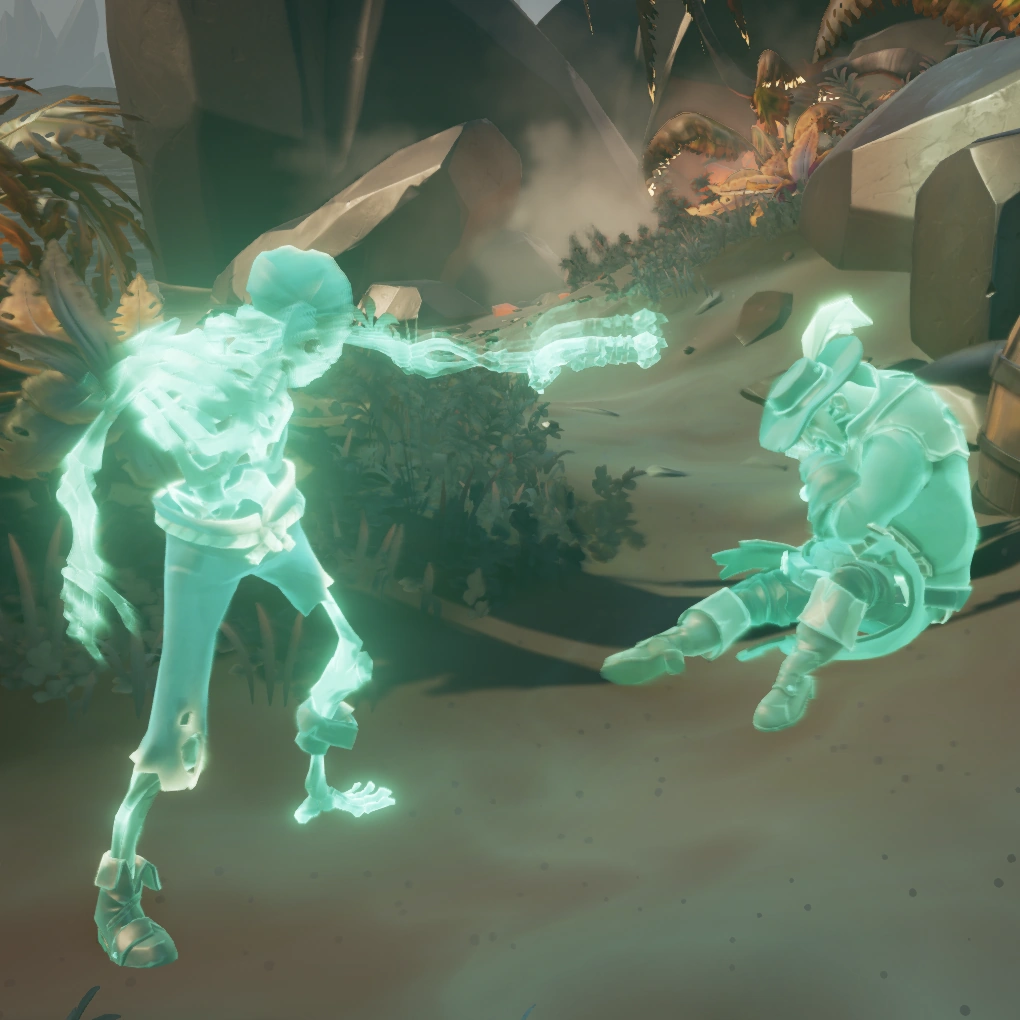
You will find Stone shot and killed by a Skeleton. This is his final resting place
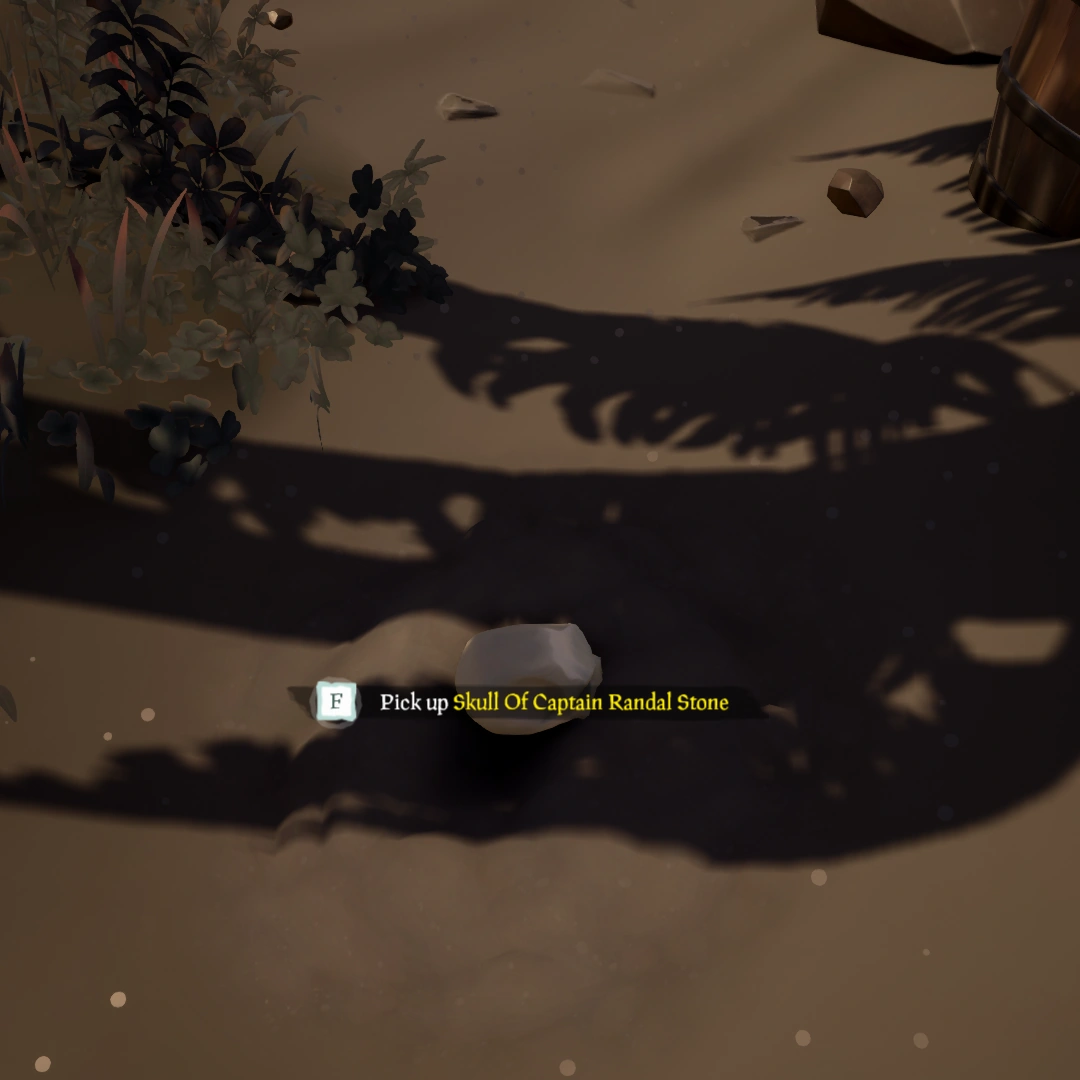
Dig at that location with your Shovel to find his cursed Skull.
The Skull looks very dull, like a Foul Bounty Skull with no glowing eyes.
Give the Skull to Pendragon who appears beside you.
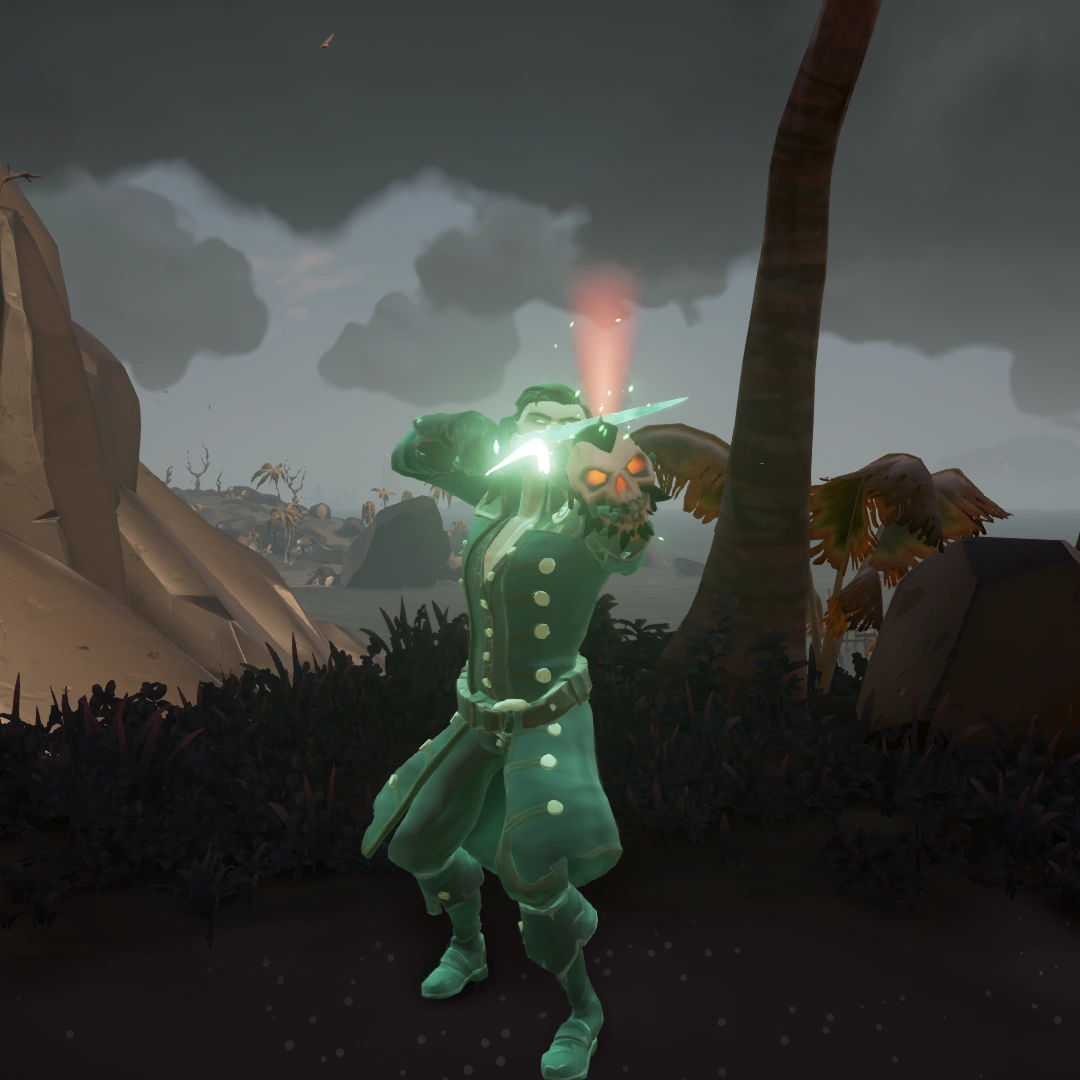
Pendragon will perform his ritual with The Sword of Souls once again to set Randal Stone free.
Randal Stone's ghostly wisp will appear to tell his version of the story, hinting towards the location of The Ashen Dragon.

Bound at Sea
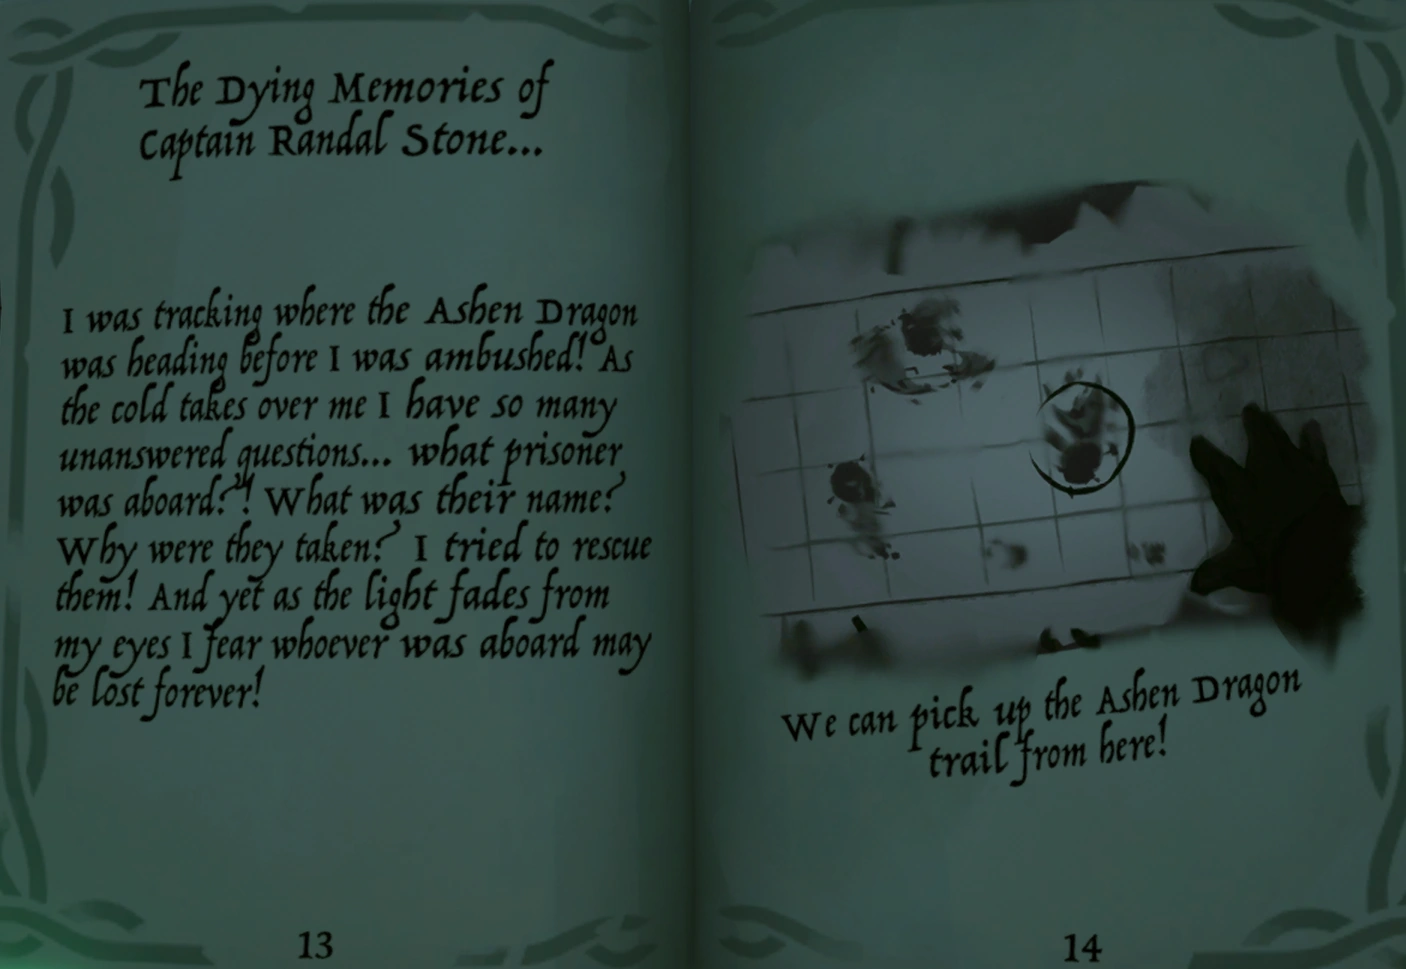
After setting the soul of Randal Stone free, Pendragon will mark down The Dying Memories of Captain Randal Stone... in the Tale Book as additional pages. The contents of these pages vary from Tale to Tale.
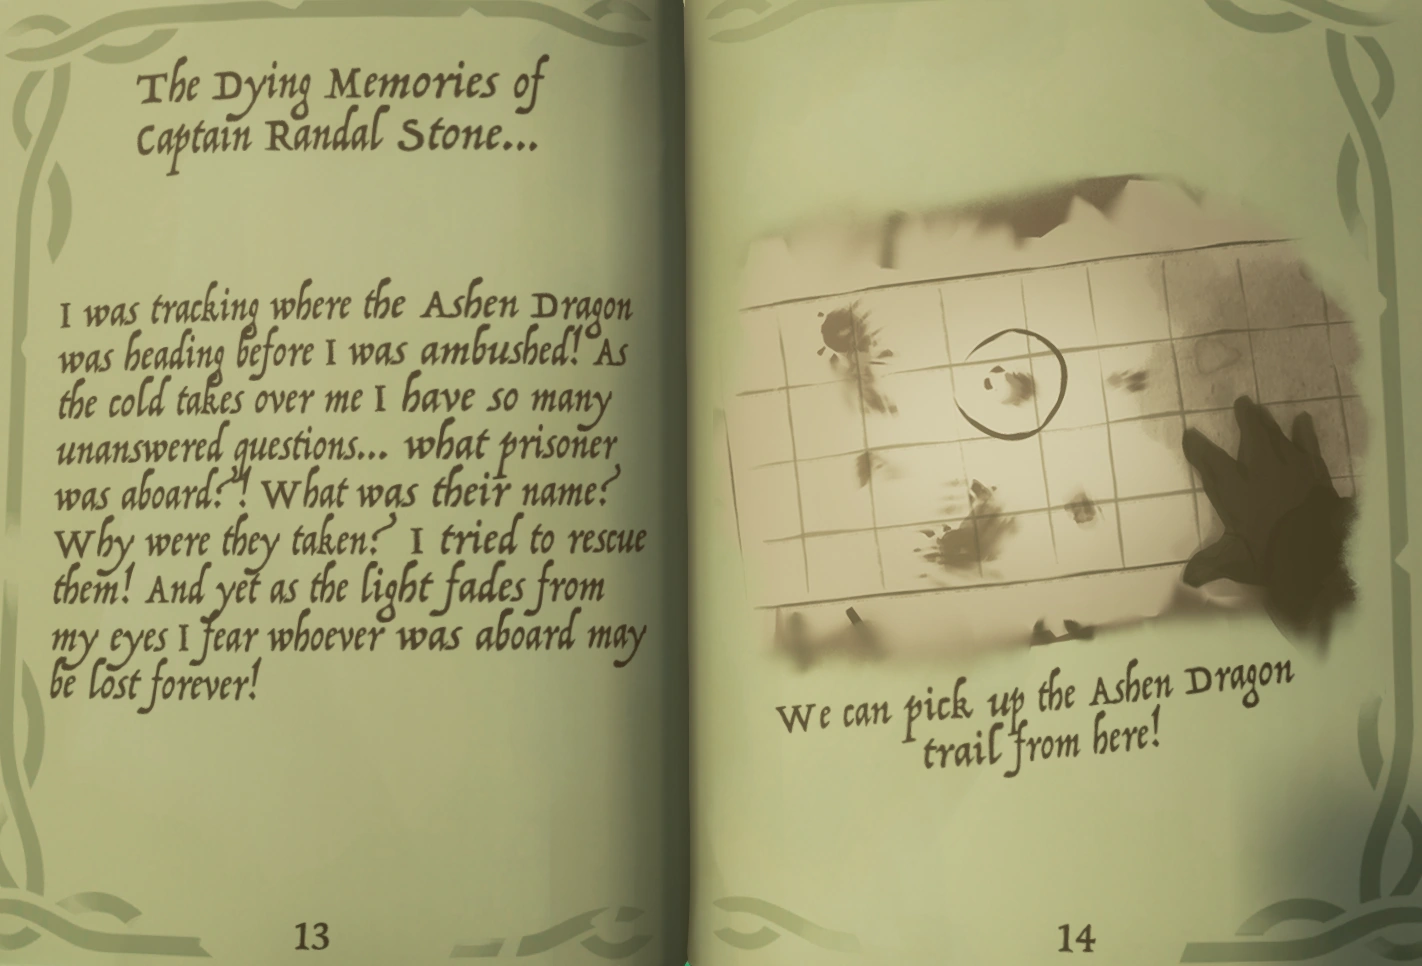
This part of the Tall Tale is quite straightforward. Similarly to the previous section, you will have to consult the additional pages to find where The Ashen Dragon was headed. Once back on the trail, it should be fairly easy to find the Location of the last Captain's Soul. Same as before, use all the Tools in your hand to track him down.
Hints, Walkthrough & Images
Below are a handful of Clues and Hints to complete this section of the Tall Tale. If these are not clear enough, then a full Walkthrough with images is provided below.
Hints
As before, look to the horizons for the ghostly ship of Ashen Dragon and follow it. Sometimes the ship won't appear until you actually set foot on the Island.
As before, take out your Enchanted Lantern once again to trace the footsteps of the last Captain.
CLICK FOR WALKTHROUGH AND GALLERY
|
|---|
Walkthrough
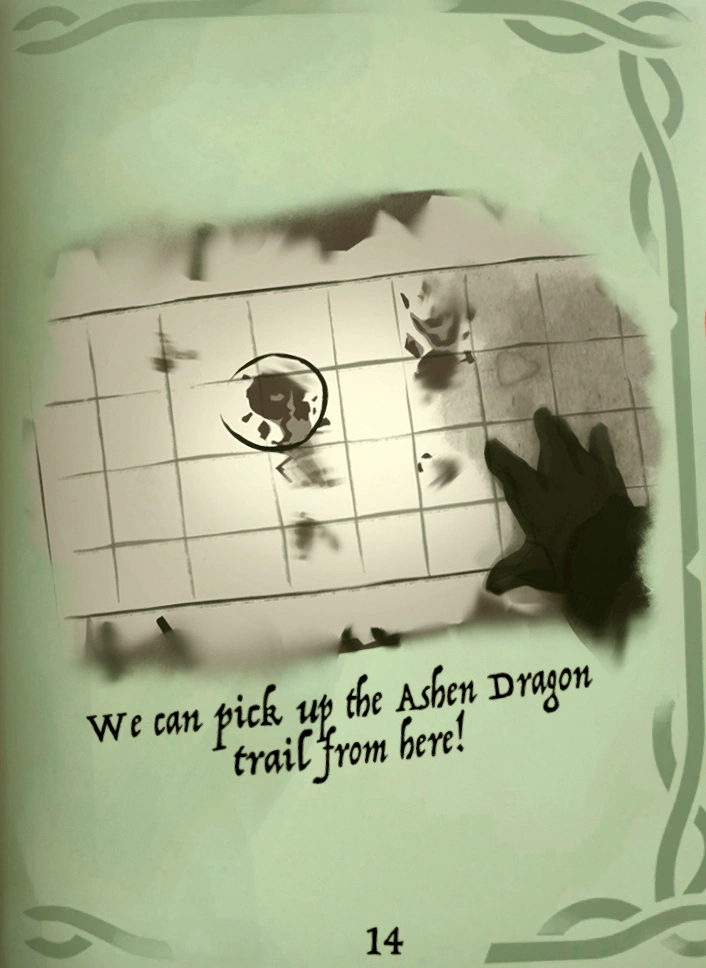
This section is almost identical in structure to the last, but more straightforward. After setting Randal Stone free and receiving his memories in your Tale Book, take a look at the last page. This time you will see a drawing of a part of The Devil's Roar Map with one Island encircled. You will have to check your Map Table and sail to that Island to be able to see The Ashen Dragon once more. Sometimes the Ship won't appear until you reach the Island's Title Card range or step foot on the Island itself, but mostly you should be able to see it on the seas from far away.
So far, the pages have been reported to lead to Ruby's Fall, Morrow's Peak Outpost, Molten Sands Fortress and Brimstone Rock (See above and below for the variant pages of the Journals).
Pick up the trail once again. This time, the Ashen Dragon will always lead you towards Flintlock Peninsula. You may have to follow and sail to the ship two to three times. Sail to where the Ship anchored and step on shores.
Note: The final Ashen Journal can be found on Flintlock Peninsula. See The Ashen Journals section below for more information.
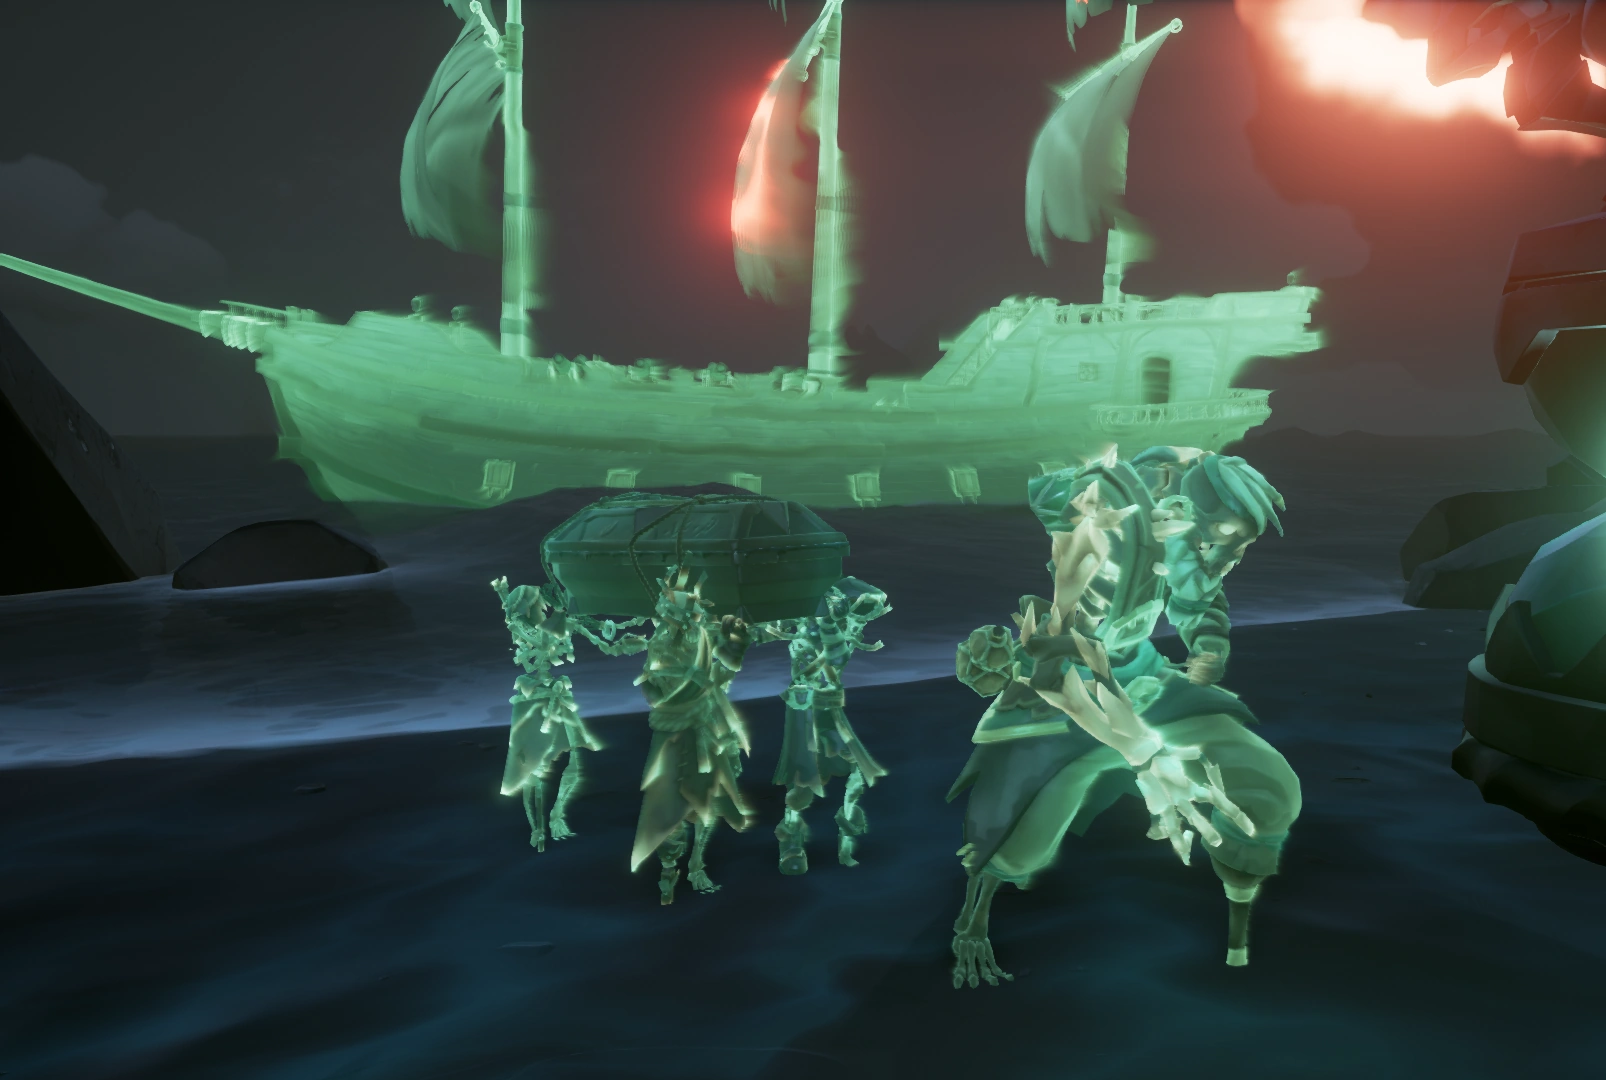
As before with the other captains, step on shore by the Ashen Dragon and take out your Enchanted Lantern. Raise it high to see the ghostly remainders of four skeletons carrying a Sarcophagus lead by their Commander. Follow the Commander's ghostly foot(and pegstep) with the Lantern. It will lead you to the final resting place of the final Captain, except it's in a cave with a wall of stone blocking the way.
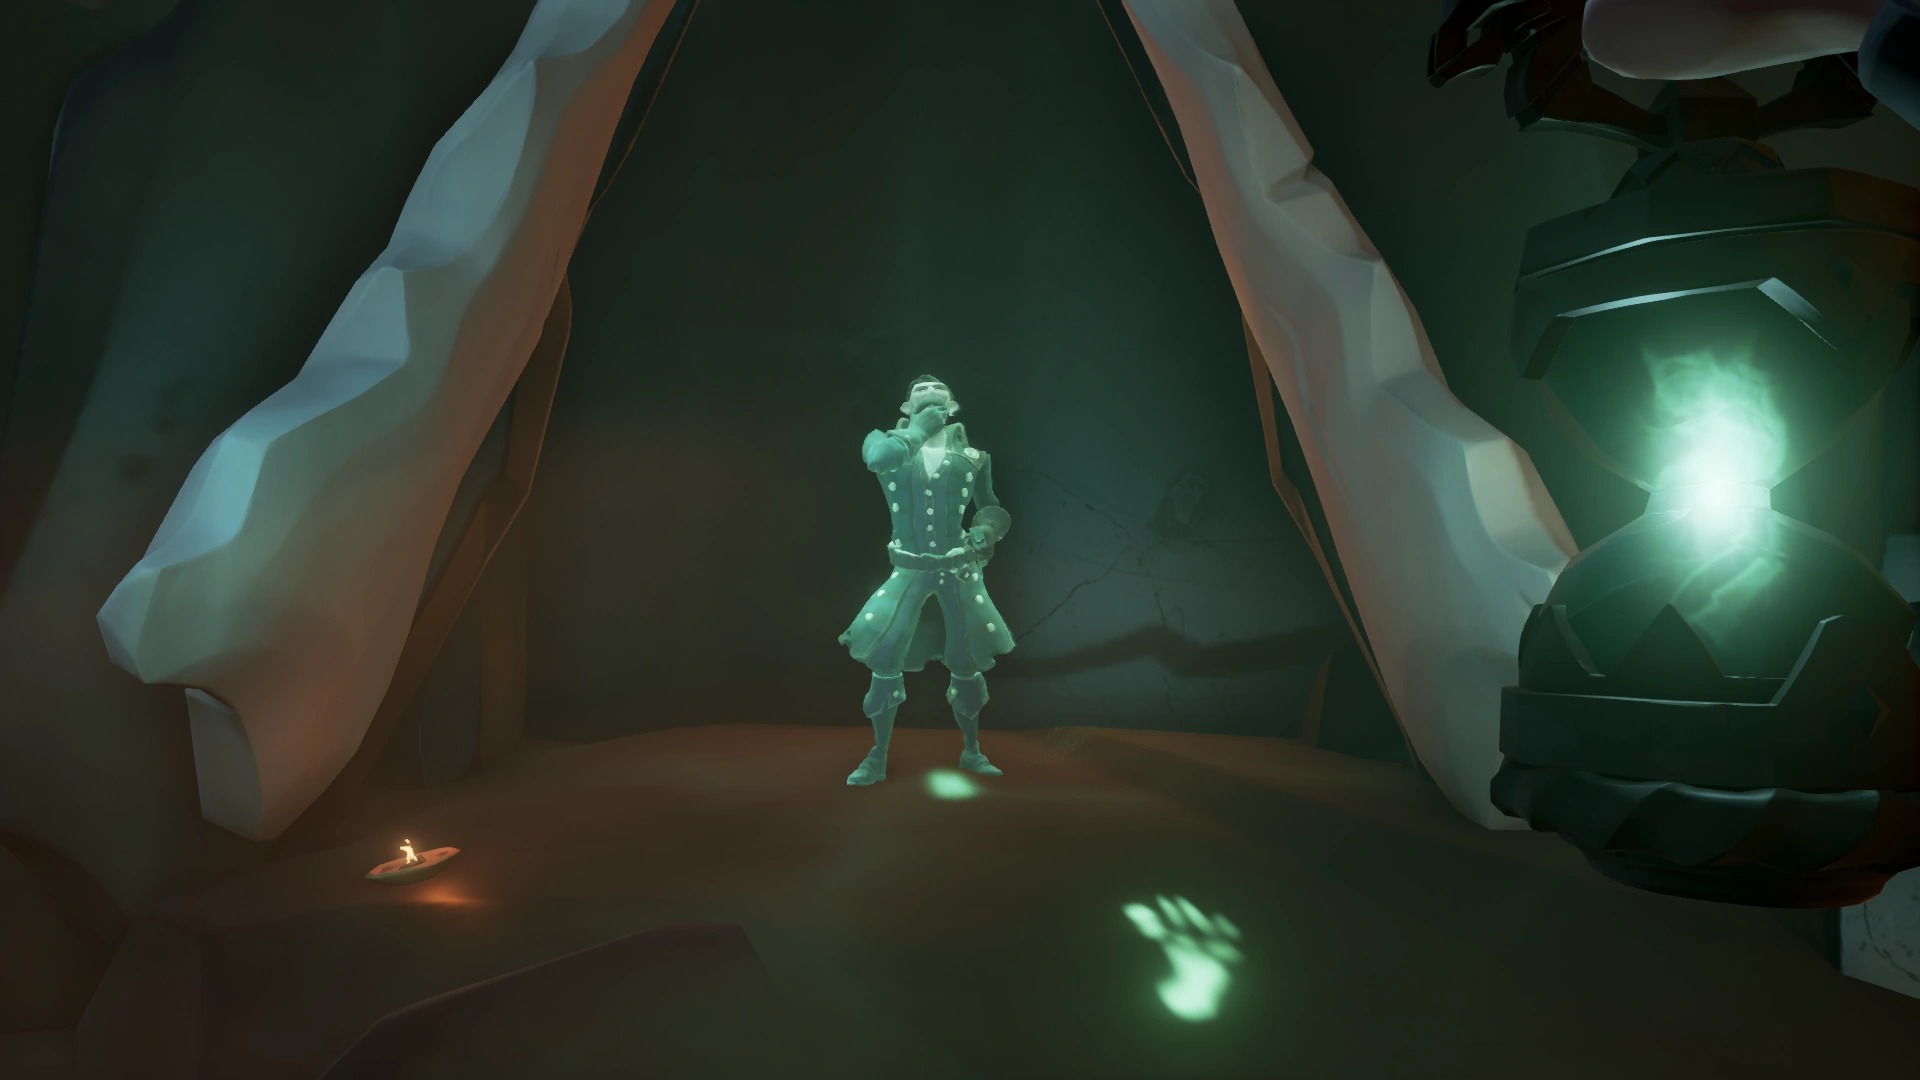
Pendragon will materialise to help you out with his aforementioned "supernatural shortcut":
Pendragon
Hmm. No way in... Not from the outside, anyway. Wait here a moment.
There, now. The way ahead seems clear. We must be getting close...-
-
-
-
Image Guide
The Journal Pages leading the players to Molten Sands Fortress
The Journal Pages leading the players to Brimstone Rock
The Journal Page leading the players to Morrow's Peak Outpost
The Journal Pages leading the players to Ruby's Fall
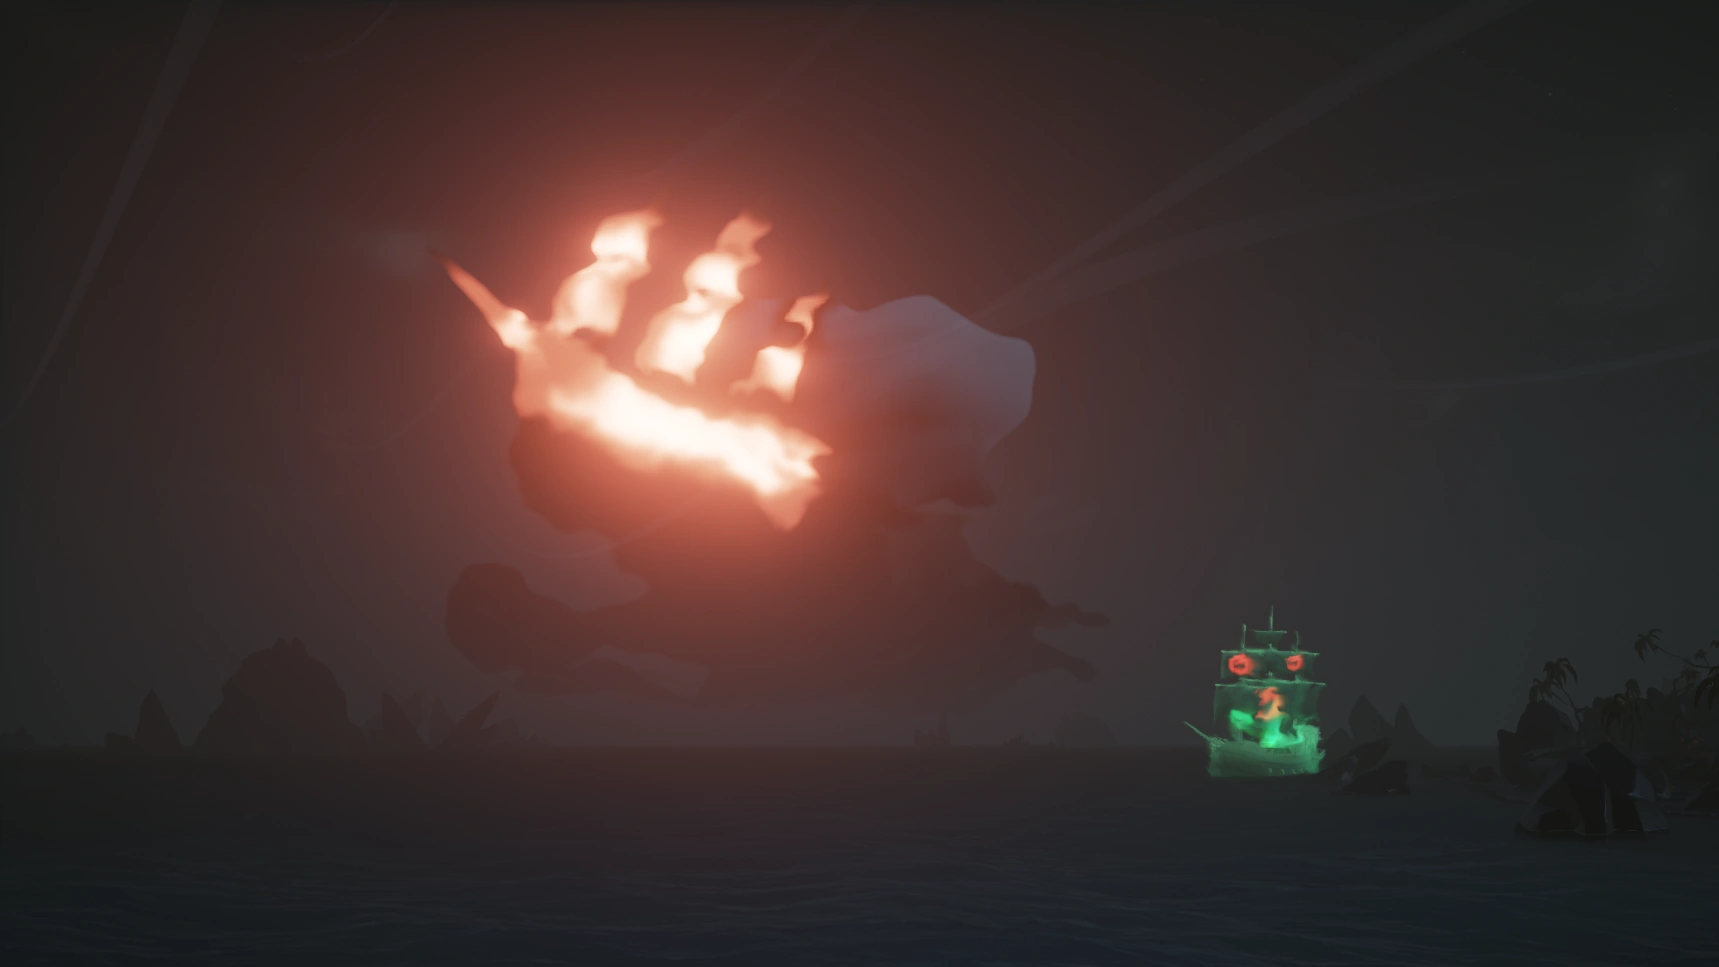
The Tale will always lead you to The Ashen Dragon anchored by Flintlock Peninsula at this point.
Step on shore by The Ashen Dragon and raise your Enchanted Lantern to find a funeral procession.
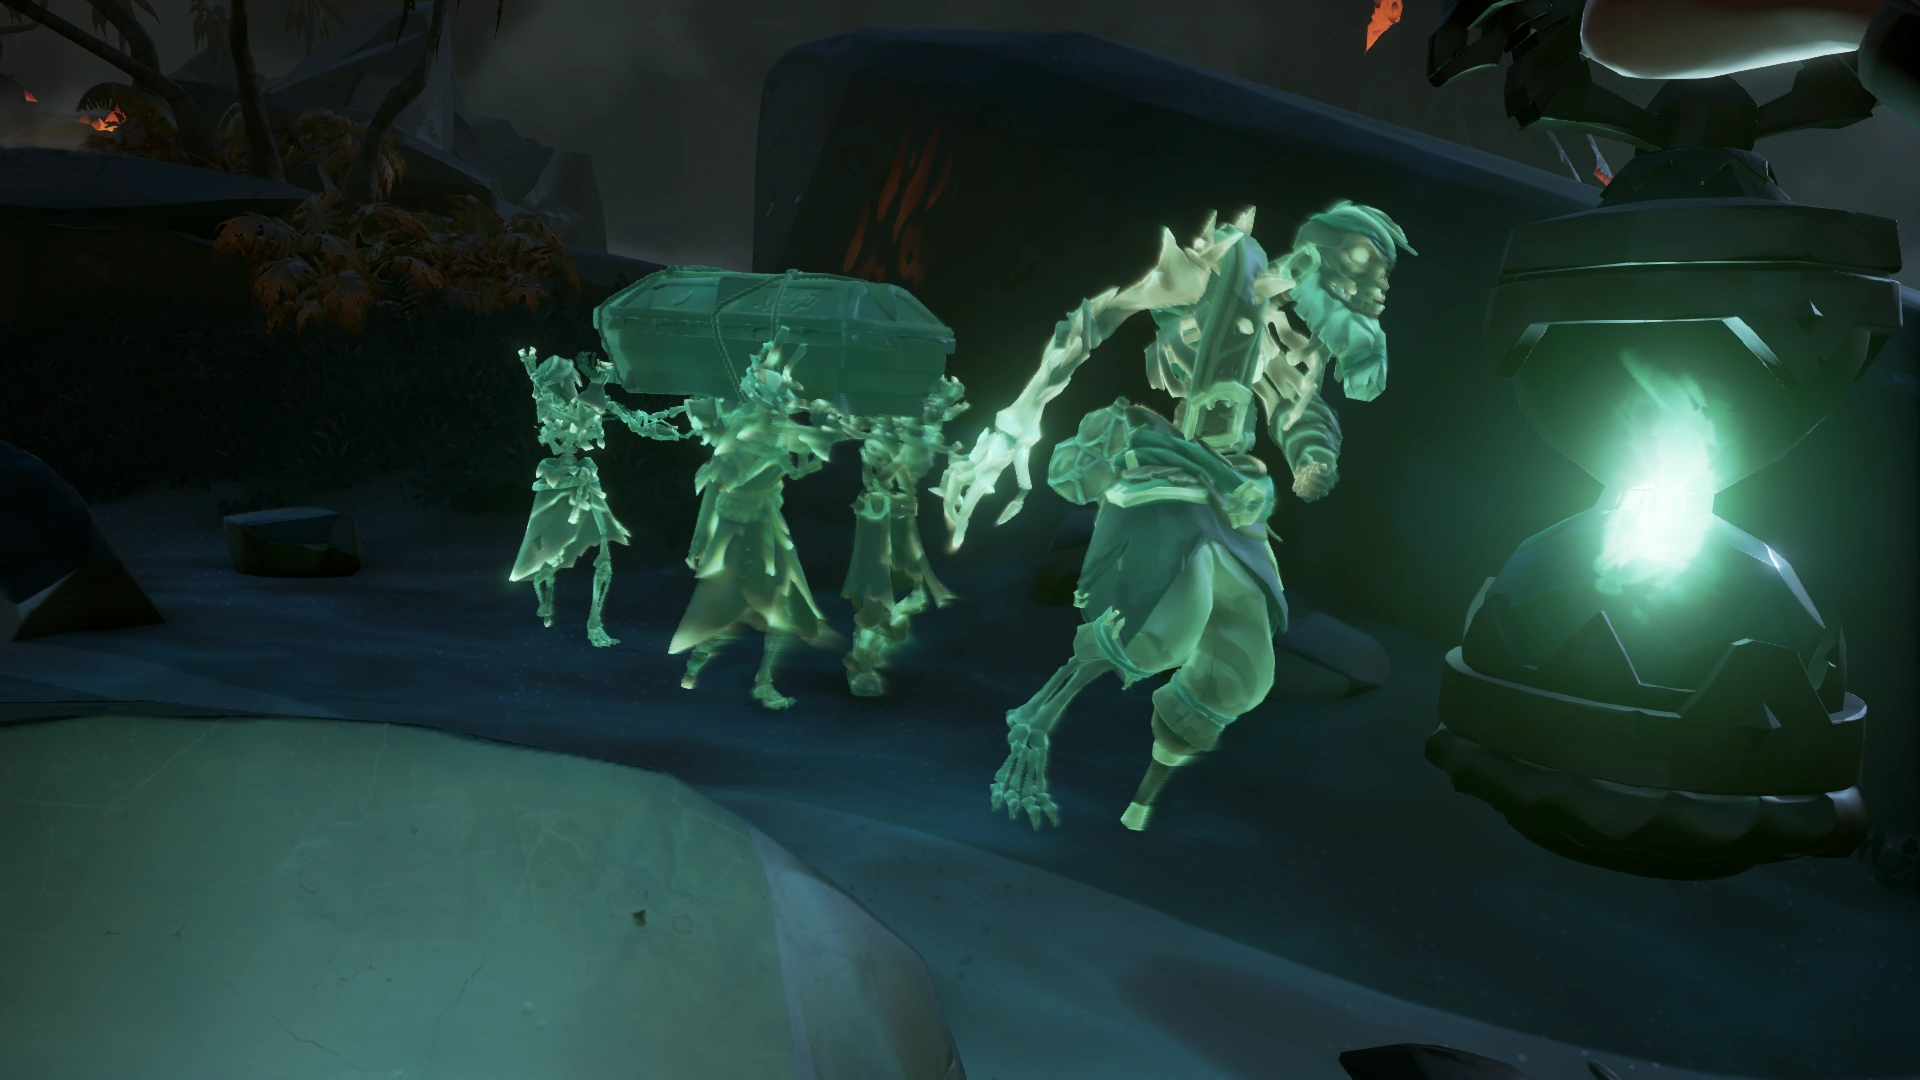
Follow the Skeleton Commander's ghostly foot and peg-steps to find where the coffin was delivered.
You will find the footsteps leading into a closed off cave. Pendragon will appear and offer you help!
Entombed
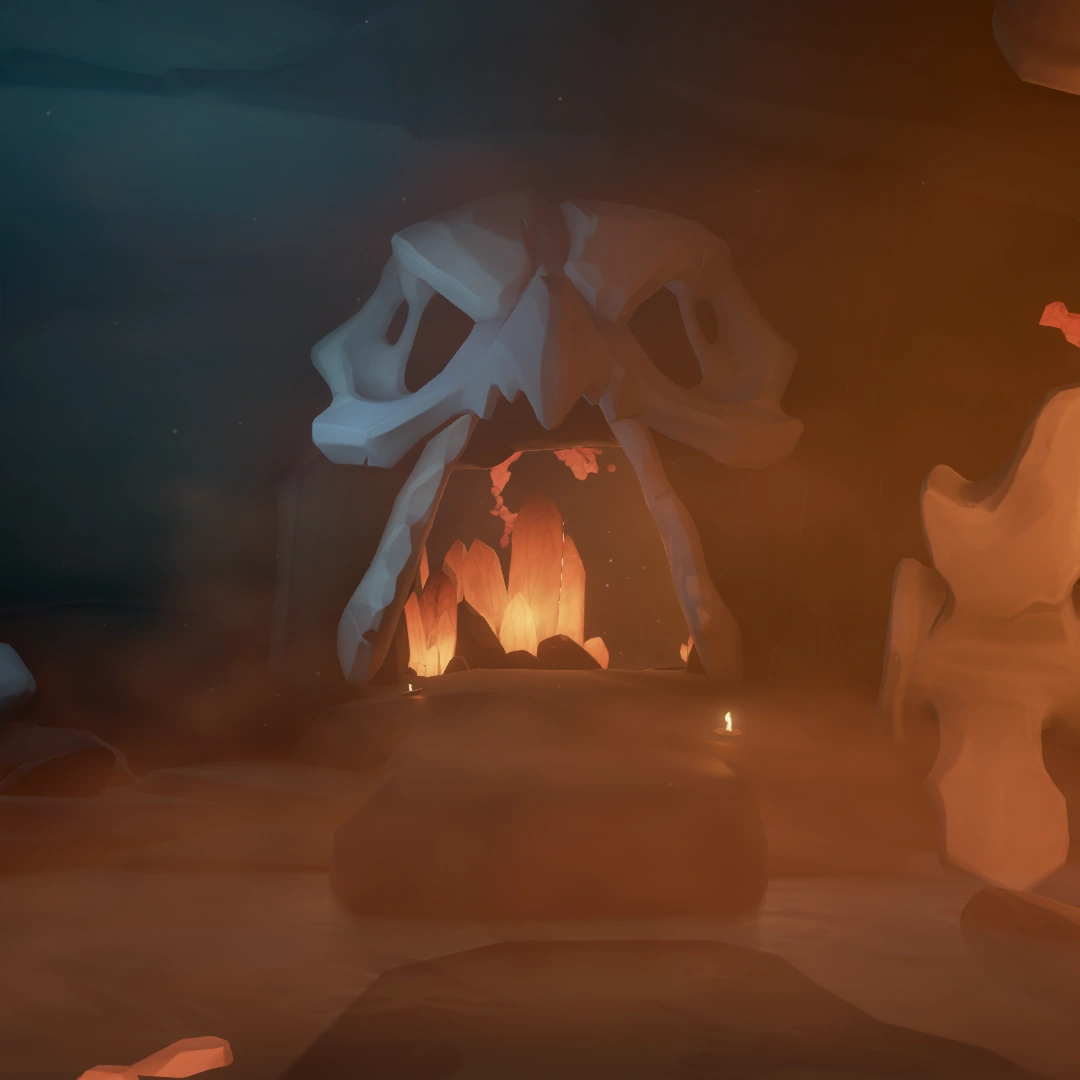

The Cave and Tomb of the final Captain
Now for the final part of the Tall Tale. Enter the Cave and be prepared to save the soul of the final lost Captain.
After freeing the Soul of the lost Captain, the Crew will acquire the Entombed Commendation and be privy to the final Cutscene.
After the cutscene, the Tall Tale will be complete, rewarding the Crew with The Seabound Soul Commendation and 8000 Gold.
Walkthrough & Images
Below you can find a Walkthrough with images for this section.
CLICK FOR WALKTHROUGH AND GALLERY
|
|---|
Walkthrough
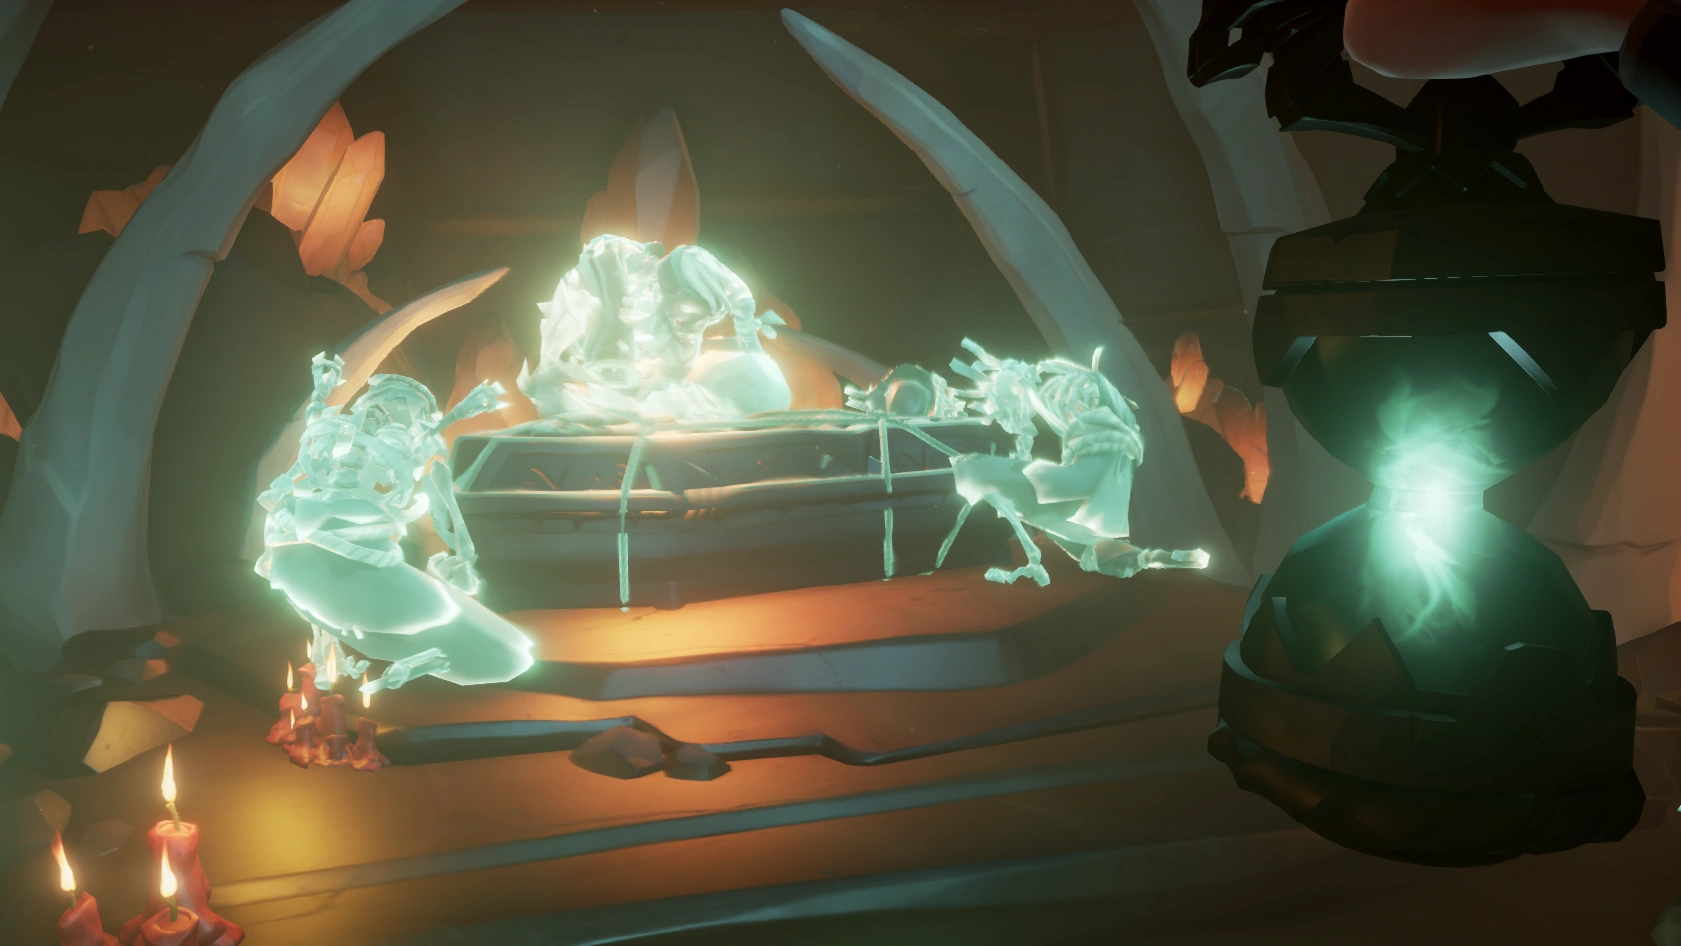
The final section of the Tall Tale is very straightforward. Pendragon will open the cave door from the other side. If you Raise your Enchanted Lantern you will see the Skeleton Commander and his Crew place the Sarcophagus on the platform ahead and pay their respects. Clearly these are the remains of someone well respected by these Skeletons.
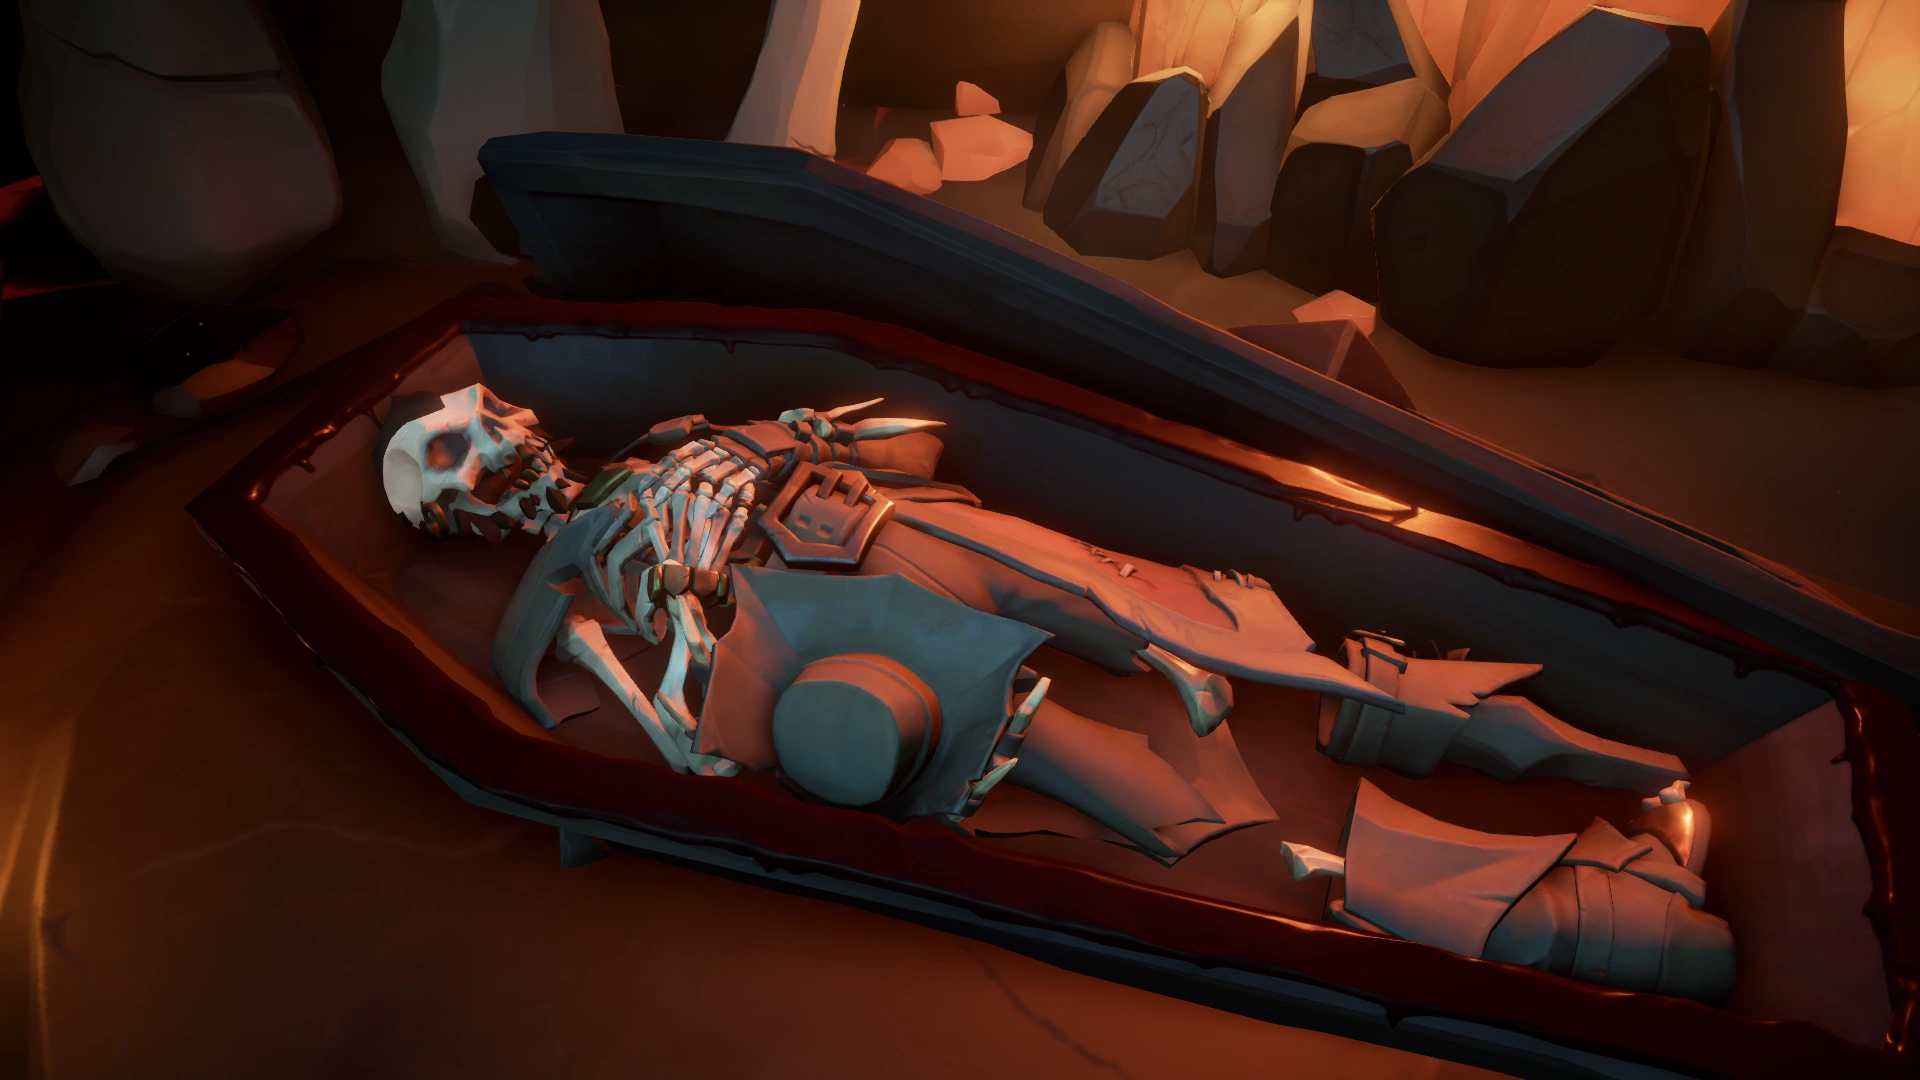
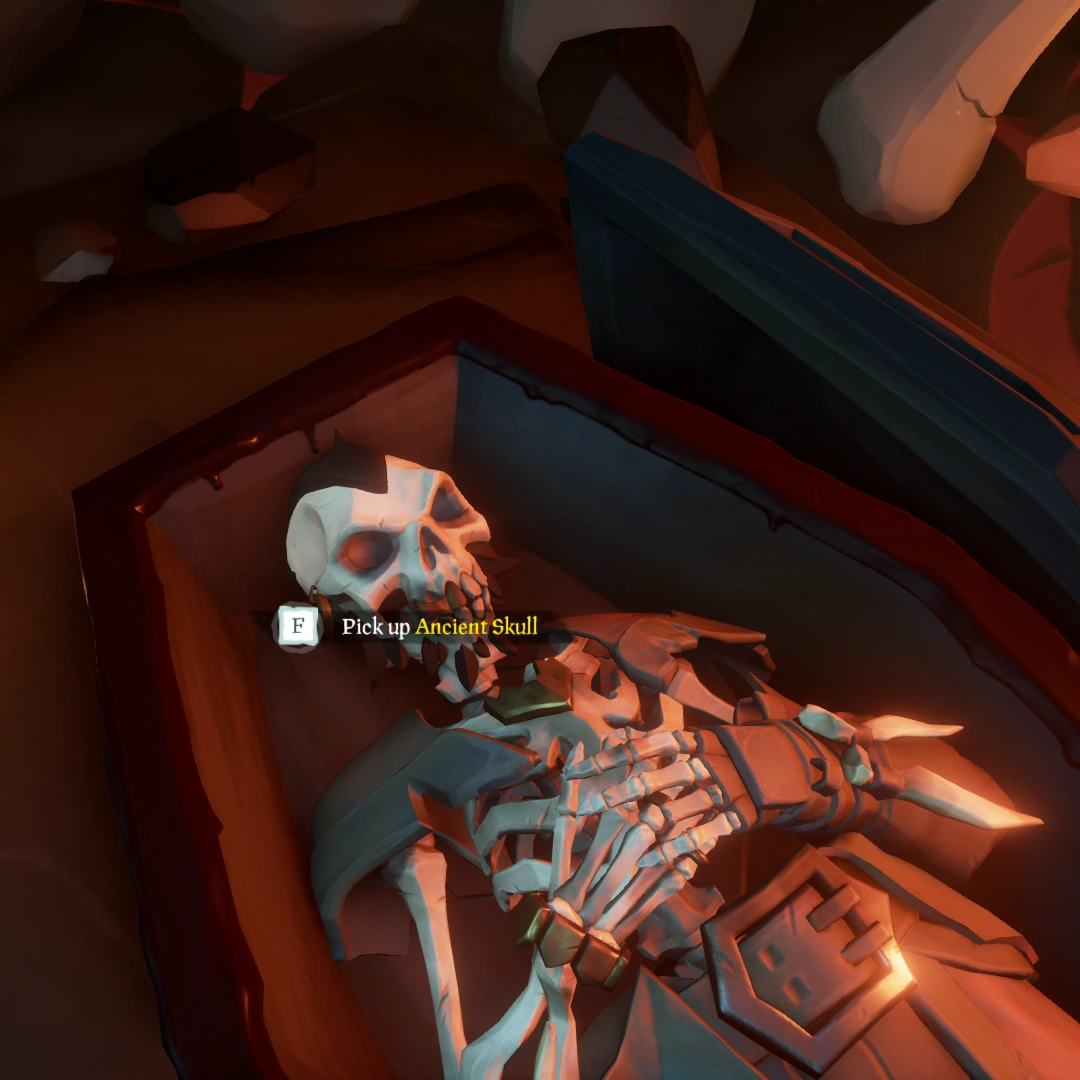
Walk to the Sarcophagus and Open it to find the last Captain inside. You will be able to Pick Up the Ancient Skull from the Sarcophagus.
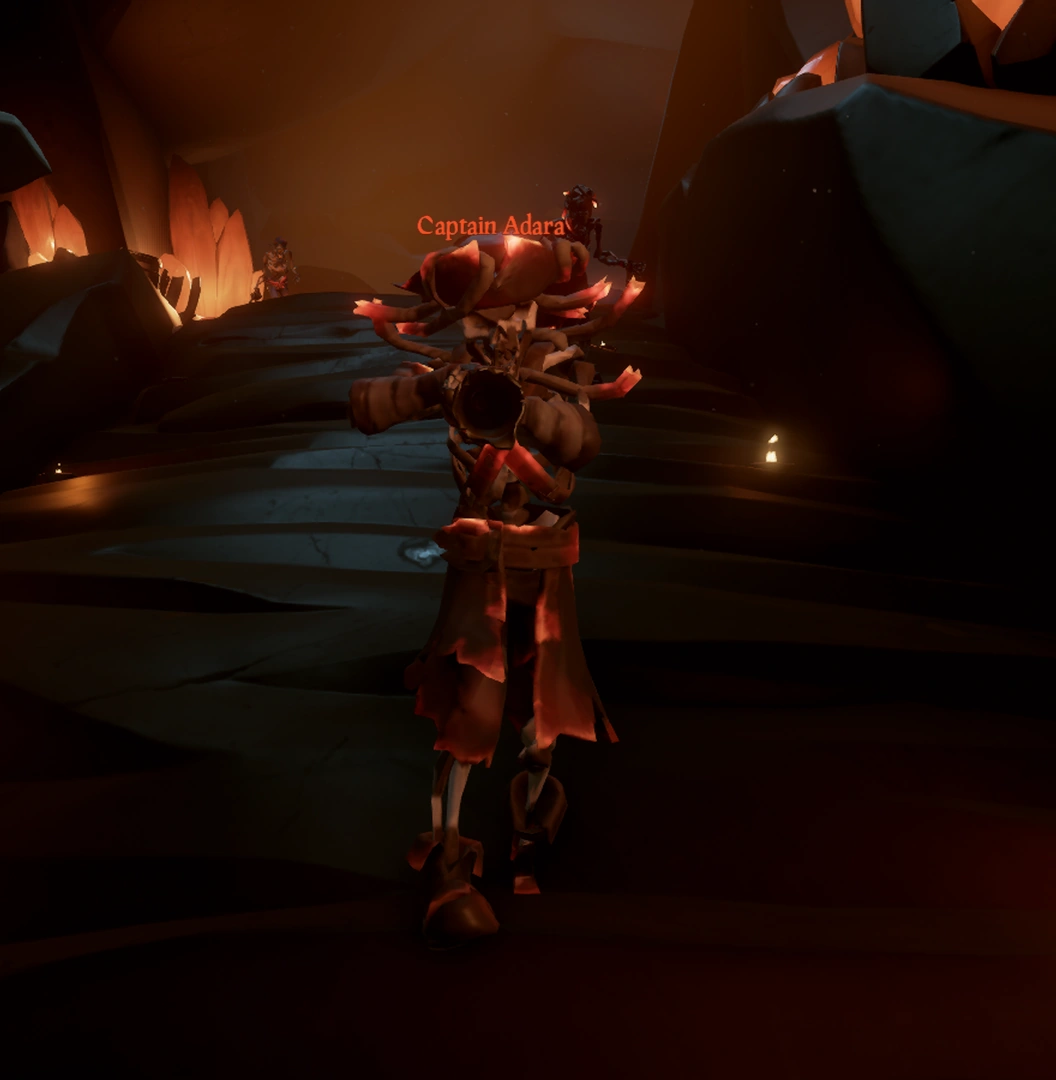
After you pick up the skull, its guardians, Ashen Skeletons burning in embers, will appear to bring you down and protect the remains of the Sarcophagus. Their Captain, named Adara, will periodically try to intimidate you with a random selection of the following lines:
Captain Adara
Line 1
No escape...
-
-
-
-
Line 2
Smell your fear...
-
-
-
-
Line 3
Trespassers...
-
-
-
-
Line4
The oath... must stand...
Line5
Burn with me...
Line6
Protect the bones...
Line7
They've took the Captain!
Line8
You shall not steal...
Line9
We will find you...
Line10
Thief!
Line11
We will... defend...
Line12
Track them down!
Line13
Surrender...
Line14
Die... Here...
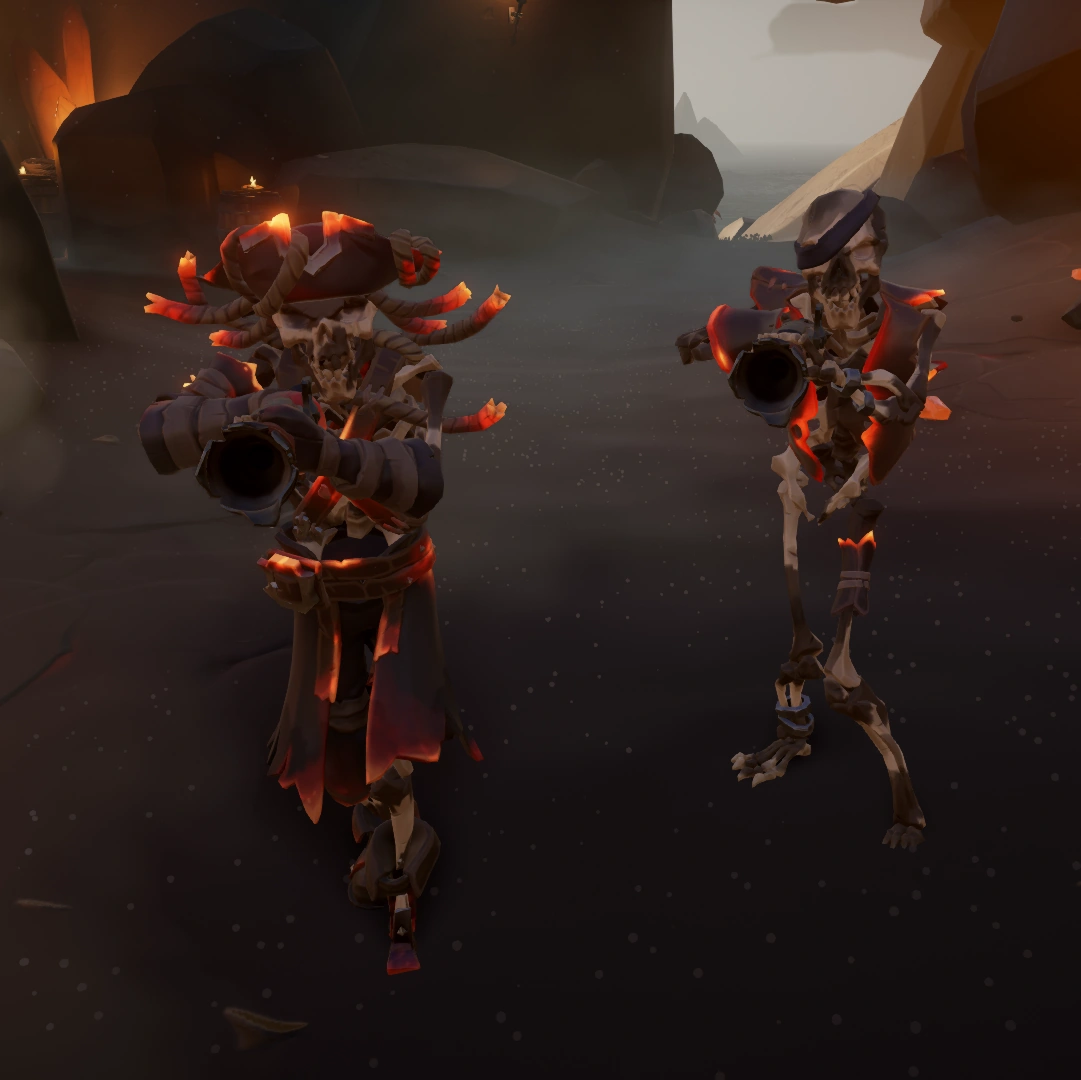
You will need to kill Captain Adara and her Ashen crew to progress ahead. Captain Adara has about as much health as a regular Skeleton Captain. As such, it should take just about 4 point blank Blunderbuss shots to kill her. Her crewmates are very easy to kill, dying to only 3 Cutlass hits, however they keep respawning as long as their captain is alive.
After you kill Captain Adara and her crew, Pendragon will materialise for the final time outside the cave and ask you to bring the Ancient Skull to him to free the final Soul trapped inside:
Pendragon
Line 1
Another trapped soul! Bring them here and I’ll set them free.
-
-
-
-
Line 2
Ahh, another skull! We make quite the team.
-
-
-
-
Line 3
Bring me the skull and I’ll free the spirit inside... Whoever they are.
-
-
-
-
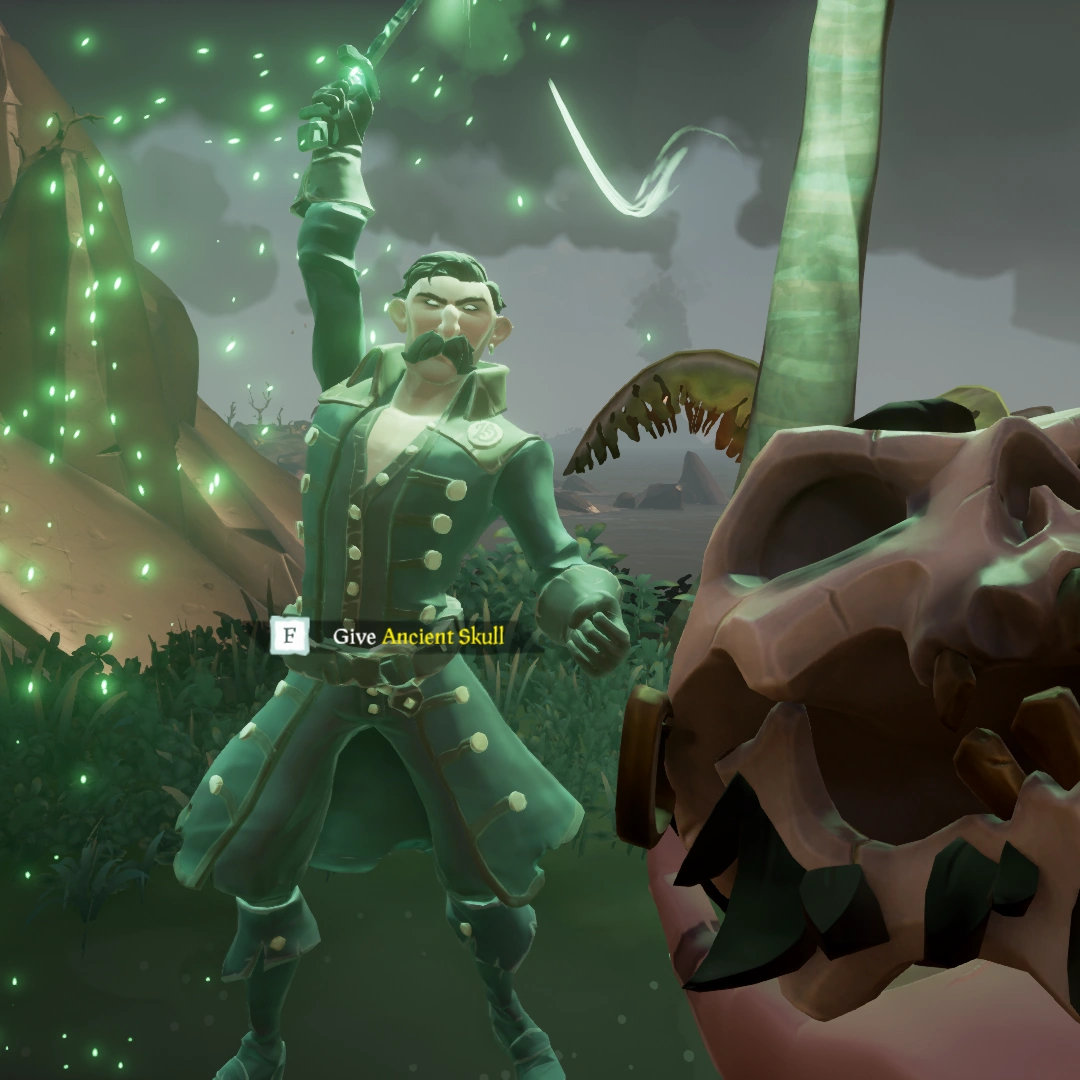
Give the Ancient Skull to Pendragon and watch him complete the final ritual with his Sword of Souls, albeit with a bit of a difficulty, for a grand spectacle:
Pendragon & the final Captain
Pendragon
Whoever this poor soul may be, the Ashen Dragon went to great lengths to hide them away. Stand back, and I’ll release them from their prison!
-
-
-
-
Mysterious Voice
Free! At! LAST!
All those long years spent trapped inside my own remains... Betrayed by my own kind...
Dreaming of the day I would be at liberty to once again burn my name across the waves. CAPTAIN! FLAMEHEART!-
-
-
-
Captain Flameheart
I see you, little pirates... The ones to whom I owe my gratitude. Thanks to your pathetic act of mercy, your sword has set me free!
The Ashen Dragon was never my prison. It was my funeral pyre, crewed by those who were loyal to my cause.
Ashen Lords who still long for the thrill of battle, and shall soon be reawakened.
This world has gotten so much weaker... Festivals! Alliances! Squabbling over trinkets! I judge it unworthy.
But know this, pirates. Know this, merfolk. Know this, Sea of Thieves... I have returned, and the fires of my vengeance shall consume you all!-
-
-
-
Pendragon
...What have we done?...
Your reward for completing the tale is 3,000 Gold
Image Guide
Go inside the cave to find the ghostly skeletons paying their repects.
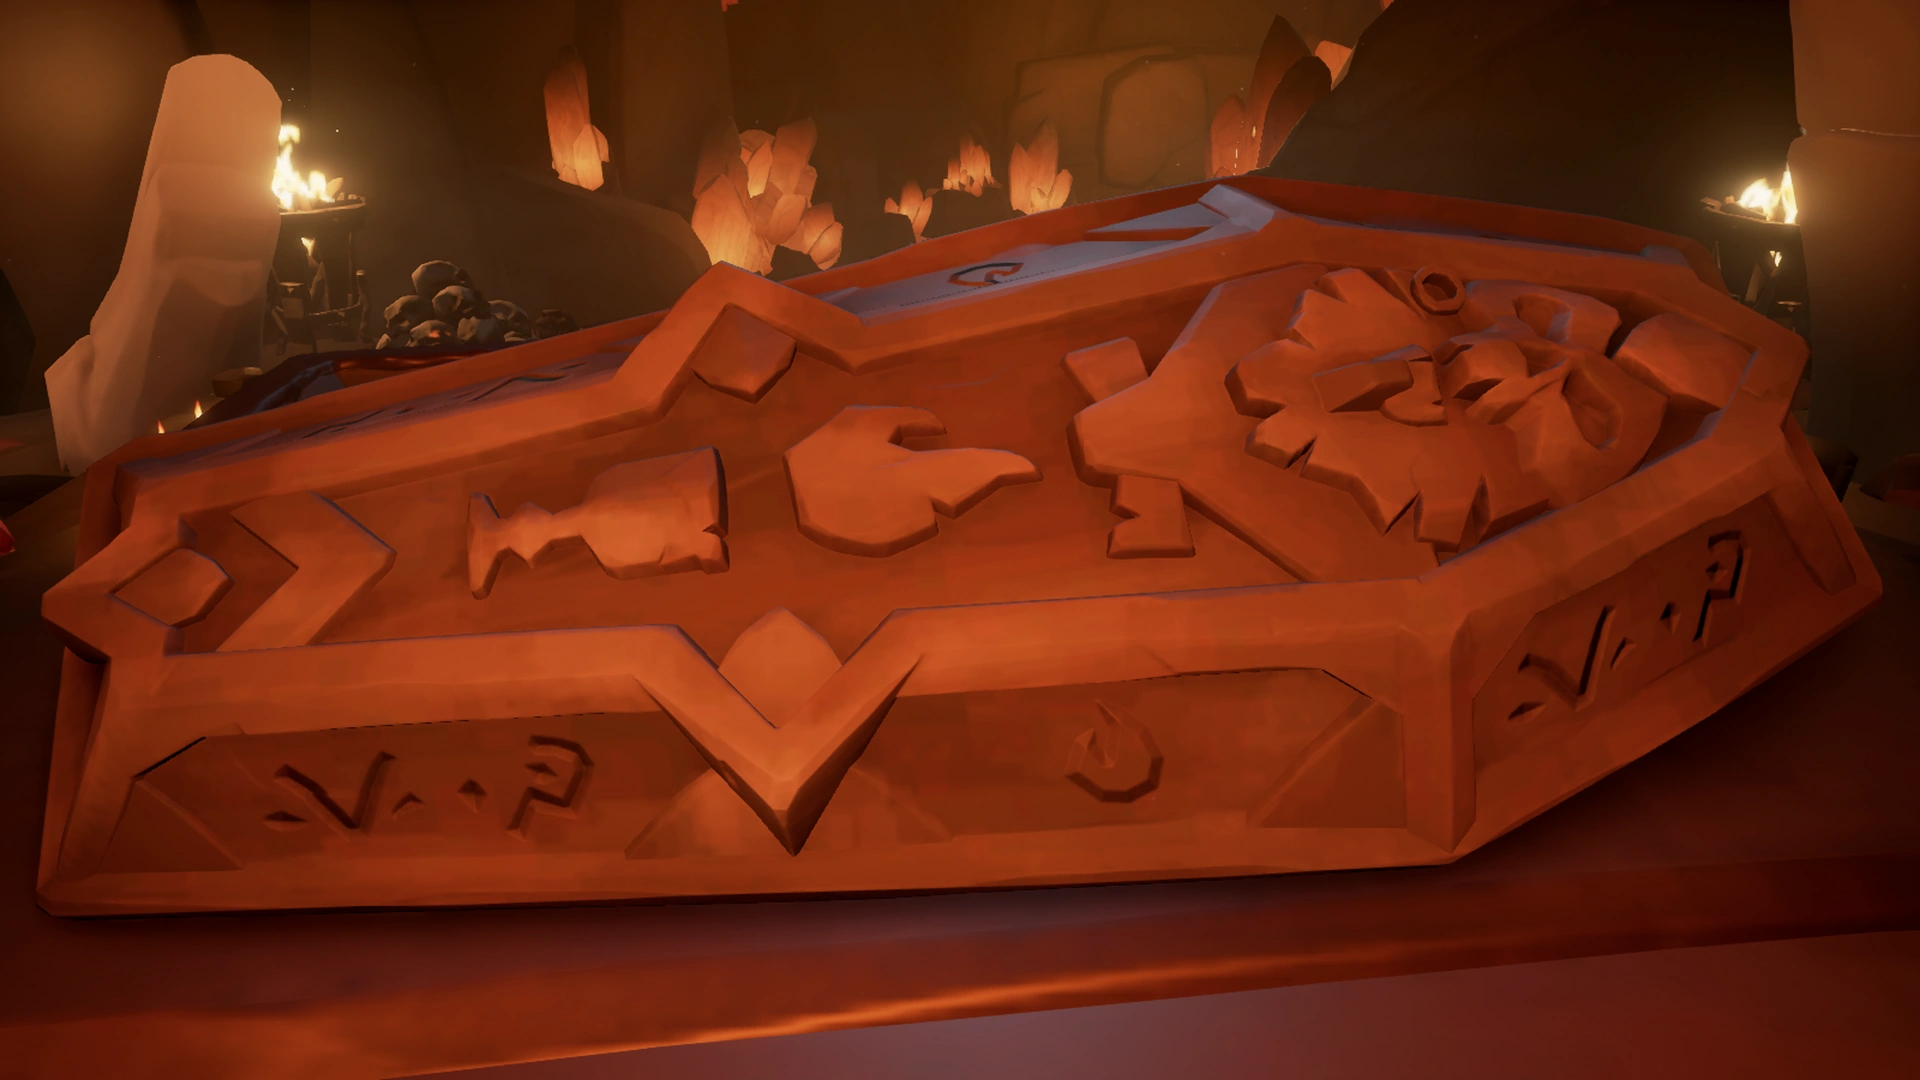
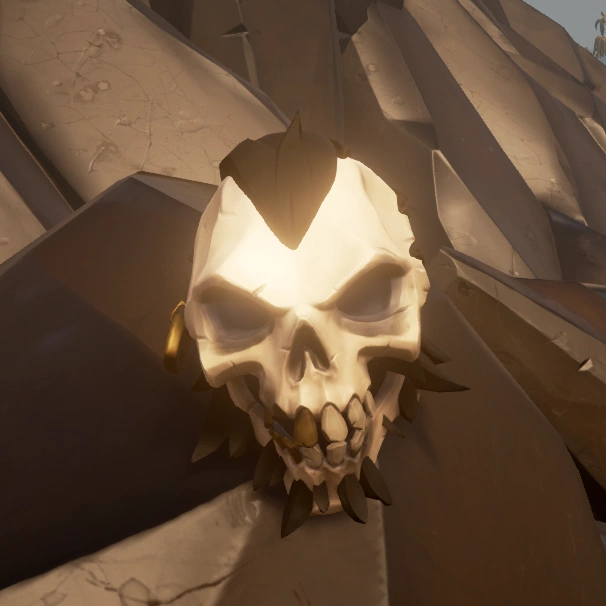
The Sarcophagus has Skeleton Glyphs on it, reading Flame and Heart.
Once open, you will find a large mysterious Skeleton inside.
Pick up the Skull from inside.
The Ancient Skull in hand, hiding the soul of the final Captain.
As soon as you pick up the Skull and leave the cave, Captain Adara of The Ashen Dragon will ambush you.
Despite looking menacing, these skeletons are fairly weak.
Give the Skull to Pendragon.
Once again, Pendragon will use his Sword of Souls to set the soul of the Skull's owner free.
This time, however, it takes a lot of energy.
The Skull's owner revealed.!

Journals
With The Seabound Soul Tall Tale active, five Journals will appear around The Wilds and The Devil's Roar, telling the story behind The Ashen Dragon from the perspective of the ship's Captain. These Journals are only present for the crew who is doing the Tall Tale itself. Reading all Journals award the The Ashen Journals Commendation.
The locations of the following Journals are always mentioned in previous Journal entries.
Click on the Expand button if you wish to see an image of an exact location of any given Journal.
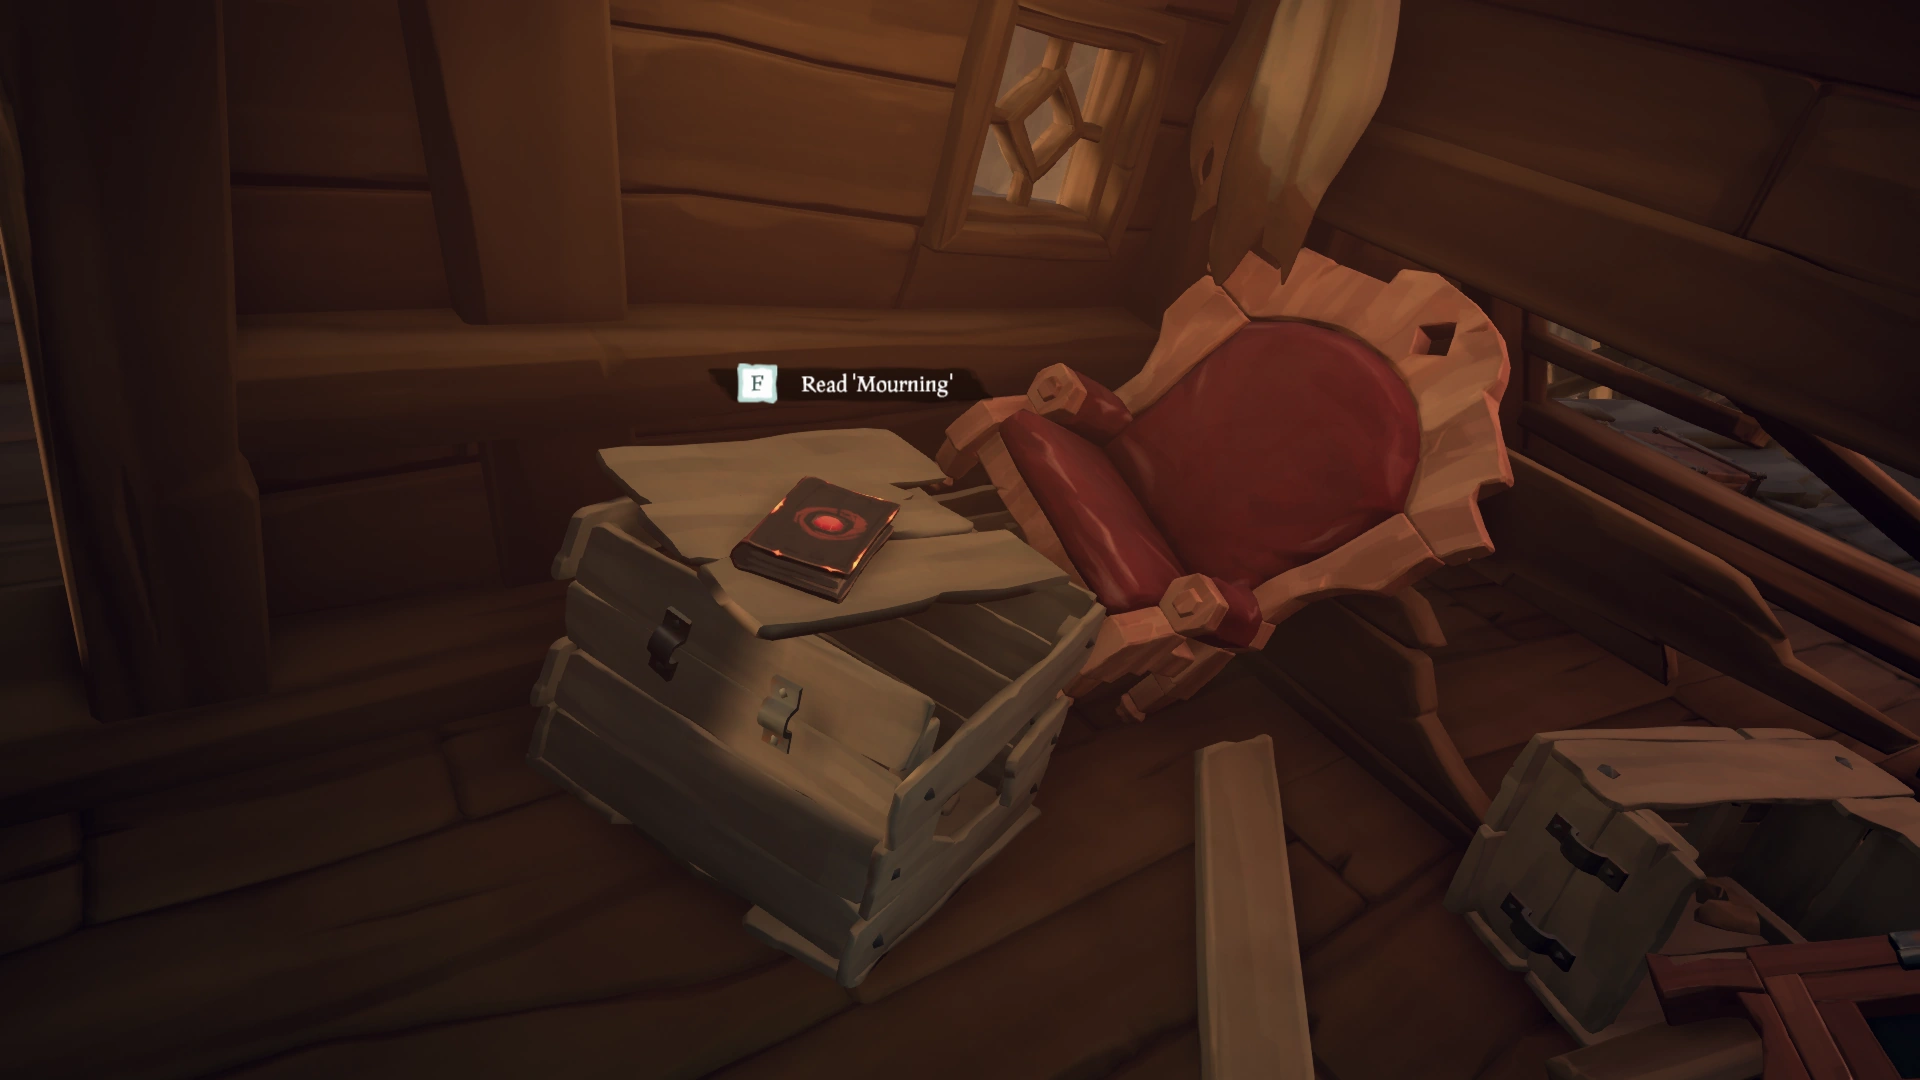
Mourning
The Mourning Journal at Shipwreck Bay, in the Captain’s Quarters of the Blackwyche resting on a box by a chair. This is the same room where the Tale Book is found.
Today is the Fated Day. The darkest of hours, on which we of the Ashen Dragon must set sail to fulfil our final duty.
I am her Captain. I alone remember the words of flesh-kind, though I am as old as our ship. And yet, on this Fated Day, another commands me.
He speaks little, save to explain the Rites. The flames that perpetually wreath our vessel seem to coil around him, as if longing for his touch.
It seems our route is preordained, and takes in many past glories. First, we shall sail to Shiver Retreat, blazing a path across the waves.
Our precious cargo and its guard are below deck, in their rightful place. All that we are, all we have accomplished… ends today.
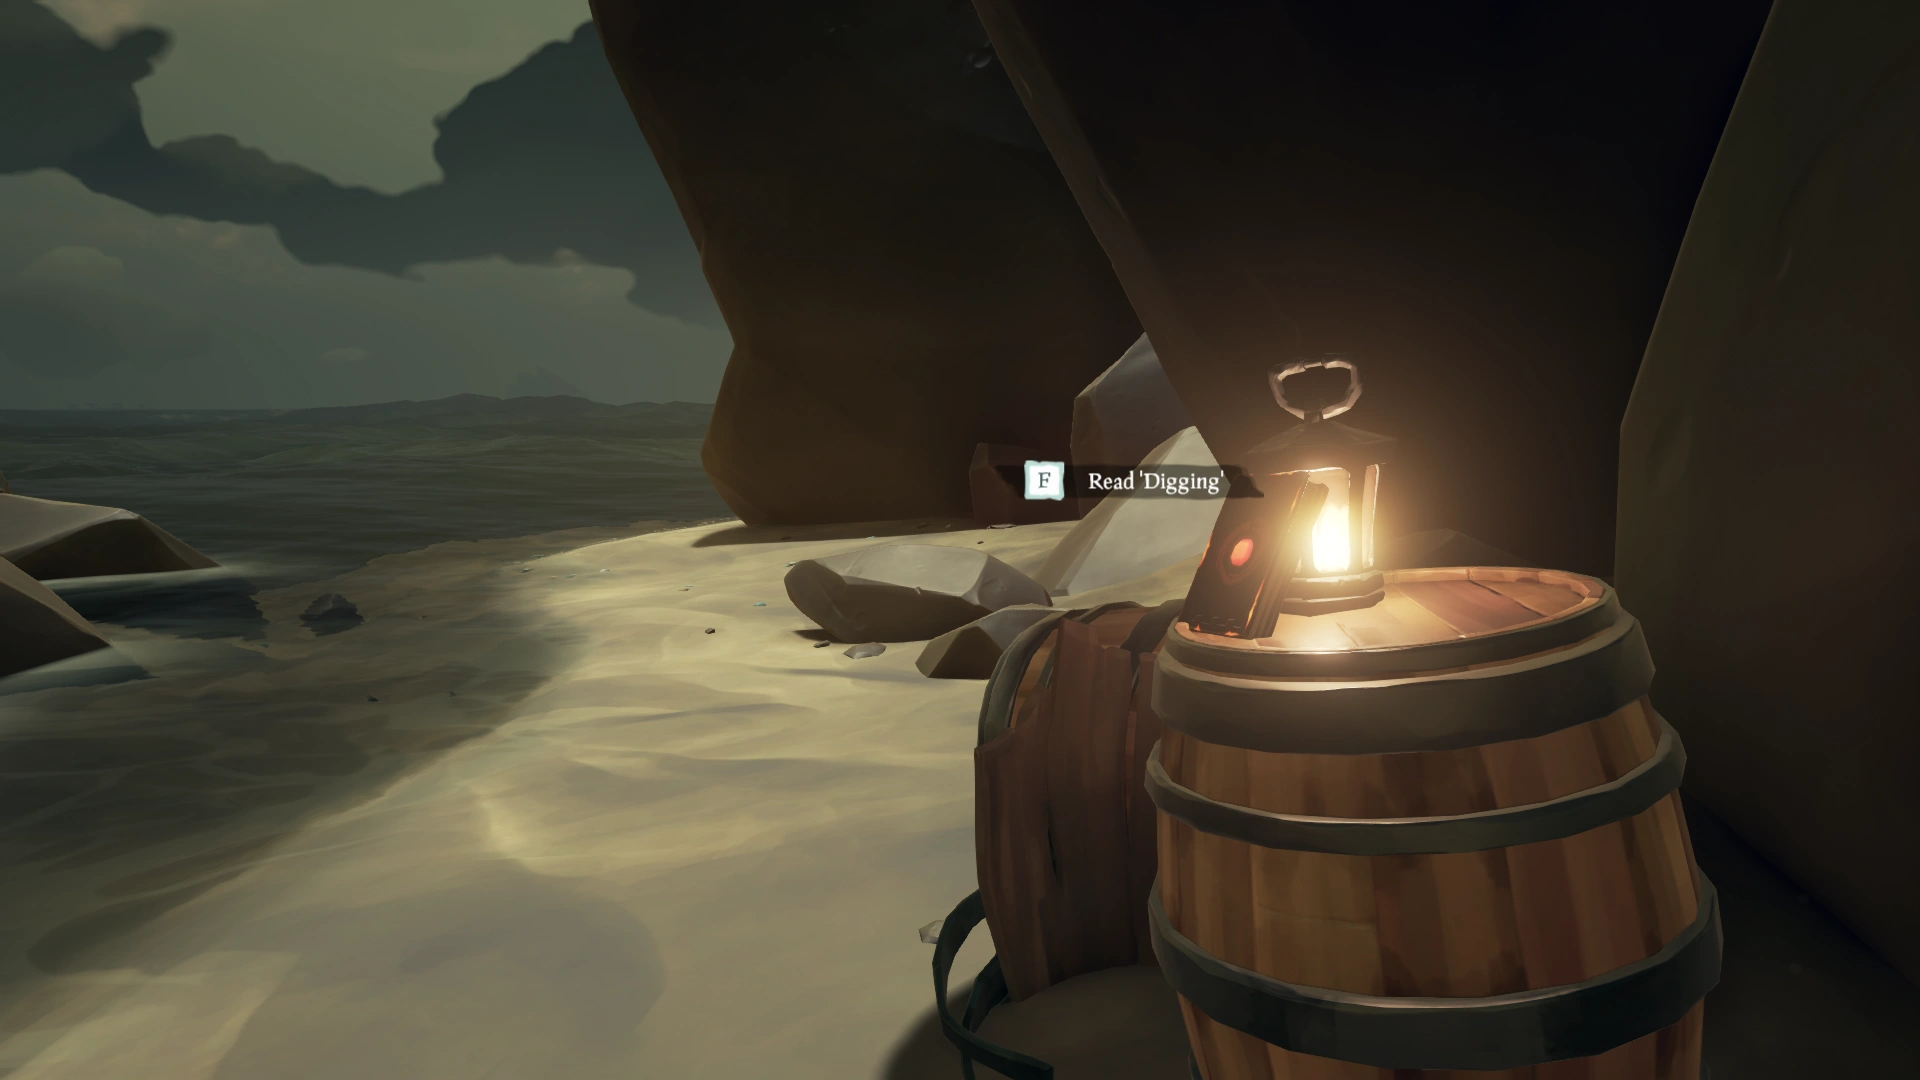
Digging
The Digging Journal is found at Shiver Retreat, one of the possible locations of the first section of the Tall Tale. The Journal is on top of a Barrel Between two rock formations in the middle of the island. This Journal also documents the location of the 3 Ashen Artefacts required for the Ashen Artefacts Commendation.
For the first time since our mission began, our Commander issued new orders. I did not dare to question them.
Tri-Rock Isle, Cinder Islet, Cursewater Shores. At his instruction, we sailed to each of them in turn, and I went ashore.
There, I buried three great treasures from our hold - relics that even our Commander regarded with something approaching fear.
I can only hope I have hidden his belongings well enough that they shall remain undisturbed. Even as he is now, I fear his wrath.
Now, we resume our charted course, passing Liar's Backbone as we sail. I hope that this shall be our final diversion.
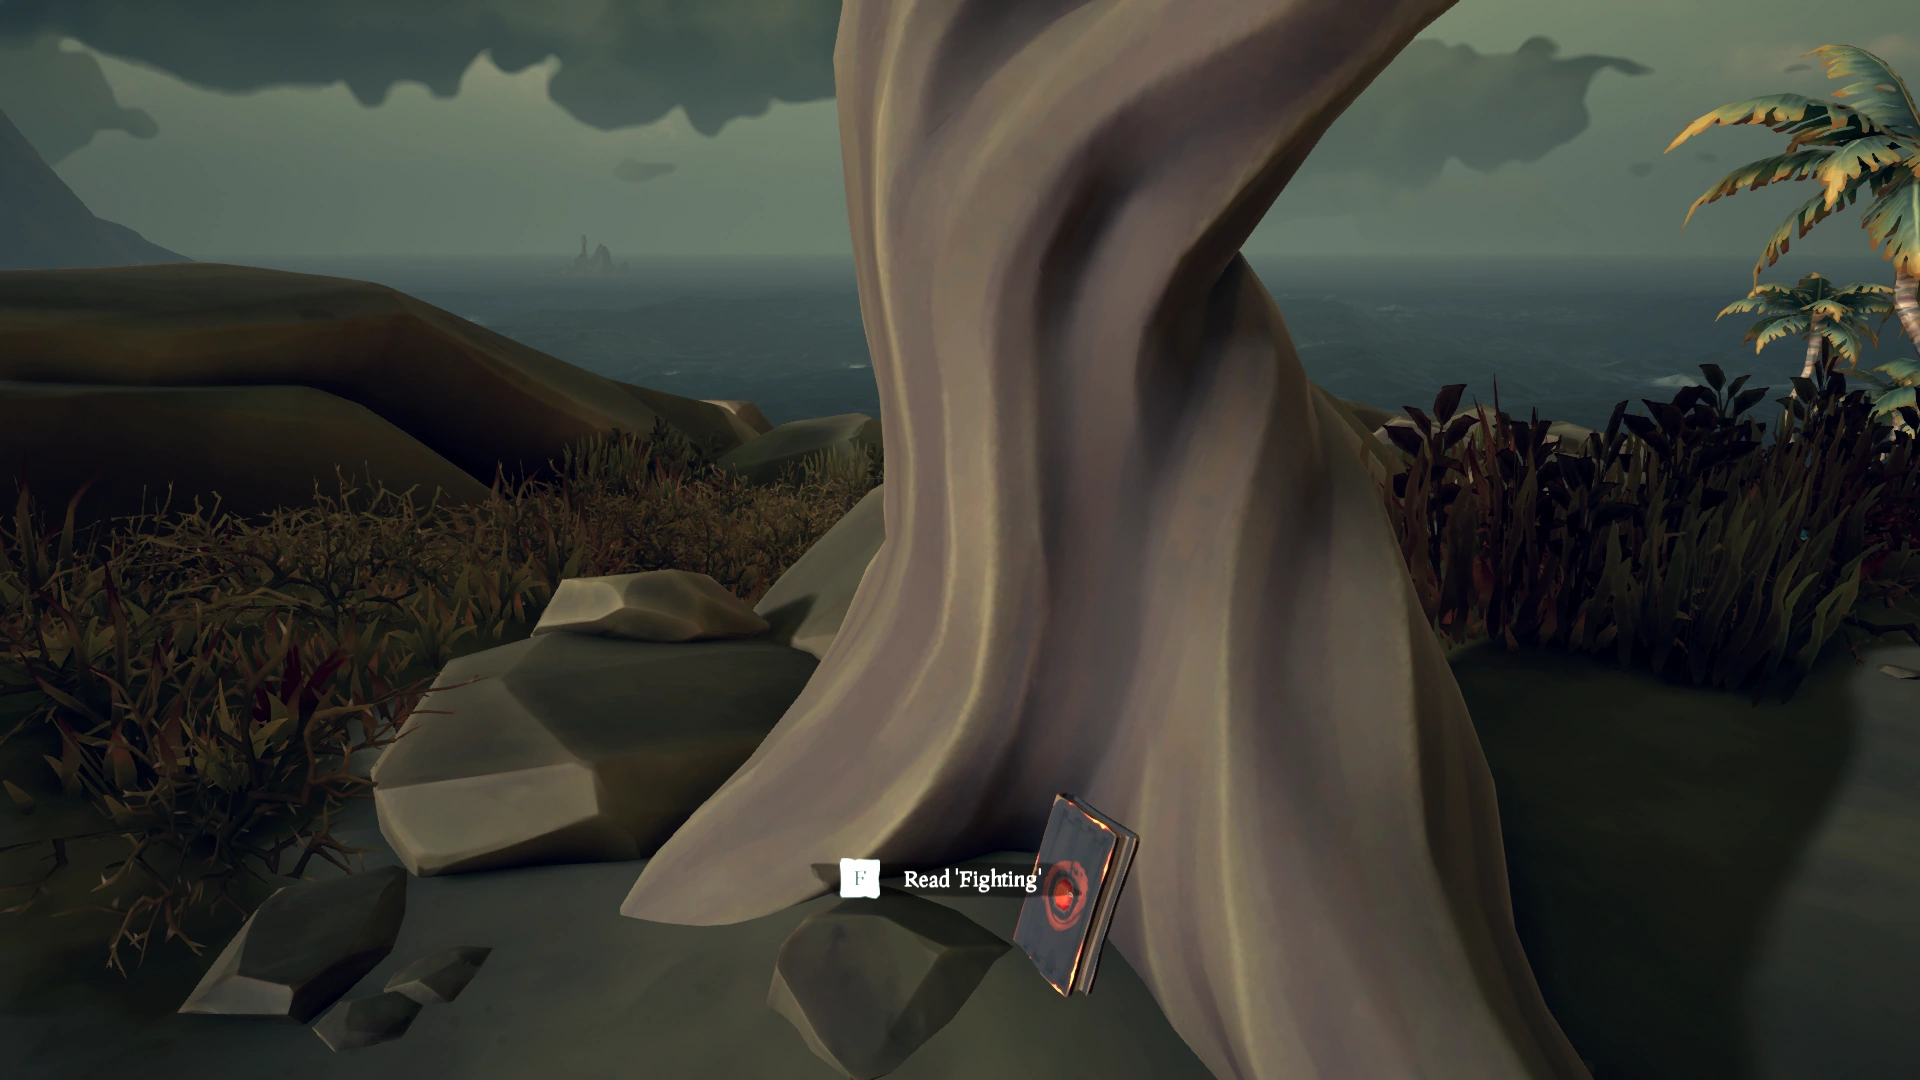
Fighting
The Fighting Journal is found at Liar's Backbone, one of the possible locations of the first section of the Tall Tale. The Journal is up the hill, nested between the roots of a dead tree.
Wretched pirates! They dared to interrupt our journey and try to scavenge from us! Now we must moor at Scorched Pass and make repairs.
Two galleons approached at once, as allies. Clearly they meant to surround us, though the heat of our flames kept them at bay.
To my surprise, our Commander stepped forward, moving with a swiftness I did not expect and burning white-hot with righteous fury.
So magnificent was he, one ship turned and fled! The other was ripped apart by our cannon fire even as our crew assailed theirs.
To punish their insolence, our Commander himself boarded their vessel, using his great power to curse their Captain before hurling her into the hateful sea.
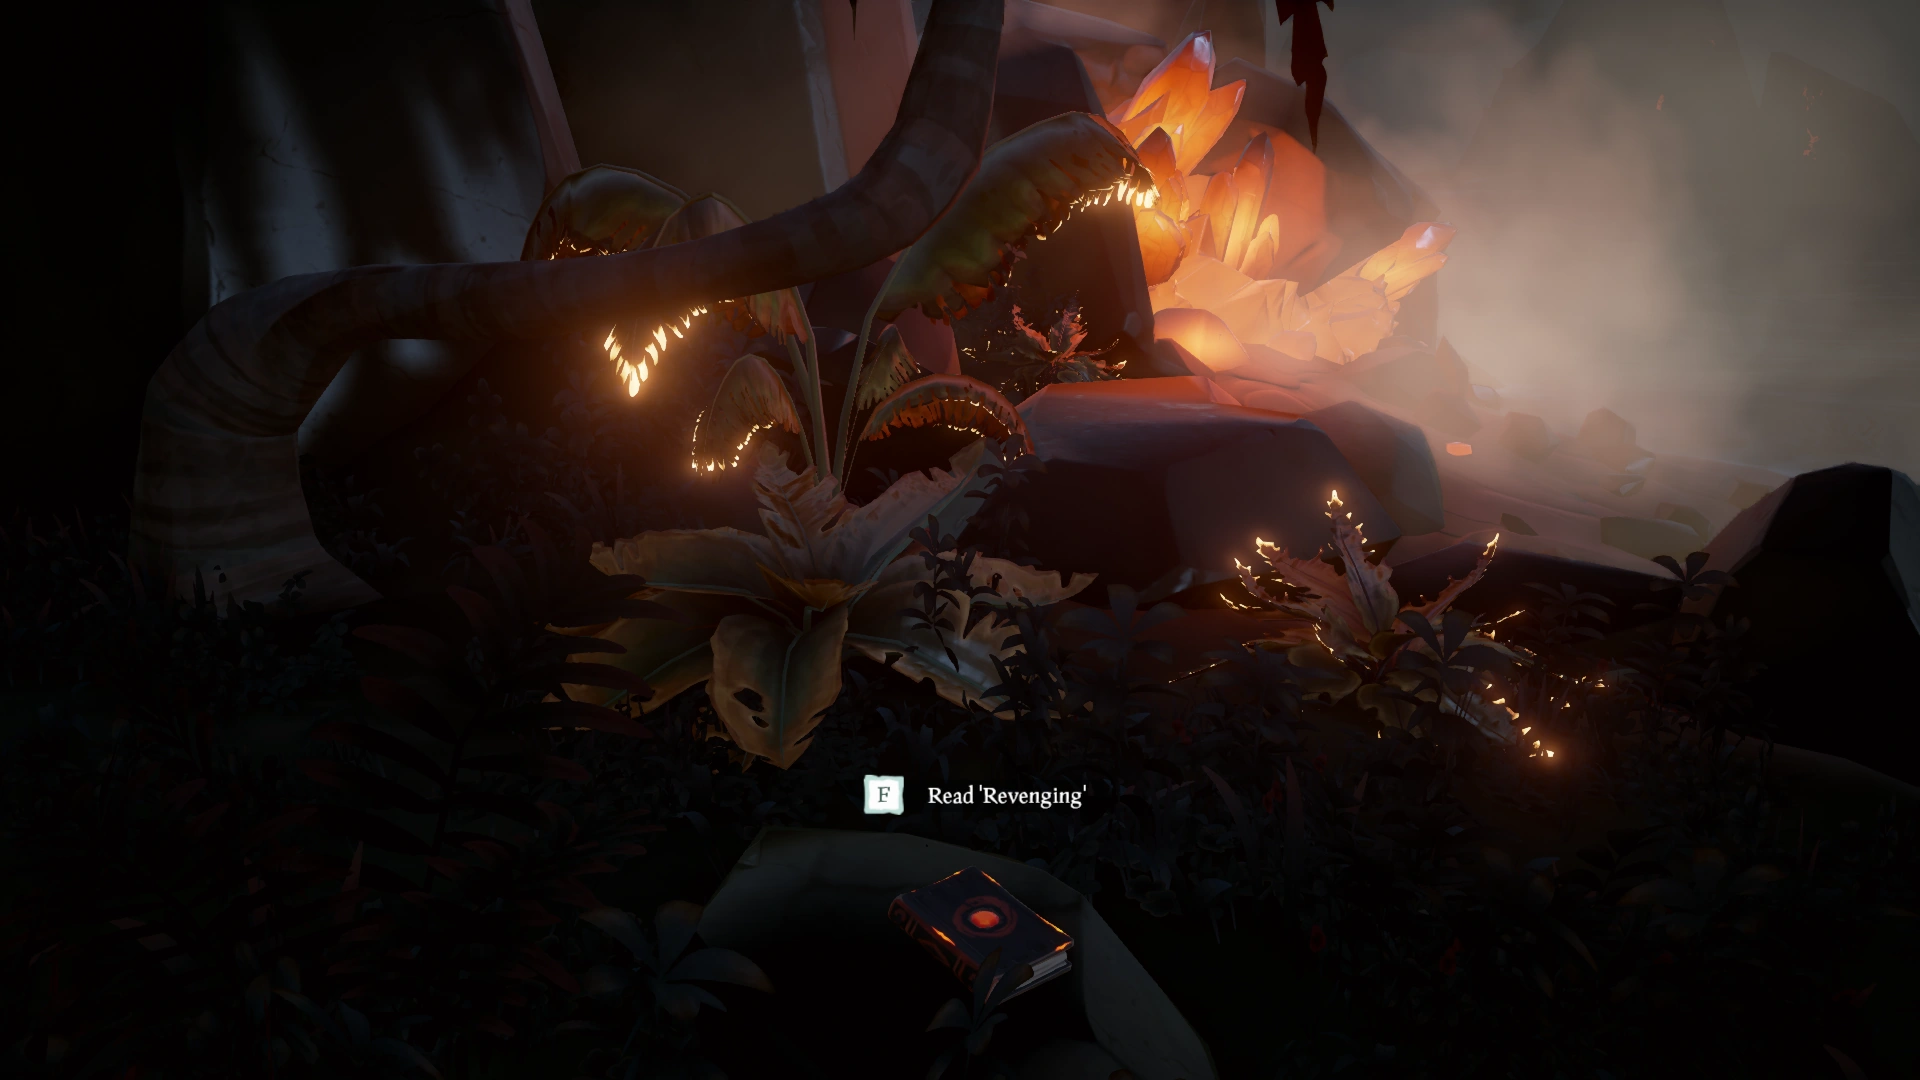
Revenging
The Revenging Journal is at Scorched Pass, one of the possible locations of the second section of the Tall Tale. The Journal is placed on a single small rock between three palm trees by the larger eastern rock formation.
It was a risk, but I was right to take it. Our repairs had left us low on supplies, and I could not rule out the possibility of another attack.
I do not know how the pirates divined our heading. Perhaps it was mere chance, and yet, when I set foot on land, her Captain was lying in wait.
Had I sent my crew, they would likely be lying in pieces, but my bones were forged in fire. In moments, it was he who lay broken at my feet.
As before, our Commander bound the fool’s spirit so that he could not return from the Sea of the Damned. He will plague us no longer!
The final leg of our journey sees us pass Flintlock Peninsula. Until then, I have much to consider. Once our mission is complete, what will become of us?
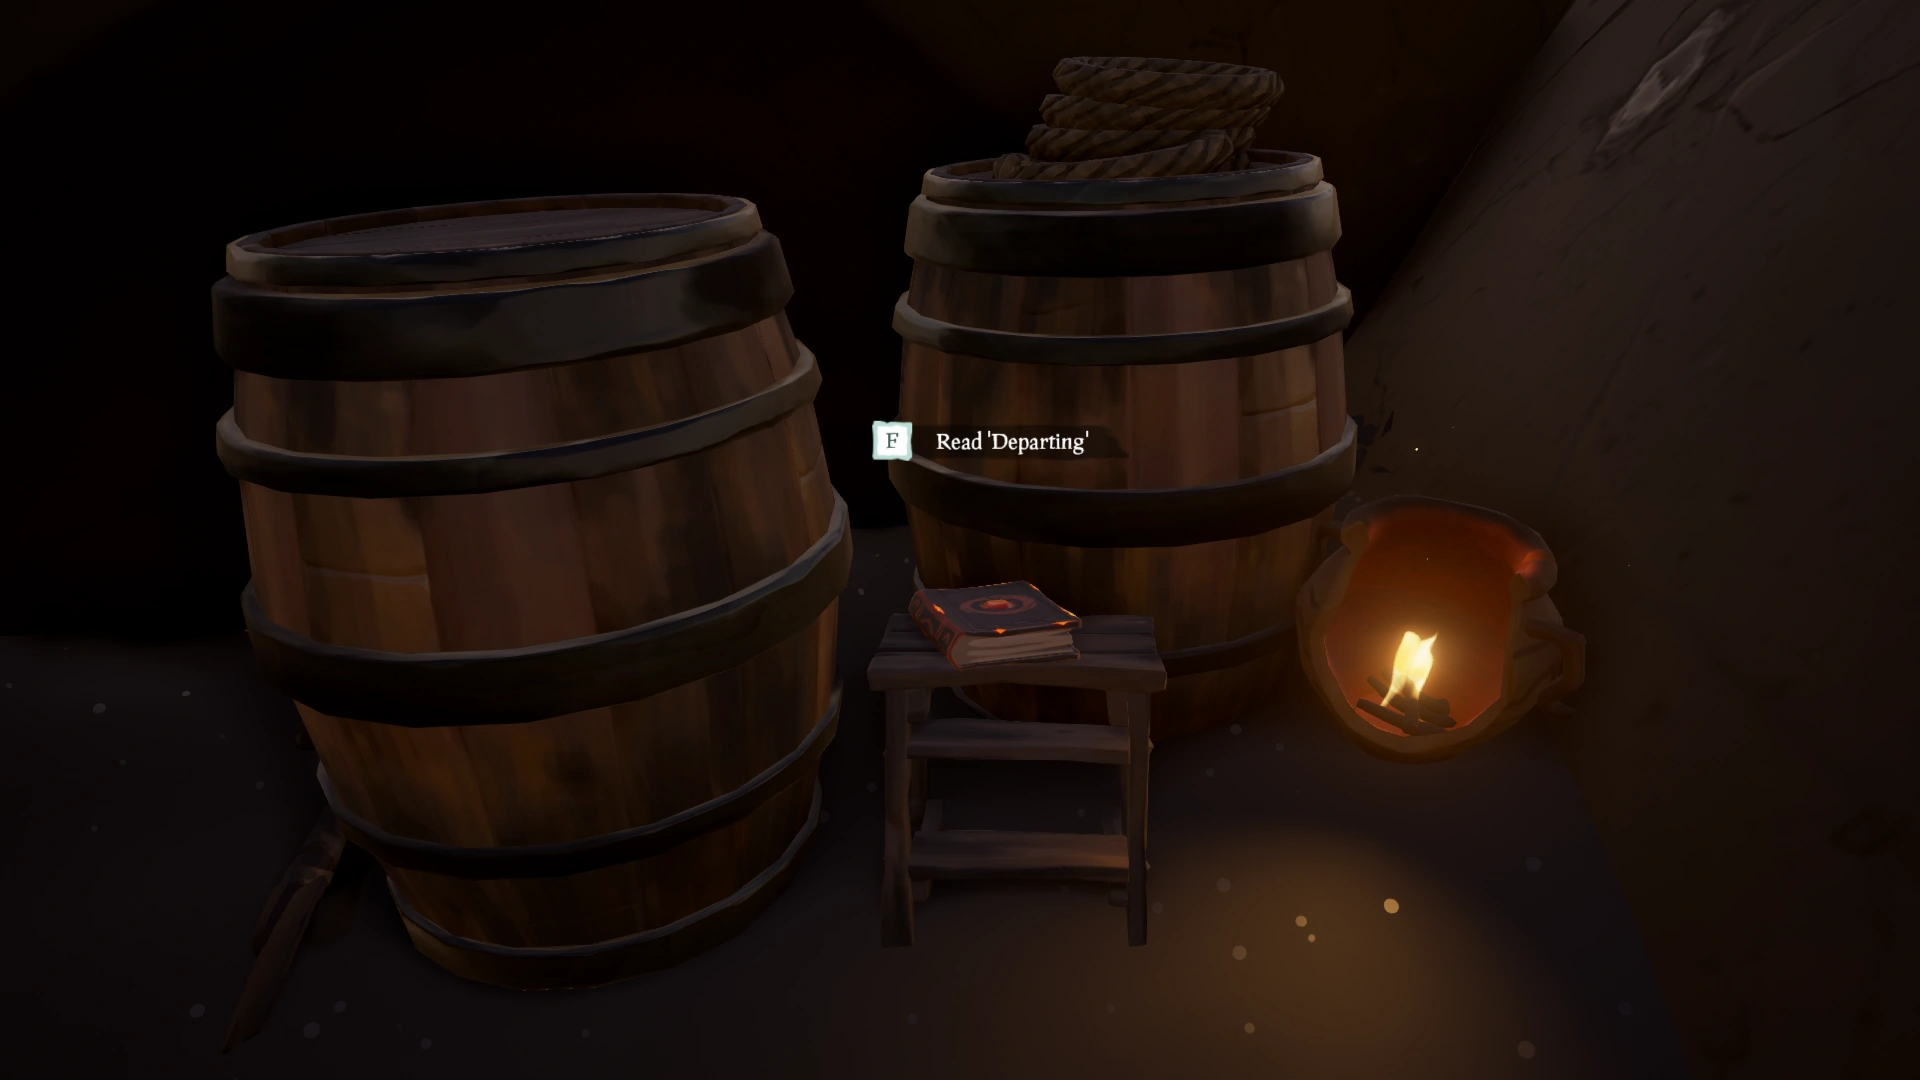
Departing
The Departing Journal is at Flintlock Peninsula, the final location of the Tall Tale. This Journal is placed with two Barrels found on the north-east side of the Volcano, near the island's Beacon. The Journal is next to a cliff overlooking the Tomb Cave.
The deed is done. A great door protects the remains, and will keep pirates and other intruders at bay. I have ensured it can only be opened from within.
When the last of the Rites had been completed, our Commander bade us set course, deep into the Devil's Shroud itself.
I thought perhaps he meant for its tendrils to destroy the Ashen Dragon as it has so many other ships, but he gave me one last order.
Once he had spoken, the Commander burned so fiercely that even the fog seemed afraid, and so a path was cleared. Such is the might of an Ashen Lord!
He is naught but dust now, his power expended. As ordered, we will pass through the Shroud and into hiding until we are needed once more.
One day, he shall summon us, and the world shall once again know the fury of the Ashen Dragon...
The Ashen Artefacts
The Seabound Soul Tall Tale has three Ashen Artefacts hidden and buried at three different Islands. The Location of these Artefacts is documented in one of the Ashen Journals (see the Ashen Journals section above). These Artefacts have to be discovered for the Ashen Artefacts Commendation. The Artefacts have unique names and Pirate Chat commands, however they look similar to regular Devil's Roar versions of Trinkets and can be sold for a relatively small amount of Gold and Reputation to the Gold Hoarders.
How to Find Them

Players can read up on the location of the buried Artefacts from the second Ashen Journal located at Shiver Retreat (see Ashen Journal section above). These locations are: Tri-Rock Isle, Cursewater Shores & Cinder Islet. Each of these Islands can be one of the possible locations of various sections of the Tall Tales.
The exact burial spot of the Artefacts can be found by raising the Enchanted Lantern provided with the Tall Tale to see the ghostly apparition of a Skeleton burying the Artefact with a shovel. Use your own Shovel at the same location to uncover these Artefacts.
The Artefacts

Found buried on Tri-Rock Isle. The Lantern shows the Artefact being buried in the middle of a circular patch of dirt between some grass, palms and rocks.
The Chalice shares its model with the Roaring Goblet Trinket.
Found buried on Cursewater Shores. Cursewater Shores is one of the possible locations of the second section of the Tall Tale. The Lantern shows the Artefact being buried on the North-Eastern side of the Island right by some rocks and bushes.
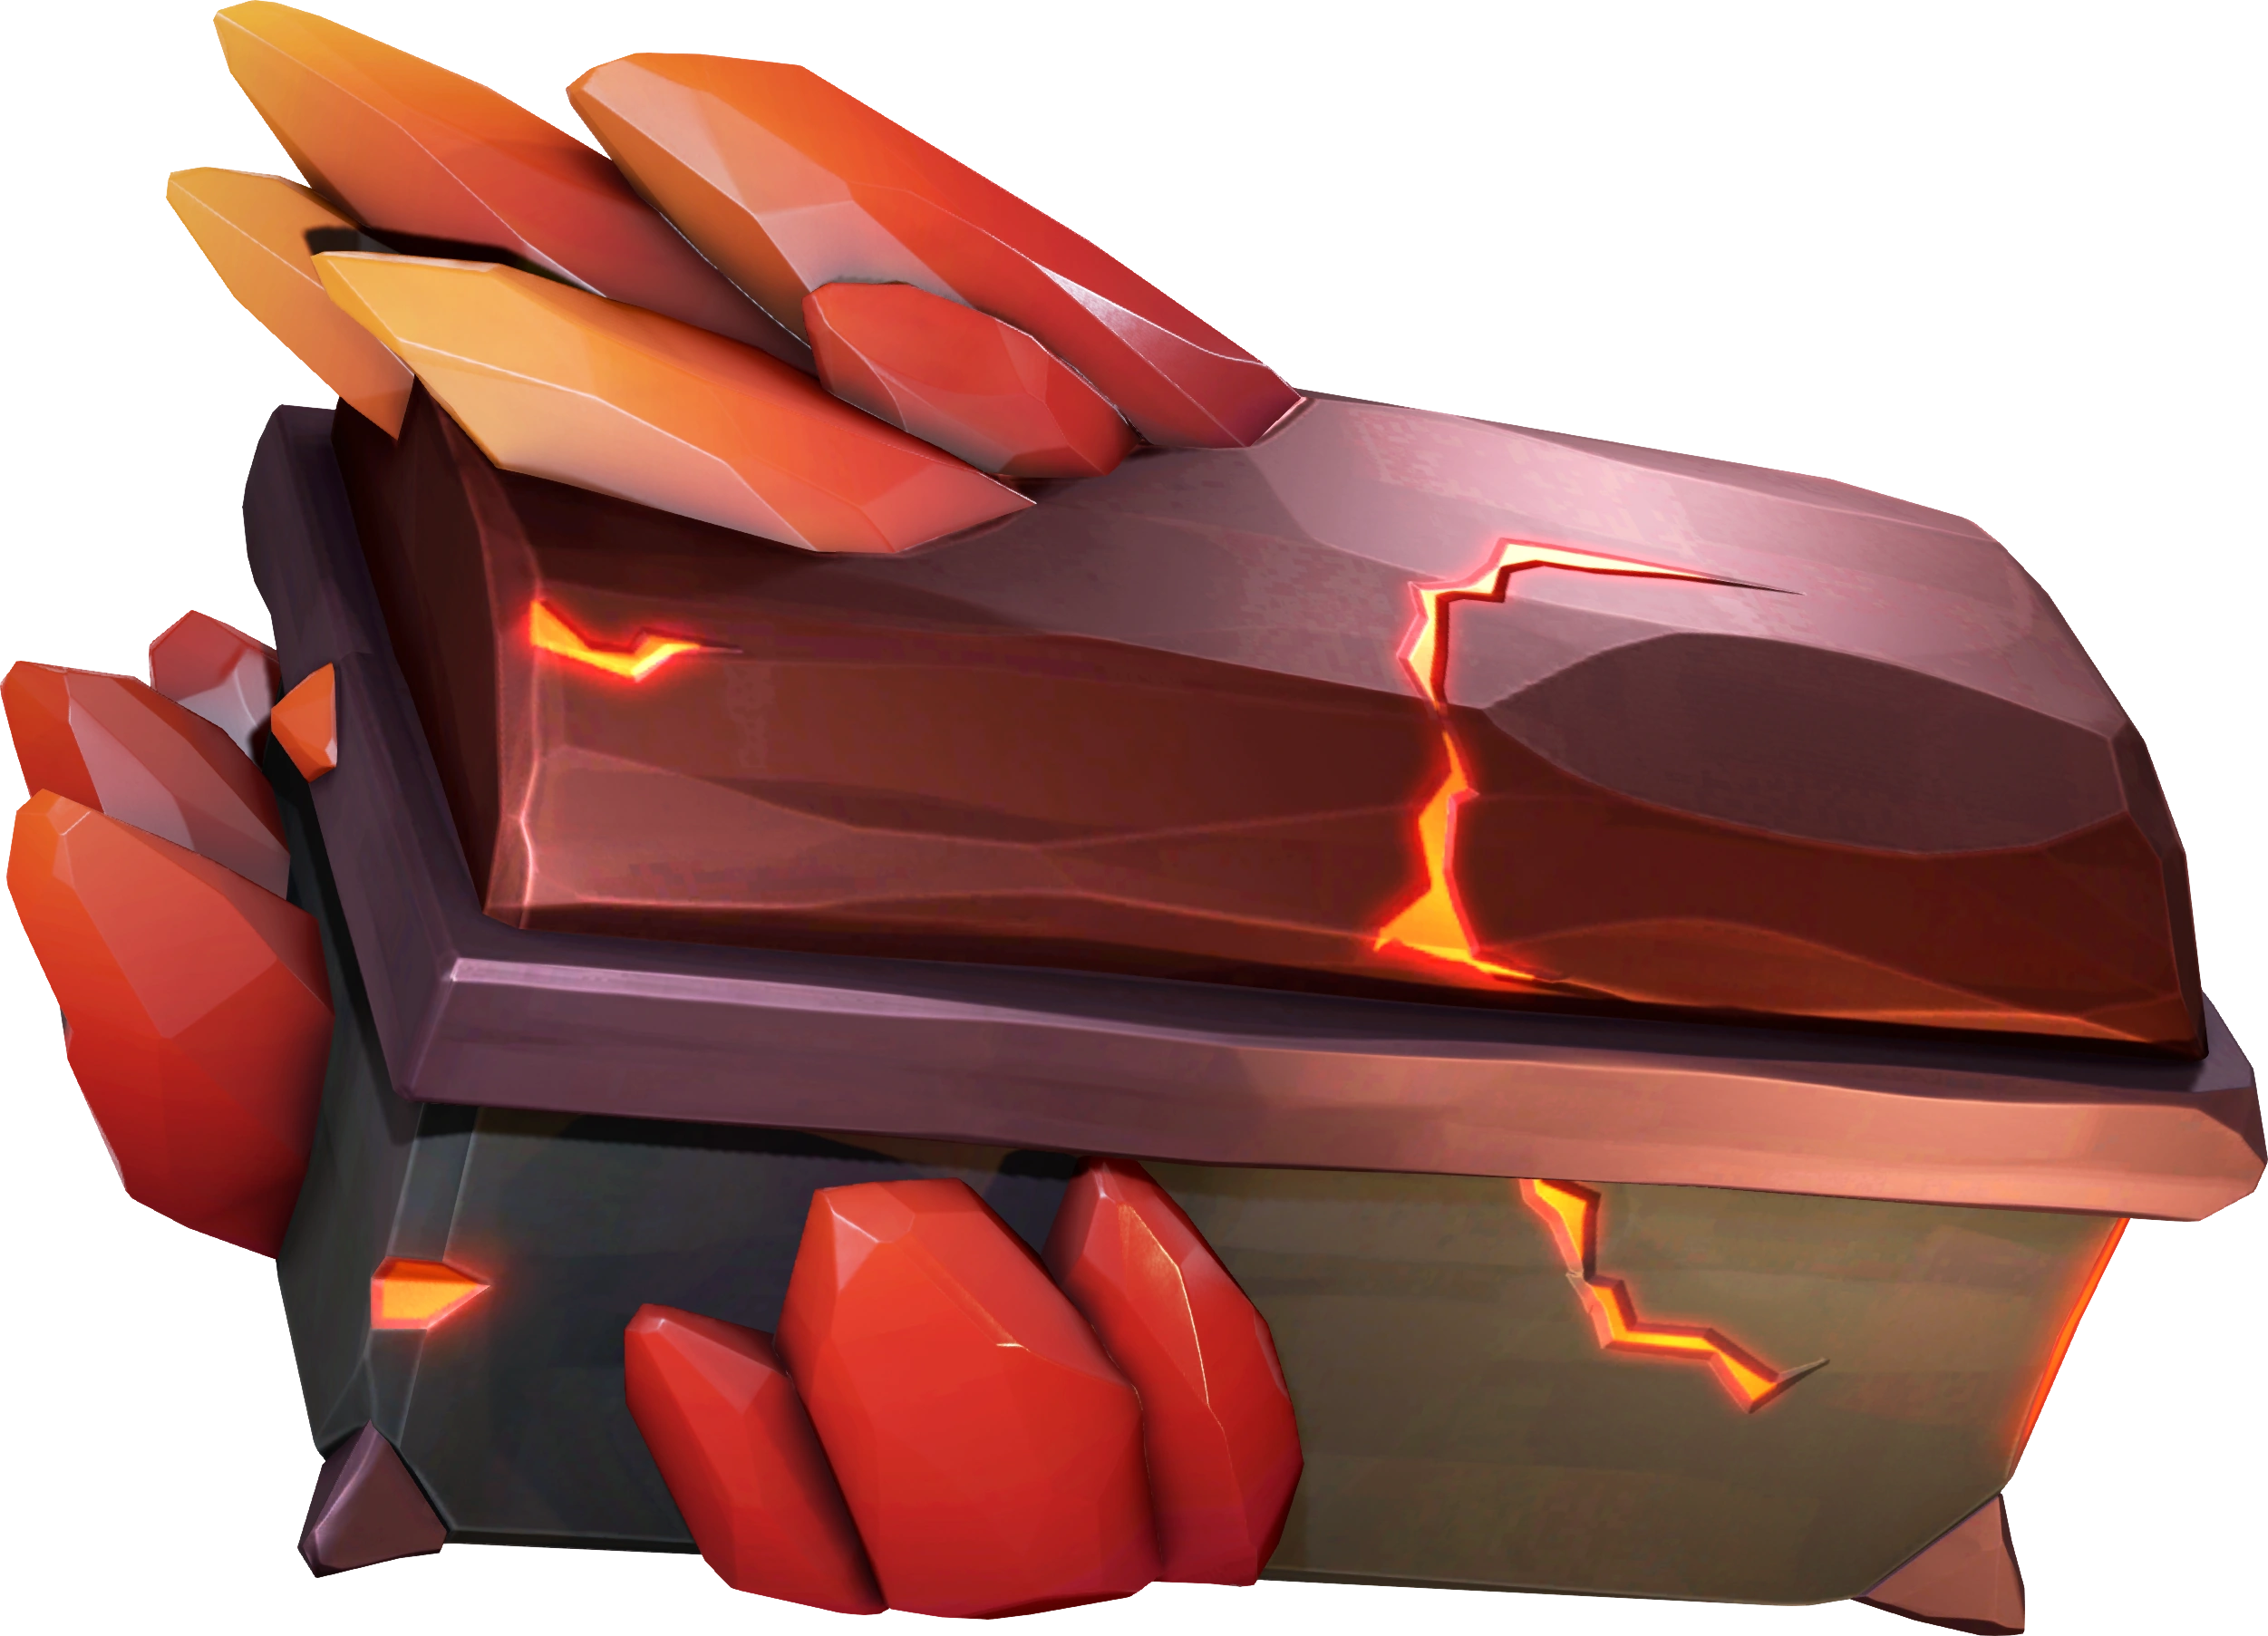
The Keeper shares its model with the Brimstone Casket Trinket.

Found buried on Cinder Islet. Cinder Islet is one of the possible locations of the second section of the Tall Tale. The Lantern shows the Artefact being buried right by one of the larger rock structures and bushes.
The Grail shares its model with the Magma’s Grail Trinket.
Notes
- Ambient Skeletons do not spawn during the Tall Tale.
- Volcanoes and Geysers should not activate on Islands during important parts of the tale.
Commendations
| The Seabound Soul | ||
|---|---|---|
| Name | Requirement | Reward |
| A Watery Grave | Free Captain Martha Jane. | – |
| A Foiled Ambush | Free Captain Randal Stone. | – |
| Entombed | Free the Soul of the lost Captain. | – |
| Ashen Artefacts | Discover the 3 Ashen Artefacts. | – |
| The Seabound Soul | Complete ‘The Seabound Soul’. | Sword of Souls |
| The Ashen Journals | Discover the (five) Ashen Dragon Journals. | – |
| A Rise in Power | Complete the Tale (3 times). | – |
| Fire and Ash | Complete all commendations for ‘The Seabound Soul’. | Sails of the Ashen Dragon |
Trivia
- The author of the five additional Journals is most likely Captain Adara
- Spoiler Alert: The Hieroglyphs on the Sarcophagus read as Flame and Heart